Administrative Access Tools
This chapter explains how to see and modify access rights between Safran Planner users. You can use the tools in the ADMIN ribbon to control the access rights for different sets of Calendars, Profiles, Resources, Userfields, etc. For the user to access the access tools, Safran Planner needs to be connected to a database. The ADMIN ribbon also allows sharing and using report groups, filter groups, and pictures.
Different Sets
Under the Admin tab, you will encounter different Sets in the Setup section. These sets correspond to the fields you see when selecting the Data tab. The key distinction is that the Data tab only allows you to view or edit information related to the sets used by the currently open project. In contrast, the Admin tab grants you the ability to view or edit all the sets in the database, specifically the sets where you have been granted access. The owner of these sets manages the access rights, which you can provide using the access tab of each set.
Remember, working in the Admin tab is independent of any project that might be open.
Enterprise Fields
Safran Planner offers a wide range of options for managing enterprise fields. You can add enterprise fields of various types, including Flag, Text, Date, and Reference. These Enterprise Fields are structured similarly to their project counterparts. However, there is a key distinction between Enterprise Fields and the fields of the project userfield set. While you assign values from the project userfield set to individual activities, Enterprise field values are assigned to entire projects, showcasing the software's versatility.
The defined Enterprise fields are available for all projects in your database.
Access Rights
Using access rights is relevant if you are connected to a shared database. It is not available if you are working with files or on a personal database.
As the owner of your project plan, you may define access rights for one or more users or user groups so they can read, update or copy the available settings. Sharing applicable plan settings in planning teams will increase efficiency by saving time when users should make similar settings in their project plans.
ADMIN ribbon presents the settings in which you can define access rights.

How to Define Access Rights
The project owner provides access to other users. Six sets, Calendars, Profiles, Resources, Userfields, Symbols, and Enterprise Fields allow you to define access rights.
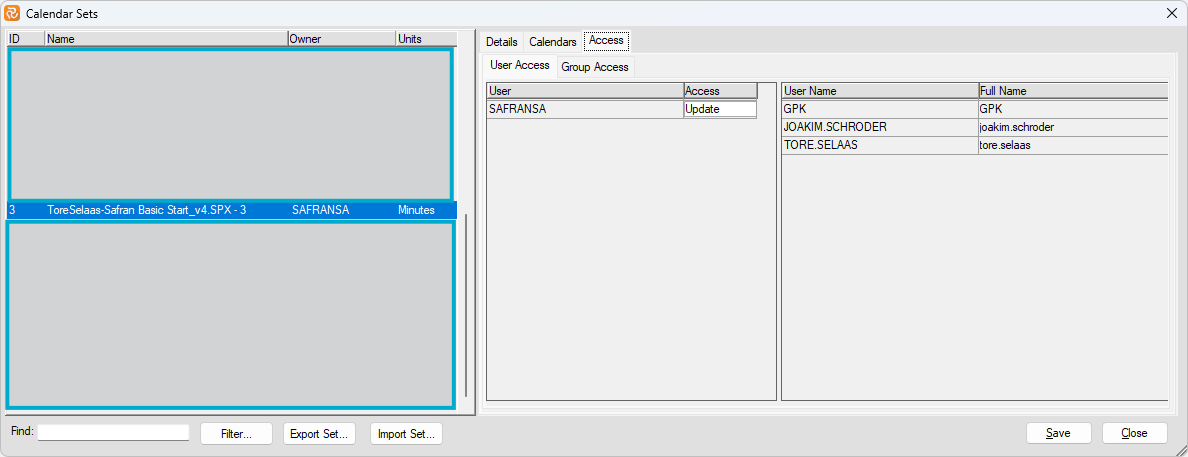
By opening any of these sets, you will notice a standard interface. On the left-hand side of each window, you can see a list of projects which includes the project ID, name of the project and who is the project owner. Note that you can only define access within the projects for which you are the owner.
On the right-hand side of the windows, you will find three tabs. The first tab gives you information about which projects use the selected Set. The second tab provides the relevant information depending on the set you want to define access. Opening Calendar sets, the second tab will give information on available calendars, and if you open the Userfield sets, the same tab will provide the information for the available Userfields. The third tab is where you can define which user(s) may have access to your project. Also, you can choose between the two access levels for either the ability to update the set or only to be able to read it. To give access to one or more users, use the drag-and-drop method.

Report Maintenance
In this section, you can define report groups, filter groups, or collect the logos that the others in the planning team can use in their reports. The report groups, filter groups, and pictures are available in all reports for anybody who has access to the project plan. Creating groups, in addition to saving time, has the advantage of sharing unified report configurations, filters, and logos among the project users.
Report Groups
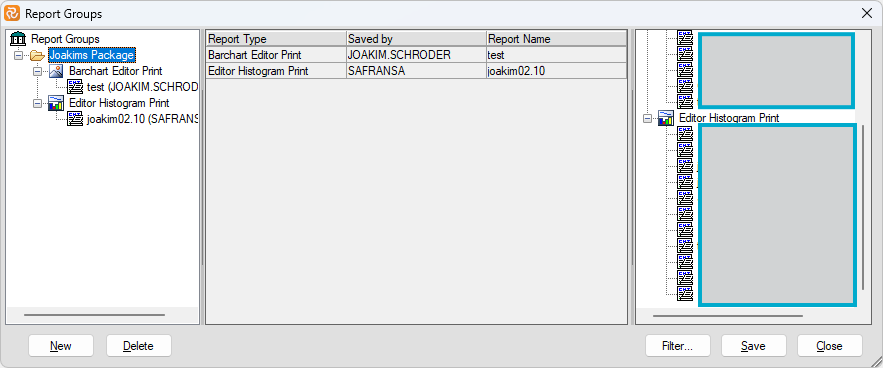
Select ADMIN > Report Groups to see the available report groups, create new ones or delete the ones not in use. Click New to create a new report group. If you want to add a report to a report group, select the report in the list and drag it to the appropriate report group in the left section of the window. If you want to remove a report from a report group, pull it from the left part of the window and drop it in the section with all available reports. If you want to remove a report group, click Delete.

Filter Group
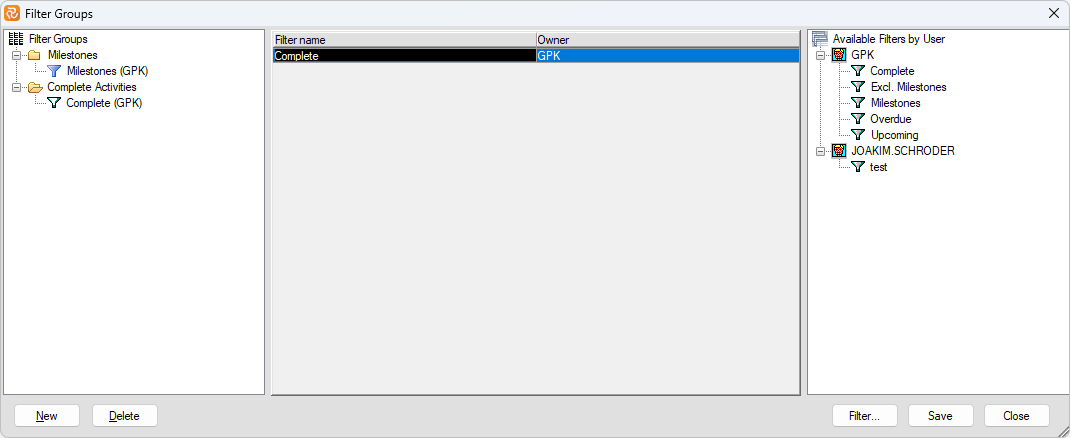
Select ADMIN > Filter Groups to see the available filter groups, create new ones or delete the ones not in use. Click New to create a new filter group. If you want to add a filter to a filter group, select it in the list of available filters and drag it to the appropriate filter group in the left section of the window. If you want to remove a filter from a filter group, pull it from the left part of the window and drop it in the section for all available filters. If you want to remove a filter group, click Delete.

Picture Manager
The picture manager allows users to save pictures or, more often, logos in the project database. Saving to the database enables users to access the pictures/logos as long as they are connected to the database. This is useful when creating/printing reports because all users can access the pictures/logos.
