Integrated Plan – Concepts
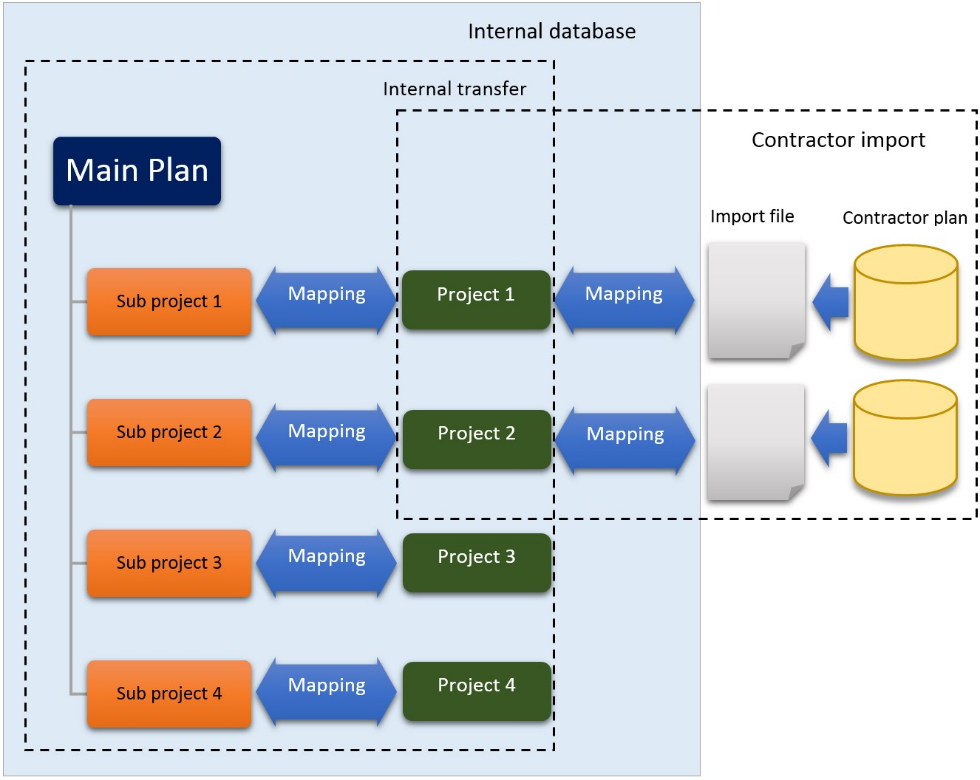
Safran Project has a practical interface for internal data transfer within a network of integrated plans. An integrated plan network consists of two parts: Contractor Import and Internal Transfer.
The first part involves importing data delivered by an external contractor on a file, which is imported into a project in the internal database, following some (user-defined) rules for mapping userfields. This means a project in the internal database is a copy of the contractor project.
The second part involves transferring filtered data from single projects in the database to a main project plan. This project has a set of sub-projects, one for each project to be transferred. Again, there is a set of defined mappings where the user may define calendar, profile, resource, and userfield mapping.
Contractor Import Configuration
The first import of a contractor project has to be done by a standard Safran project import, which initiates the project, its calendar, userfield set, etc. The userfield set may then be modified to align with company standards, so this project may be used as part of project groups if desired. Other attributes should be kept as they are, e.g., the import updates calendars, profiles, and resource definitions.
Import Setup
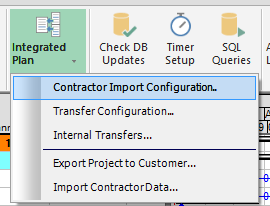
Before any imports can be made, the import must be defined. The setup window can be reached by selecting the ‘Contractor Import Configuration’ in the DATA ribbon > Integrated Plan.
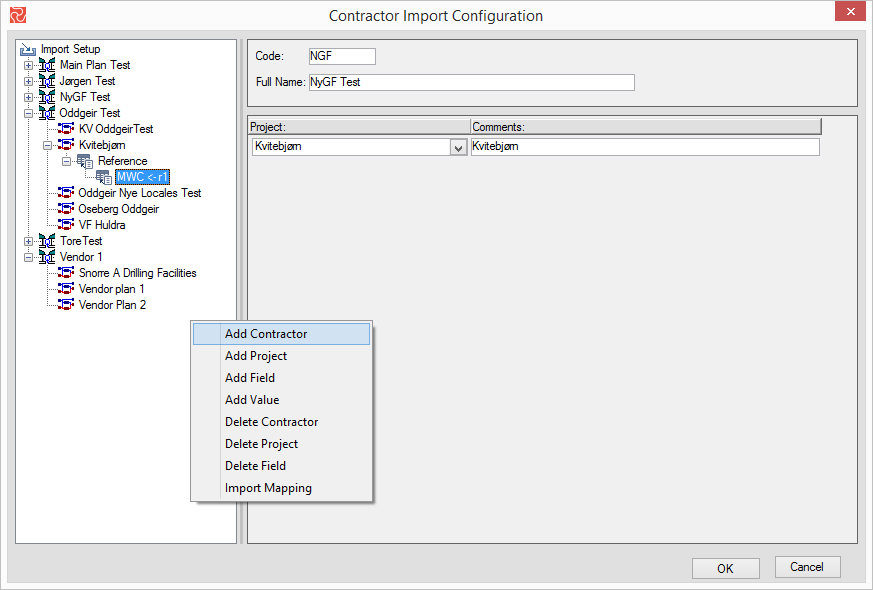
In the setup window, the left part of the screen (the tree view) lists all defined contractors. Under each contractor, you can find the projects described for each contractor and divided by the type of userfield being mapped and the separate userfields of each type.
Select ‘Add Contractor’ from the shortcut menu to add a contractor. Choose ‘Delete Contractor’ from the same menu to remove a contractor.
You may connect one or more existing projects to a contractor. This is because a contractor may have multiple contracts related to numerous projects. You can add a project to the contractor by selecting the contractor in the tree view and then ‘Add Project’ from the menu.
You may want to define one or more internal contractors and add a project to them even though you never want to do imports. This is because projects used for Internal Transfer have to be defined on this screen. Adding fields and mapping to these is unnecessary.
For each project, you can set up some rules:

You should decide whether you are supposed to map all userfields or just reference fields. For example, The customer may have selected to use date field D1 to keep his target starts from the last baseline–you want to keep these dates as well, but the standard for your company is to use D1 for something else, so you want to map the contractors D1 to your D7. To allow this, you must check for allowing mapping of “All userfields.”
In addition, you should decide whether you want to copy the values for all userfields or just those you mapped. The rest of the userfields will then be left blank. This is to cater to situations where only a limited number of contractors' user fields have any significance for you, and you may want to reduce the amount of data being imported.
If you view a project in a tree view, you get a list of all userfields for which you have created a mapping.

In the ‘Connect’ column, select a userfield in the target project, and in the next column (To Contractor Field), choose which userfield from the import file should be connected to the selected user field in the target project.
It is crucial that the user who does the mapping fully understands the contractor’s userfield usage.
In the ‘Mapping method’ column, you can specify the mapping method for the field. The options for mapping vary by the type of field being mapped. The mapping of reference fields is the most extensive. In contrast, for most fields, you can only choose between ‘Ignore’ (meaning that all activities will be set to blank for this column), ‘Copy’ (meaning that the values from the import file will be copied), and ‘Set all to’ (meaning that all activities will have the same value for this userfield).
The options for reference fields are:
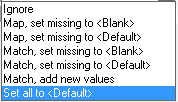
If you choose one of the “Map” options, you must create a mapping table for this userfield. Any values in the import file not in the mapping table will be set to your specified default value or to blank. If you use one of the “Match” options, the import looks for an exact match of the imported value among the values specified for this userfield in the target project/code set. If a match is not found, the default—or blank—value is used instead, or if specified, the imported value is added to the target code set.
For text userfields, you cannot select any of the “Match” options, but you may specify a mapping.
If you select a reference—or text—userfield in the tree view and specify a mapping option for that field, you can set up the value mapping for that userfield.
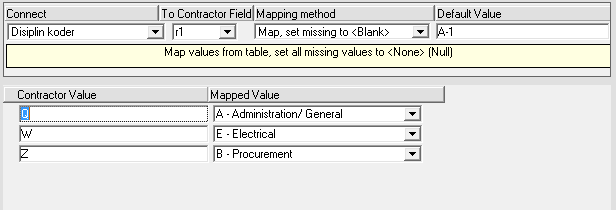
Once again, the user who does this setup must be familiar with the codes used by the contractor and their meaning (along with your codes, their meaning, and what you want to achieve with the mapping).
When we set up the mapping, we cannot know what codes are in the import file, so you may input any text in the column for contractor value. These will have to be distinct. A value can not be mapped to two values in the target project. The mapped (target) value is selected from a drop-down containing all defined values for reference fields.
Run Import
When you choose to perform the actual import, the following window opens.
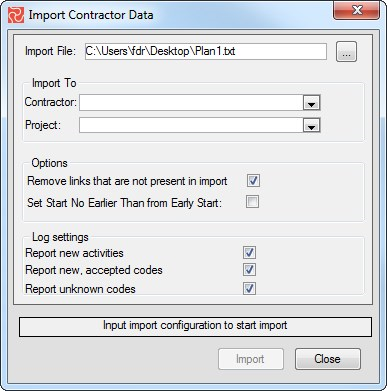
You are supposed to supply an import file (you may use the “…” button to open a standard “Open File” window). Choose a contractor from a drop-down of defined contractors, and choose a project to import to from a drop-down containing the projects specified for that contractor.
You are also given a set of specific opportunities at import time:
You can remove links in your copy of the project at the moment, but not present in the import file. Checking this will remove any logic that the contractor has removed. Unchecking this will keep these links—which is meaningful if the export only contains a part of the project or if you have added links for some reason.
You can set the target dates of your project to match the early dates from the import. This will ensure that the plan will remain the same if you—for some reason—remove the links.
You can also choose what messages to include in the generated log file—new activities, new codes (if you have a mapping that says Match—add new values), and unknown codes.
When your import is completed, you are prompted with a window announcing the import is complete and where to find the log file.

Pressing Open Log File opens this file in your standard text editor.
Internal Transfer
Internal Transfer is an option to import parts of a (source) project into a sub-project of another (target) project. Before you can perform an internal transfer, you must set it up. To set up internal transfers, you need to have the target project open as the current project.
Transfer Setup
Select ‘Internal Transfer Configuration’ in the DATA ribbon > Setup to set up transfer options.

The opened setup window provides various options for configuration.
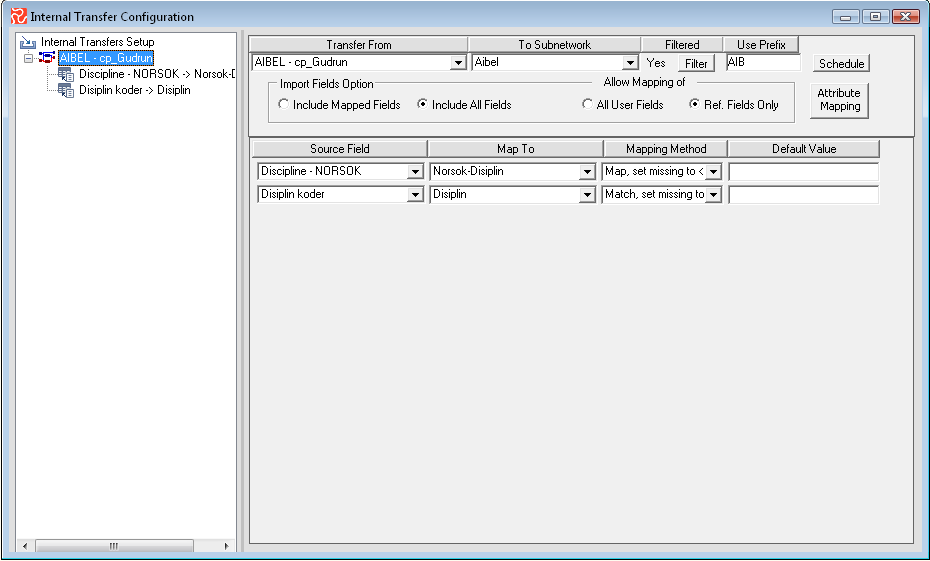
The left part of the screen (the tree view) lists all defined imports for the target project, with the contractors' and the projects' names. You can add a new project to be imported by choosing “Add Project” from the short-cut menu. Choose “Transfer From” (source project) from the defined contractors and projects list, as defined in the Import Project Setup. Any not-imported projects you want to include for mapped internal transfers must be defined in Import Setup, although you do not want to import data.
You choose “To Sub-project” from a list of defined sub-projects for the current (target) project.
For instance, you may define a filter (on the source project) for this import if you only want to transfer offshore activities. You may also add a prefix for the imported activity IDs. This allows you to create activity IDs in the target project that can give you an indication of the source project and also to avoid duplication of activity IDs if there is duplication within the defined source projects for this target (typically happens when activity IDs are auto-generated—00010, etc.).
When it comes to userfield mapping, you have the same options as for the contractor import:

You must decide whether you are supposed to map all userfields or just these of type reference. For example, in the userfield configuration for the source project, the date field D1 is used to keep target starts from the last baseline—you also want to keep these dates. Still, the userfield setup for the target project uses D1 for something else, so you want to map the source D1 to the target D7. To allow for this, you must check to enable the mapping of “All userfields”.
In addition, you must decide whether you want to copy the values for all userfields or just those you mapped. The rest of the userfields will then be left blank. This is to cater to situations where only a limited number of the source userfields have any significance in the target, and you want to reduce the amount of data being transferred.
Userfield mapping is the same as contractor import. If you select a project in the tree view, you get a list of all userfields for which you have created a mapping.

In the left-hand column, you select a userfield in the source project, and in the next column, which userfield in the target project do you want to connect the source userfield to? In the third column, you specify the mapping method for the field. The options for mapping vary with the type of field being mapped. The mapping of reference fields is the most extensive. In contrast, for most fields, you can only choose between “Ignore” (meaning that all activities will be set to blank for this column), “Copy” (meaning that the values from the source project will be copied), and “Set all to” (meaning that all target activities will have the same value for this userfield).
The options for reference fields are:

If you choose one of the “Map” options, you must create a mapping table for this userfield. Any values in the import file not found in the mapping table will be set to your specified default value or to blank. If you use one of the “Match” options, the import looks for an exact match of the imported value among the values specified for this userfield in the target project/code set. If a match is not found, the default—or blank—value is used instead, or if specified, the imported value is added to the target code set.
For text userfields, you cannot select any of the “Match” options, but you may specify a mapping.
If you select a reference—or text—userfield in the tree view and specify a mapping option for that field, you can set up the value mapping for that userfield.

For reference fields, both the source and the target value are selected from drop-downs containing all defined values for this field. Again, the source value must be distinct—one source value can only give one target value—whereas different source values can map to the same target value.
For text fields, both the source and target values are unrestricted text.
There is an option to set up a transfer schedule for this import. Pushing the “Schedule” button opens another window where you can specify the schedule:
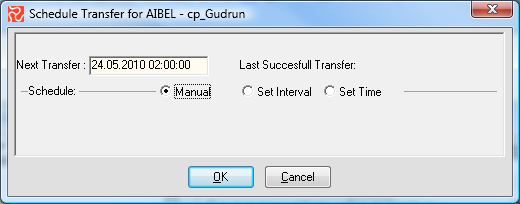
The default option is “Manual” scheduling, where you may input/update “Next Transfer” manually.
Switching to “Set interval” lets you specify how often the transfer is supposed to run:
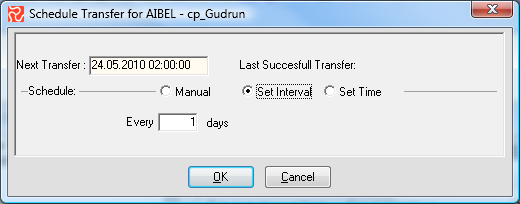
Switching to “Set Time” lets you set up another kind of schedule: You specify the report to be run every day, or once a week, on a specified weekday, and the time of day to run the transfer.
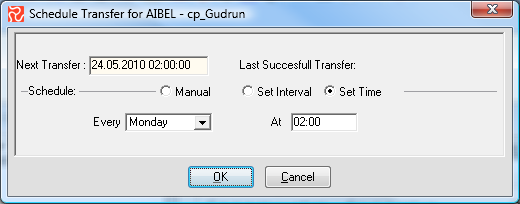
You need to open the transfer window to run the scheduled transfers for all these options.
As the source projects can—and very often will—use calendars, profiles, and resource definitions different from those of the target project, it is necessary to define a mapping for these attributes as well. Pushing the “Attribute Mapping” button gives you a window to do this:
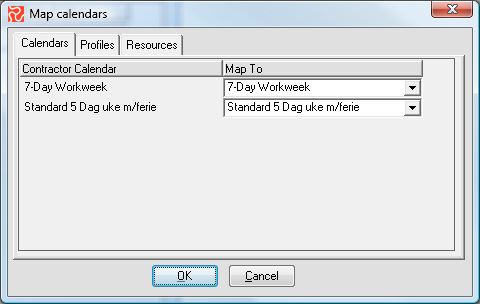
For each of the calendars existing in the source calendar, you must specify which calendar in the target to map this to. The same goes for profiles and resource definitions with similar input panes.
This mapping also allows a source project to have different calendar types, or to be more precise. The source projects can use calendars of a less detailed variety than that of the target project. This means that day-based source calendars can be mapped to an hour-based target calendar, not vice versa. Using different calendar types will lead to all durations, link delays, and resource lags/durations being recalculated.
If source calendars are not mapped to target calendars, the import will use the target calendar with the lowest ID. Unmapped profiles will have their profiles removed. Unmapped resources will be mapped to resources of the same type in the target project. All of these “unmapped mappings” will be logged.
Run Transfer
When you choose to perform the actual import, you are met with a list of projects scheduled for export and a few options:
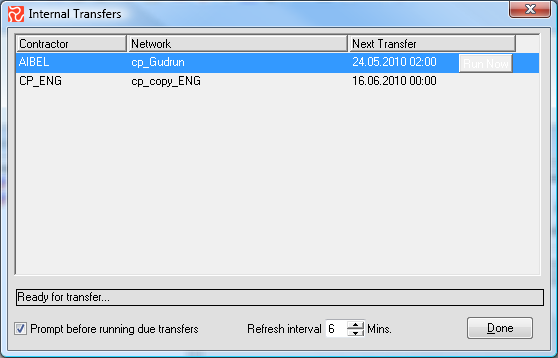
The list is sorted so the projects scheduled to transfer first are on top. If the first project is overdue, the transfer of this project will start automatically—unless you have checked the “Prompt before running due transfers” checkbox, in which case you will be prompted:
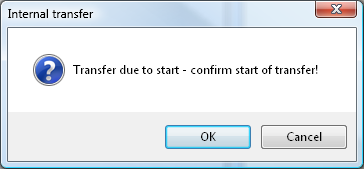
If you press OK, the transfer starts.
If you want to automate this process (letting it run so that all transfers are done as soon as the schedule says they are due), uncheck the “Prompt before running due transfers” checkbox.
The “Refresh Interval” box lets you specify the number of minutes between each time the window goes into the database, checking for overdue transfers.
The “Run Now” button on the selected row lets you run the transfer immediately.