Safran Integrated Plan
Conceptual Overview
In both project and enterprise environments there is often a need for establishing a total, integrated schedule consisting of multiple or even a multitude of single project schedules. Consolidating schedules from multiple, and often highly diverse, sources can be a complicated job requiring both a high degree of expertise/creativity as well as a considerable amount of effort.
This is due to the fact that source projects will inevitably have diverging sets of meta data such as Userfields, Calendars, Resources, Profiles as well as coding/breakdown structures. This is most obvious when source projects are submitted from external contractors, however even within a single enterprise, projects don’t always share the same/consistent meta data.
To make things even more complicated, source projects may not even be submitted using the same scheduling tool.
Integrated schedules are commonly used in Oil & Gas offshore environments in order to get an overview of the total amount of work scheduled in an oilfield or fields with multiple installations and multiple contractors.
The functionality also lends itself to multi-project environments using Safran ‘Project Groups’ that need to create a single/common project in order to run a schedule risk analysis using Safran Risk.
Safran Project provides you with a powerful and comprehensive set of tools/functionality called the ‘Integrated Plan’ that makes both creating and maintaining integrated schedules practical and at the same time with a limited amount of effort.
While ‘internal’ projects existing in your Safran database are easy to include, Safran Project’s Integrated Plan also supports the import of external schedules from both Safran Planner (.SPX), MS-Project (.XML), and Primavera Enterprise (.XER).
Note that Safran’s Integrated Plan is a purchase option. If you are not able to locate the tool on your menu, please get in touch with your Safran support representative who will be happy to help you.
The illustration below provides a conceptual overview of a typical Integrated Plan environment:
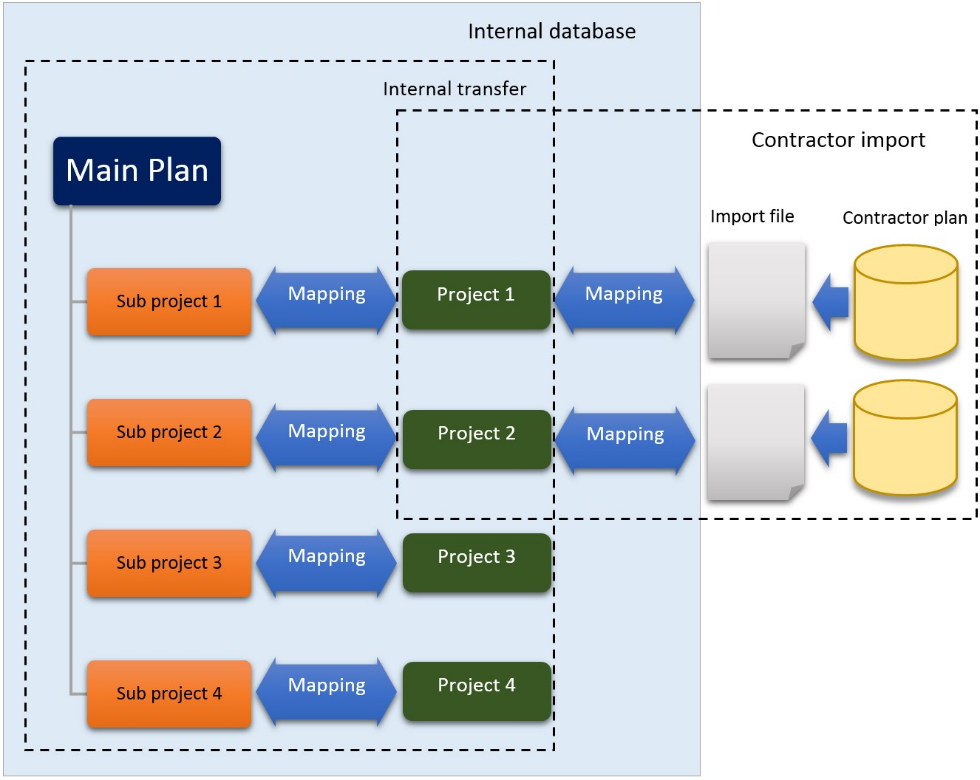
Projects 1 & 2 above are considered to be from foreign data sources/external contractors, while Projects 3 & 4 reside in the same database that the Integrated Plan is created.
Note that the two 'Mapping' processes differ slightly. The mapping capabilities available during the Import process allow you to re-arrange userfields by moving the content of a specific userfield in the source import file to another userfield (of the same type) in the Integrated Plan. An example of this might be where the Contractor/External plan uses Reference Field 1 for Discipline codes while the Integrated Plan intends to use Reference Field 15. This is applicable where both projects share the same value set (E - Electrical, P - Piping, etc.).
The mapping facilities available during the Internal Transfer are more extensive as they allow you to map 'value to value' in addition to being able to re-arrange userfields. This functionality allows you to 'merge' differing source/target code values. An example of this could be where a contractor/source network value for discipline might be 'M - Painting/Surface Protection' could be mapped to the target discipline value 'R - Surface Protection'. Additionally, the Internal Transfer mapping, may contain rules on how to handle merging deviations such as 'Set missing to blank', Ignore, or 'Add new values' and so forth.
The internal Transfer mapping also provides similar facilities for Resources, Calendars, and Profiles.
Creating and maintaining an integrated schedule is a multi-step process. For projects originating from an external source, you’ll first need to import the project to your Safran database. Once the project is within the database it can then be transferred to the integrated plan where it will be stored as a ‘sub-project’ in your main project.
Prior to transferring projects the first time, there are a number of prerequisites that must be present/established:
-
A project must be created using a company standard or appropriate set of metadata (Userfield set, Calendar set, Resource set, Profile set (if applicable).
-
A sub-project within the main project must be created for each source project to be included.
-
If you intend to include foreign/external projects you'll need to import these to your Safran Project database.
-
Export files of the Calendar/Resource/Profile (if applicable) set from each source project must be created/imported to the main project sets.
-
Export files of the Reference and Outline Code fields from each source project must be created/imported to the main project userfield sets..
-
A list of contractors/projects eligible for the integrated schedule must be established.
-
Finally, mapping rules must be defined in order to consolidate the source projects
When the above is established and appropriately configured, you will then be able to run the Integrated Plan process and generate your integrated schedule.
The configuration and mapping rules you define may be re-configured at any time if required.
The Internal Transfer process may be run as often as needed in order to keep the integrated schedule up to date and may also be scheduled to run at pre-set intervals.
Setting up an Integrated Plan
Although there are numerous ways to create the initial Integrated Schedule, we recommend you follow the suggested steps in the outline below. Once you are more familiar with working with the tool, you may nevertheless find another sequence of steps that suit your project environment better.
Create a new project
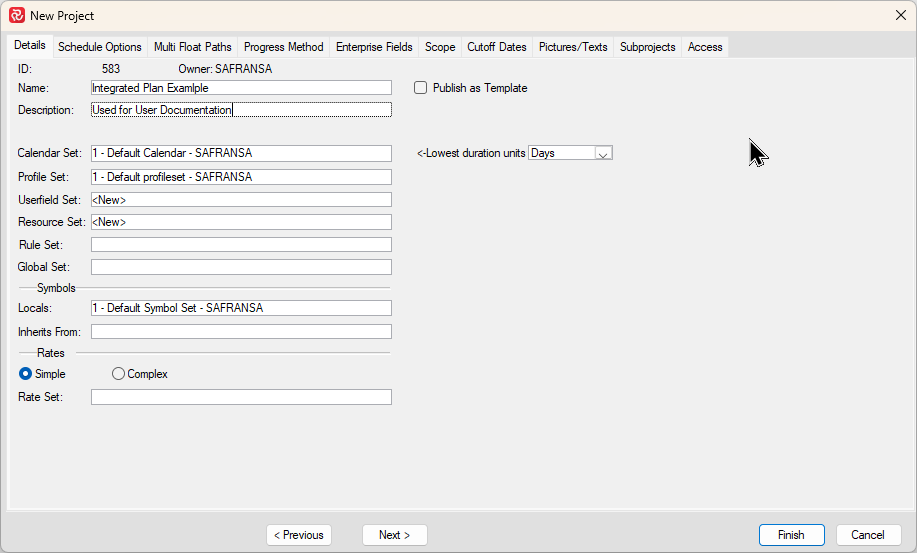
Start by creating a new project ensuring that you have chosen the appropriate Calendar, Profile, Userfield, and Resource sets. These might be found among your corporate/project environment but may also be selected as New depending on your requirements. If you don't normally use profiles, the Default Profile set will be sufficient.
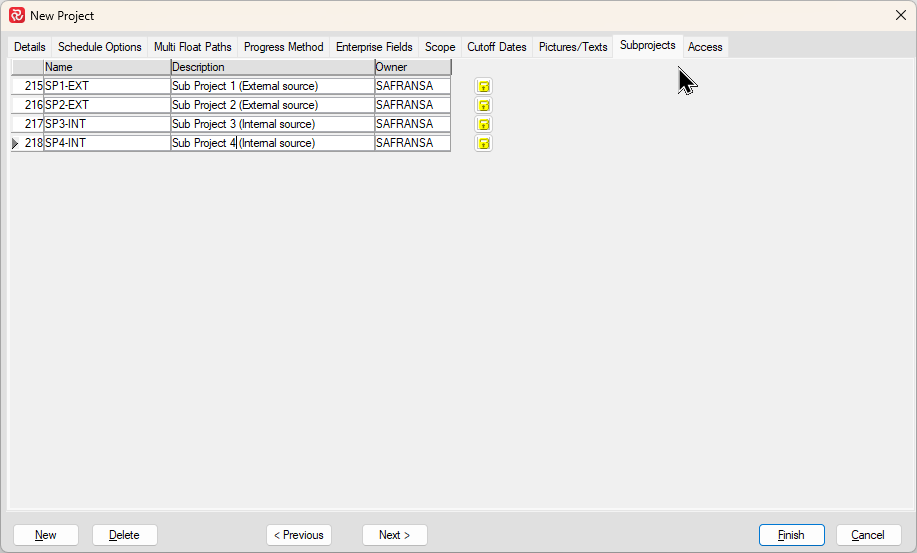
Next, while you are configuring your project, select the Subprojects tab to create one subproject for each source project you intend to include in your integrated schedule. If you need to add more projects to your integrated plan later, you'll also need to add the relevant subprojects.
Subprojects are used in their 'simplest form' in an integrated plan context. If you are not familiar with Subprojects you can find more information in Sub Projects.
Import any external projects
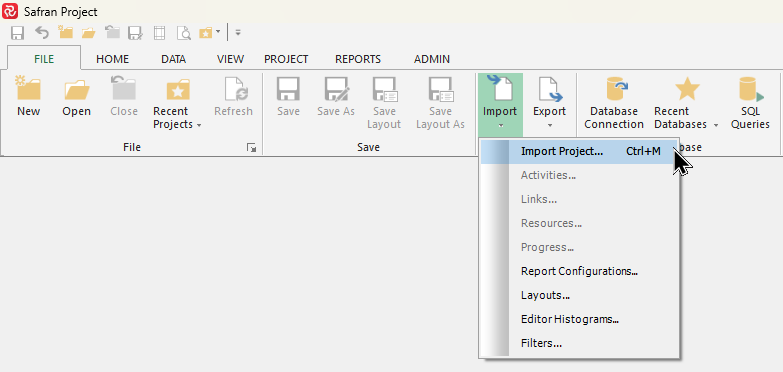
If you intend to include a foreign/external project, you will first need to import the project to your database using the File/Import/Project tool in Safran.
You can find the Import tool in the Interface section of the File ribbon:
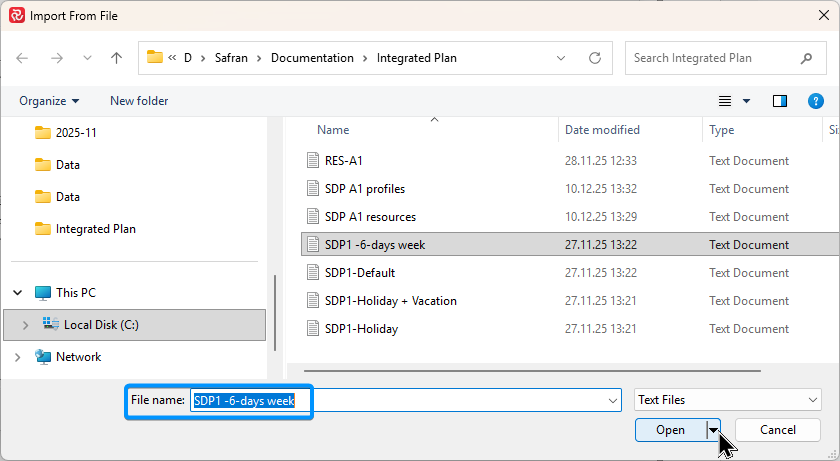
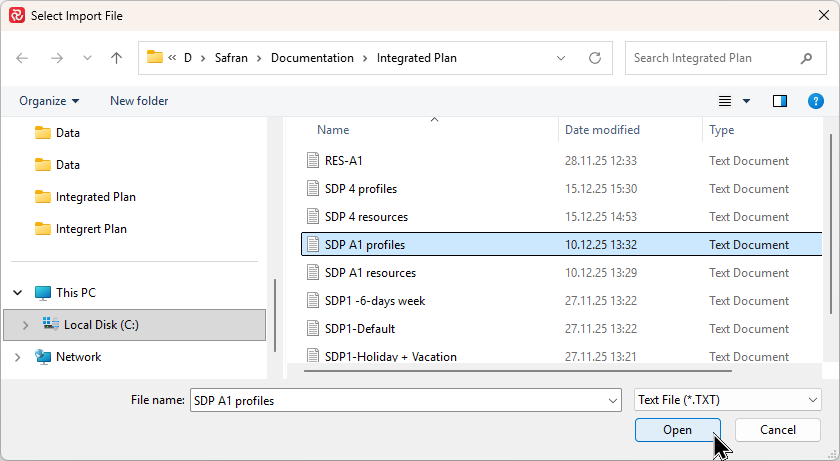
After selecting Import Project, the Select Import File opens allowing you to select your import file:
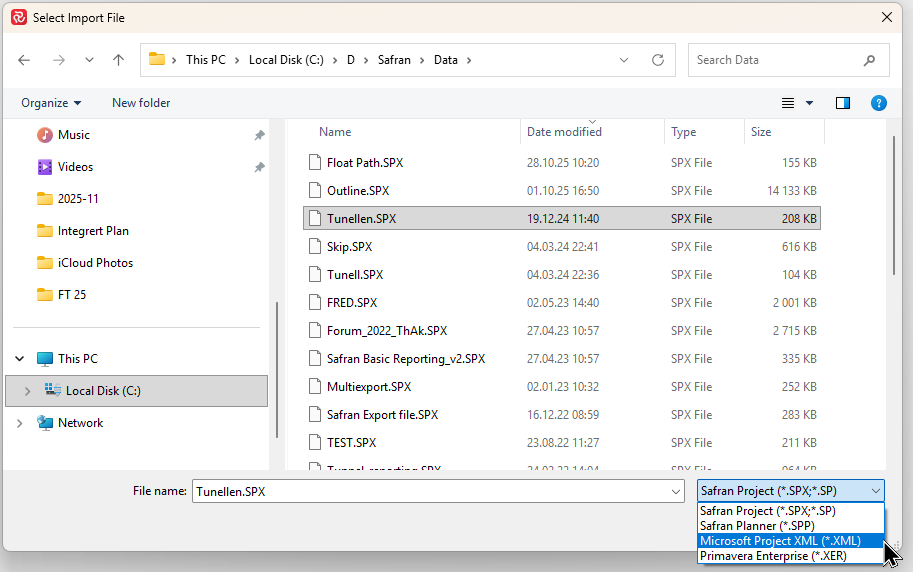
Note that the file select window will initially only contain Safran Project files (*.SPX), however if you press the dropdown in the lower right corner you'll be allowed to select/import files from both Safran Planner, Microsoft Project, and Primavera Enterprise.
When you have located your import file and pressed Open, the Project Import window appears allowing you to start configuring your import:
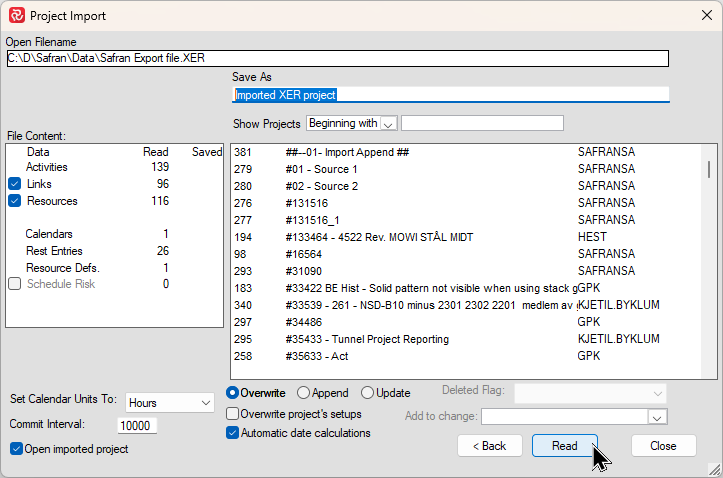
Press Read to read and interpret the contents of the file.
After this, a set of mapping panels is presented, one for each category of Userfields allowing you to rearrange or 'Map' the userfields in the source project. By default, Safran will assign the first field of each each category in the source file to the first field of the category in the target project etc..
Mapping can be done at this stage however it's not really necessary to do this now as Mapping is done as an integral step when configuring the Internal Transfer. The latter configuration also has additional/powerful functions allowing you to define how to treat the merging of userfield values and not just re-arranging fields.
Finally, enter a name for your project under Save As and press Save
If you are not that familiar with Safran's import facility, you'll find detailed information in Importing and Exporting Projects.
Create export files for Calendars/Resources/Profiles
Prior to running the initial transfer to the integrated schedule, the Calendar, Resource, and Profile sets for the project must be populated with the corresponding meta data from each of the source projects. If two or more source projects use the same/identical Calendar, Resource, Profile set, a separate copy will not be needed.
This can be done by first exporting the meta data from the source projects to file, after which the files are imported to the main project.
Export facilities are available and may be found by opening each source project and locating the relevant library sets on the Data ribbon. Alternatively, if you are very familiar with your library sets, you can also access the library sets from the Admin ribbon which provides access to all library data for all projects. This might prove more efficient as it would save you having to open each project.
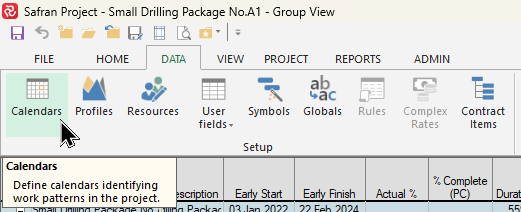
Calendars
For Calendars one export file per Calendar/Work pattern must be created.
When exporting calendars, it’s good practice to give the export file a descriptive name also containing a reference to the source project it belongs to. You’ll find that this will simplify the import process later when creating the calendar set for the integrated schedule.
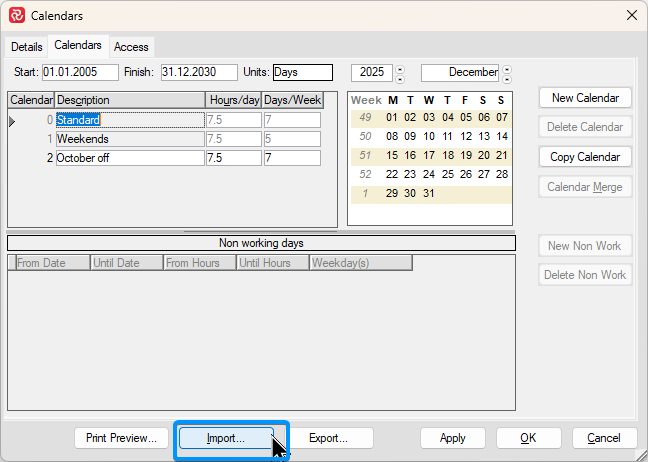
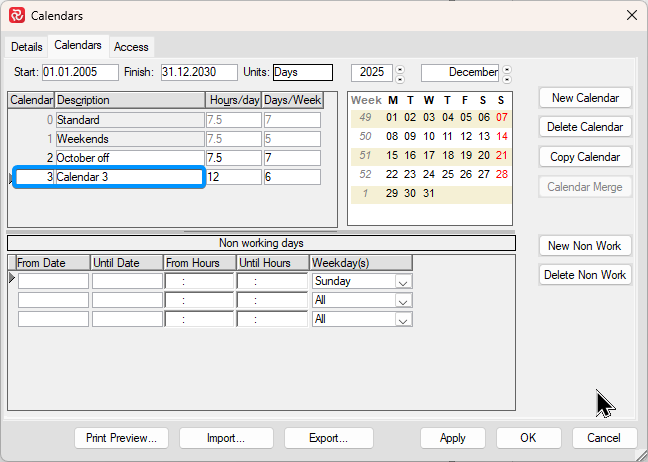
To start, open the Calendars editor:
The Calendar editor shows all calendars/work patterns and their content.
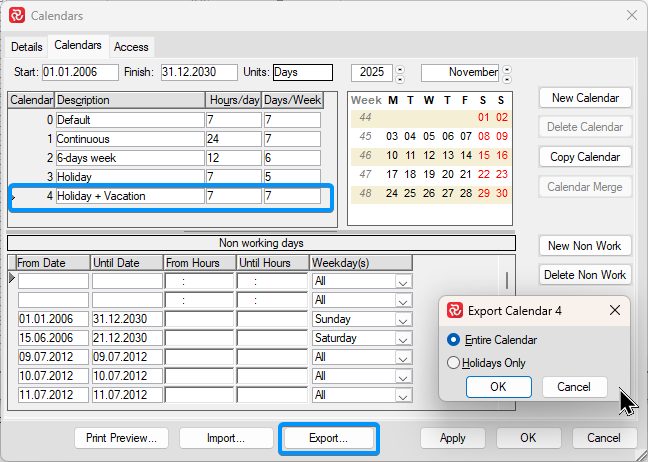
For each calendar, high light it and press the Export button. When the Export Calendar window opens ensure that 'Entire Calendar' is selected and press OK.
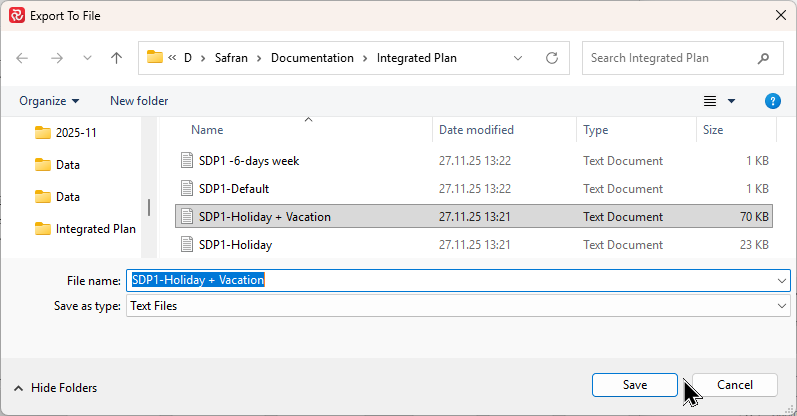
When the Export To File window opens, enter a name for the file and press Save. Note that in the example above, the file names take into consideration/have reference to both project (SDP1) and 'calendar name'.
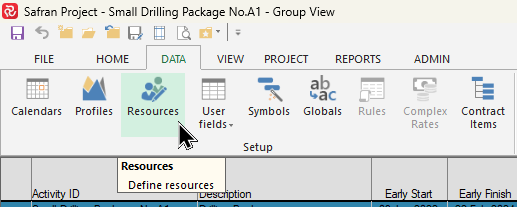
Resources
When exporting resources, it’s good practice to give the export file a descriptive name also containing a reference to the source project it belongs to. You’ll find that this will simplify the import process later when creating the resource set for the integrated schedule.
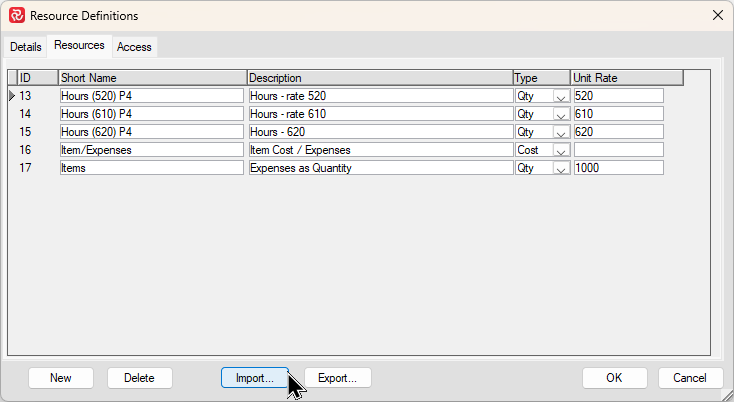
To start, open the Resource definitions editor:
Press the Export button.
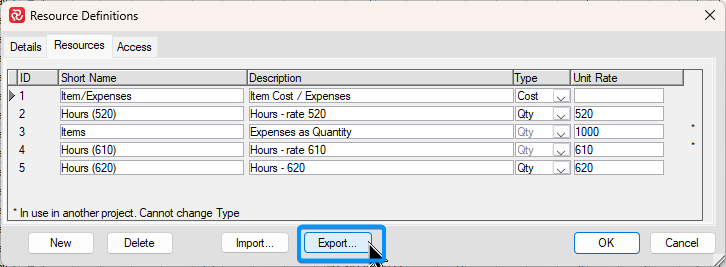
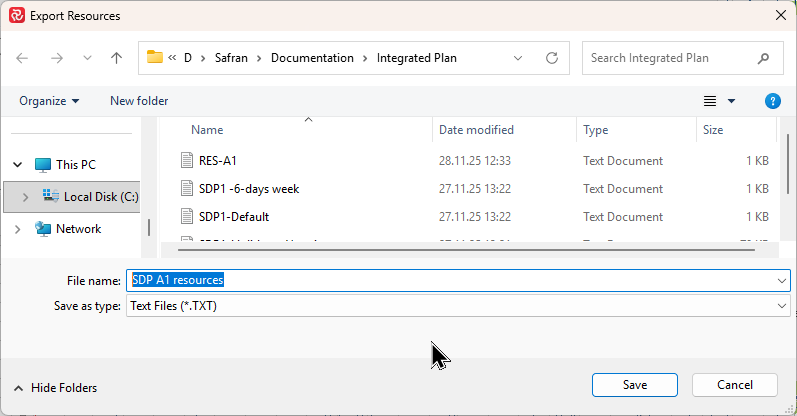
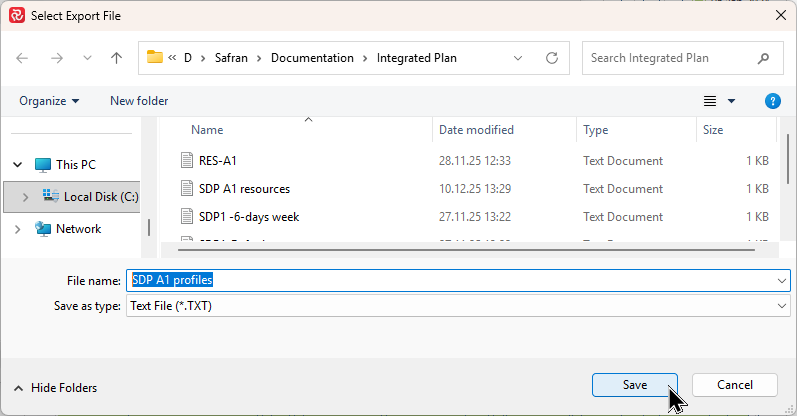
When the Export To File window opens, enter a name for the file and press Save. Note that in the example below, the file name takes into consideration the project name (SDP A1).
Profiles
When exporting profiles, it’s good practice to give the export file a descriptive name also containing a reference to the source project it belongs to. You’ll find that this will simplify the import process later when creating the profile set for the integrated schedule.
Note that if you are certain that your source projects do not use profiles, this step is not necessary as the target project/Integrated Plan will by default contain the 'Linear' profile.
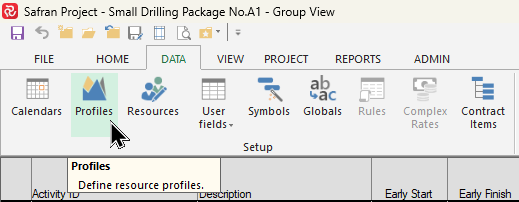
To start, open the Profile editor:
Press the Export button.
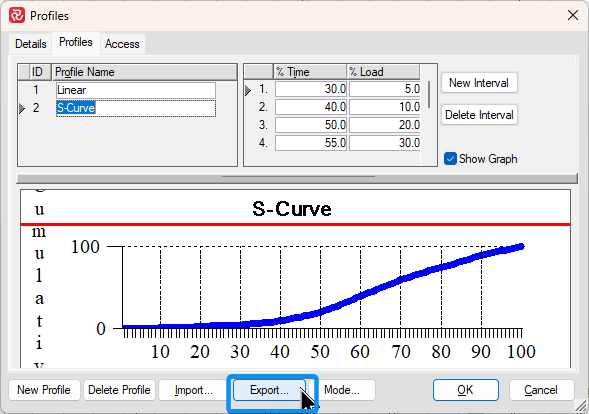
When the Export To File window opens, enter a name for the file and press Save. Note that in the example below, the file name takes into consideration the project name (SDP A1).
Create export files for Reference fields/Outline codes
Prior to running the initial transfer to the integrated schedule, the Userfield set for the project must also be populated with the corresponding/relevant meta data from each of the source projects. If two or more source projects use the same/identical Reference/Outline Code a separate copy will not be needed.
Safran Project offers in total a very large number of Userfields of each type. When establishing an Integrated Plan there is hardly ever a need/requirement to transfer all userfields. In most cases and especially when combining multiple schedules from multiple/varying sources only a minimum of userfields are necessary to be transferred.
This can be done by first exporting the meta data from the source projects to file, after which the files are imported to the main/integrated project.
Export facilities are available and may be found by opening each source project and locating the relevant userfield sets on the Data ribbon. Alternatively, if you are very familiar with your library sets, you can also access the userfield sets from the Admin ribbon which provides access to all userfield sets for all projects. This might prove more efficient as it would save you having to open each project.
Reference fields
When exporting reference field code values, it’s good practice to give the export file a descriptive name also containing a reference to the source project it belongs to. You’ll find that this will simplify the import process later when populating your reference fields for the integrated schedule.
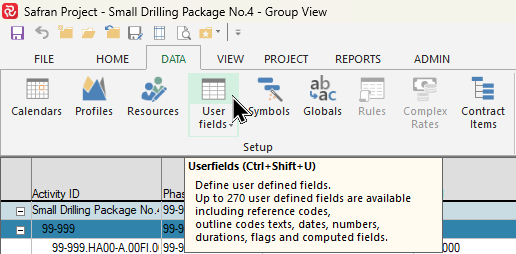
To start, locate and press the Userfields icon on the Data ribbon:
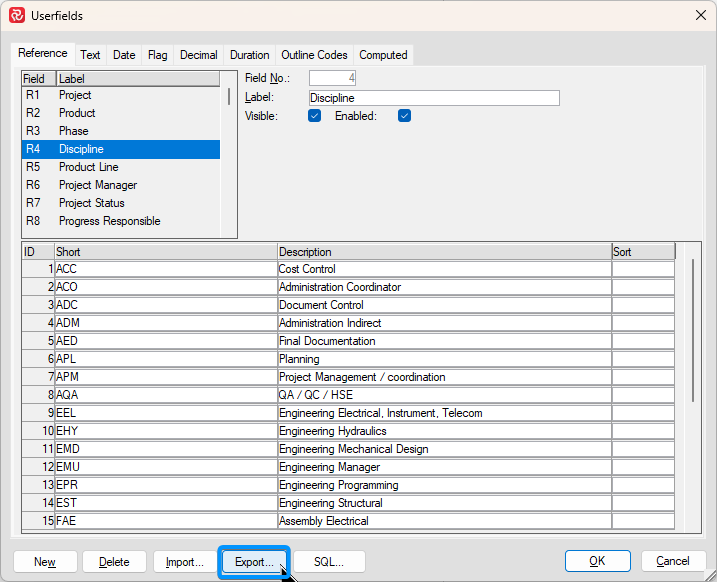
When the Userfield definition window opens, locate the reference field you intend to export and press Export:
This opens the file export window allowing you to select a location and name your file.
Outline Codes
Outline Codes are also available on the Userfields definition window.
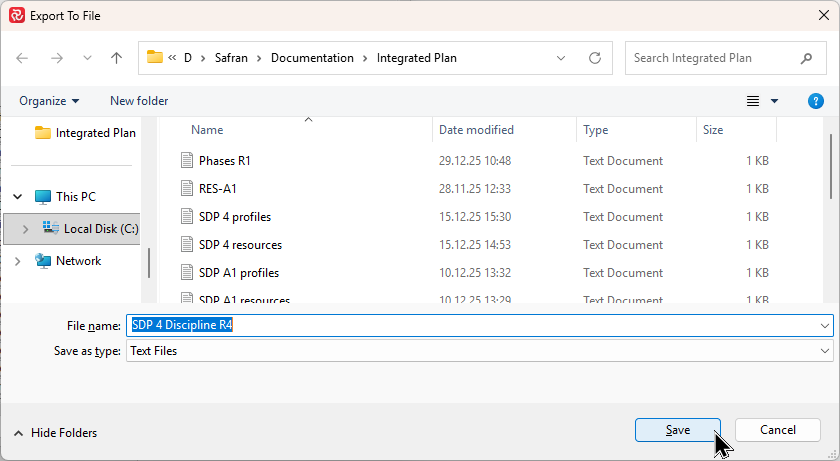
When exporting outline codes, it’s good practice to give the export file a descriptive name also containing a reference to the source project it belongs to. You’ll find that this will simplify the import process later when populating your outline codes for the integrated schedule.
Locate the outline code you intend to export and press Export:
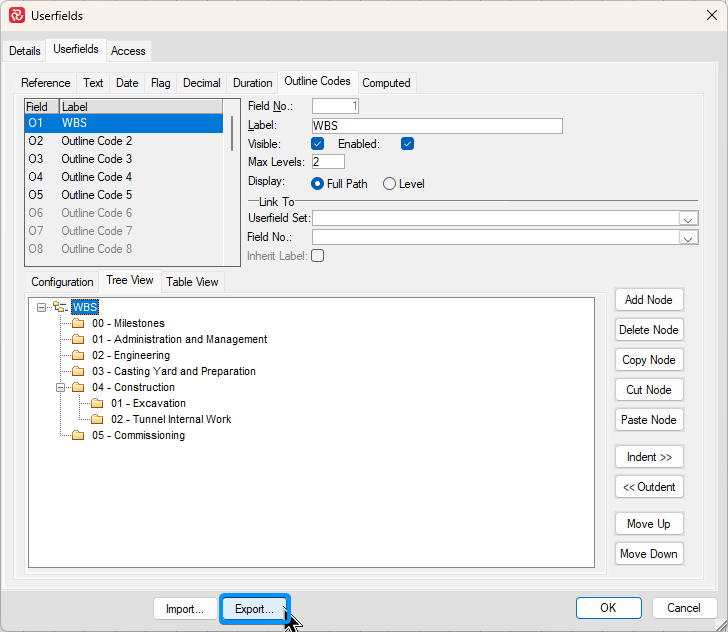
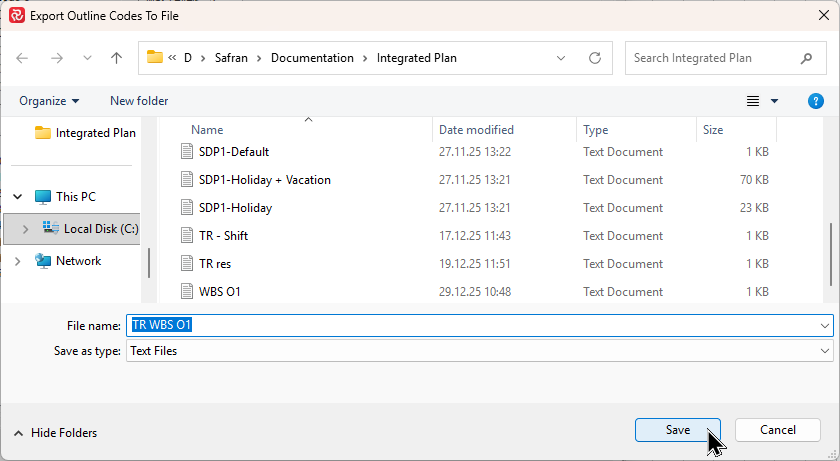
This opens the file export window allowing you to select a location and name your file.
Importing Calendars/Resources/Profiles to the Integrated Plan
When all the relevant export files have been created, it's time to import the information to the corresponding data sets in the integrated plan.
Calendars
To import Calendars, start by opening the Calendar editor:
When the editor opens, select Import:
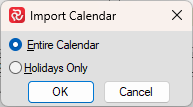
When the Import Calendar sub panel opens, make sure 'Entire Calendar' is selected, then press OK.
When the Import From File window opens, locate your calendar. It's a good idea to highlight and copy the File Name (CTRL-C) before you select Open.
When you return to the Calendar editor, note that the imported calendar has been given the next available 'Calendar ID number and is given a default description 'Calendar nr'.
If your copied the filename, you can paste it (CTRL-V) in the Description field which will make the calendar easier to identify when it comes to mapping your source/target calendars.
Repeat the above steps for each source calendar. Press OK when you are finished to save your changes.
Resources
To import Resources, start by opening the Resource editor:
When the Resource Definitions window opens, press Import to open the Import Resources window:
When the Import Resources window opens, locate your import file and press Open.
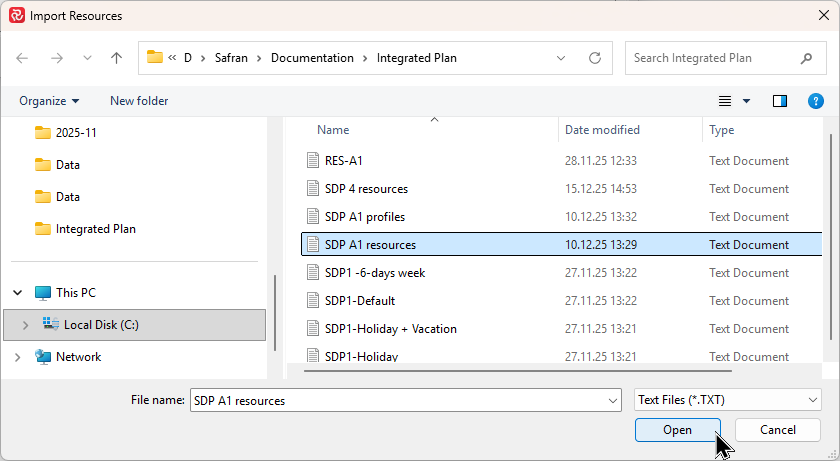
The Resource Definitions window will open again with the resources from your import in addition to any existing resources.
.png)
Note that in the example above, some resources have the same/similar names (short/description). They have nevertheless been given a postfix (P4/A1) in order the simplify the mapping process which will take place later.
Repeat the above steps for each set of resources. Press OK when you are finished to save your changes.
Profiles
To import Profiles, start by opening the Profile editor:
When the Profiles window opens, press Import to open the Select Import File window:

When the Select Import File window opens, locate your import file and press Open.
The Profiles window will open again with the profiles from your import in addition to any existing profiles.
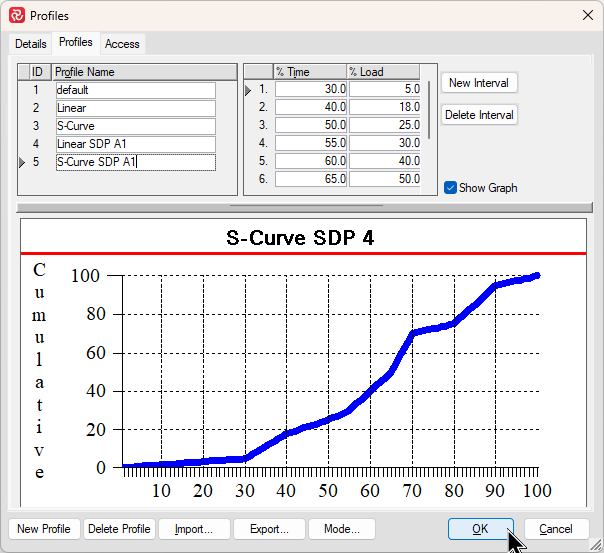
Note that in the example above, some profiles have the same/similar Profile Name. They have nevertheless been given a postfix (A1) in order the simplify the mapping process which will take place later.
Repeat the above steps for each set of profiles. Press OK when you are finished to save your changes.
Importing Reference fields/Outline codes to the Integrated Plan
When all the relevant export files have been created, it's time to import the information to the appropriate userfields in the integrated plan.
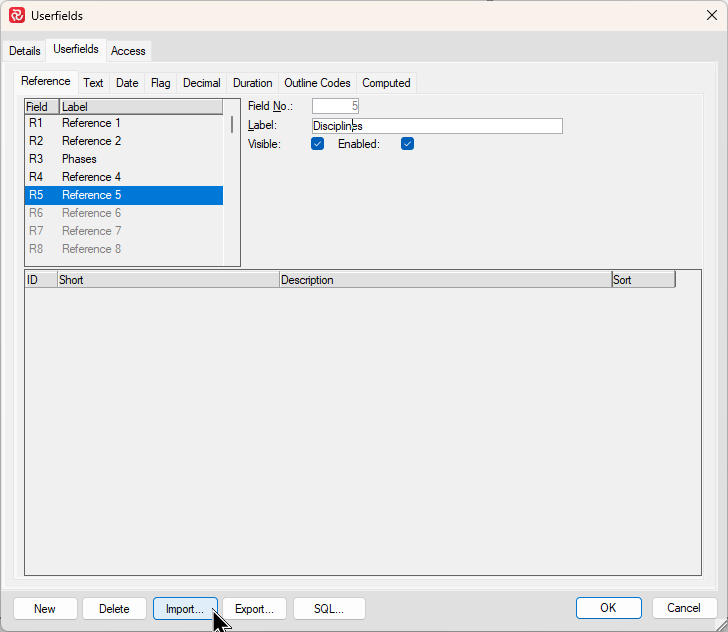
To start, make sure you have the Integrated Plan project open, then select Userfields on the Data ribbon.
Reference Fields
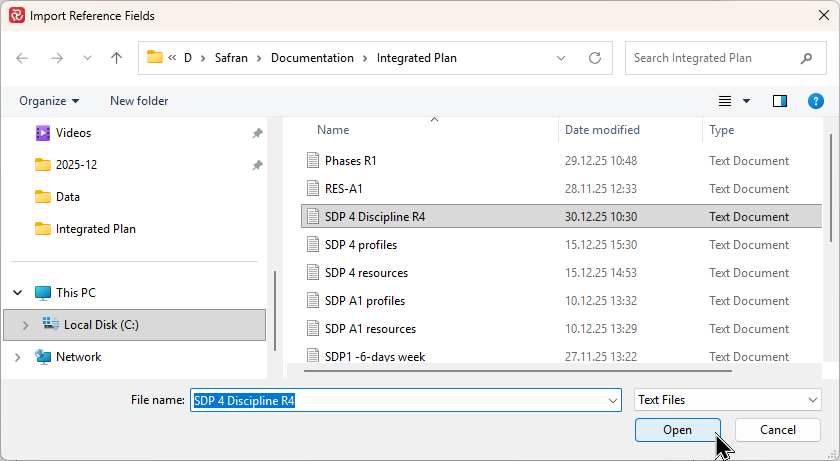
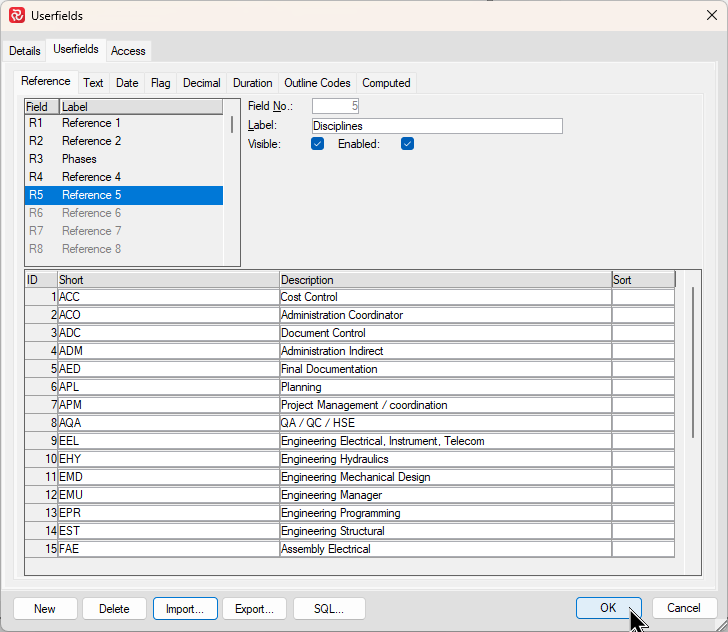
When the Userfields definition window opens, select the Reference field you would like to populate, give the field a relevant Label/Name and press Import.
When the Import Reference Fields window opens, locate your import file and press Open.
You are then returned to the Userfields definition window. Note that your reference field has been populated. Repeat the steps above for further reference fields and press OK to save your modifications and close the window.
Outline Codes
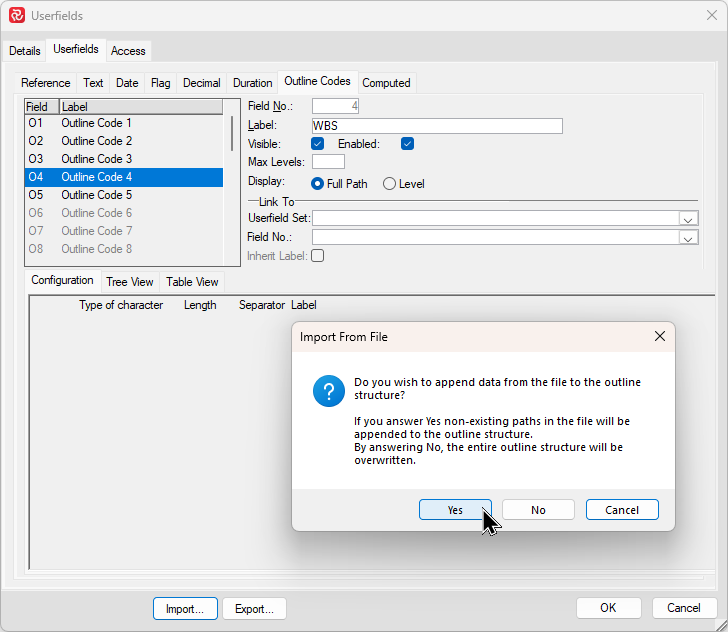
Outline Code fields are also available in the Userfields window and may be imported in the much the same manner as Reference fields.
Prior to pressing Import to locate your file, make sure you you enter a number for the 'Maximum number of levels' for your Outline Code. Failing to do this will result in an error during the import and you will be returned to the Userfields window to correct this.
.png)
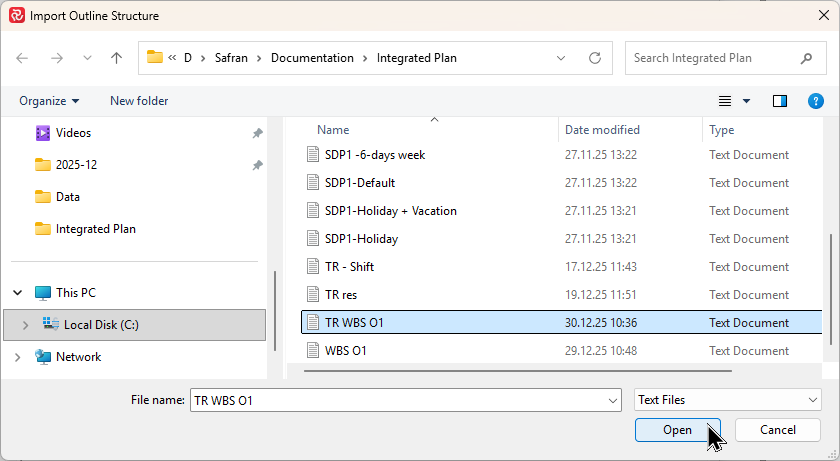
When the Import Outline Structure window opens, locate your import file and press Open.
You are then returned to the Userfields definition window, however in this case you are given options as to how the data should be treated, either to 'Append or Overwrite' any existing data. If the field is empty, both options will have the same effect, however selecting No will ensure the integrity of your imported outline code.
After you have made your selection, you are then returned to the Userfields definition window. If you then select the Tree View tab, you'll see the imported data.
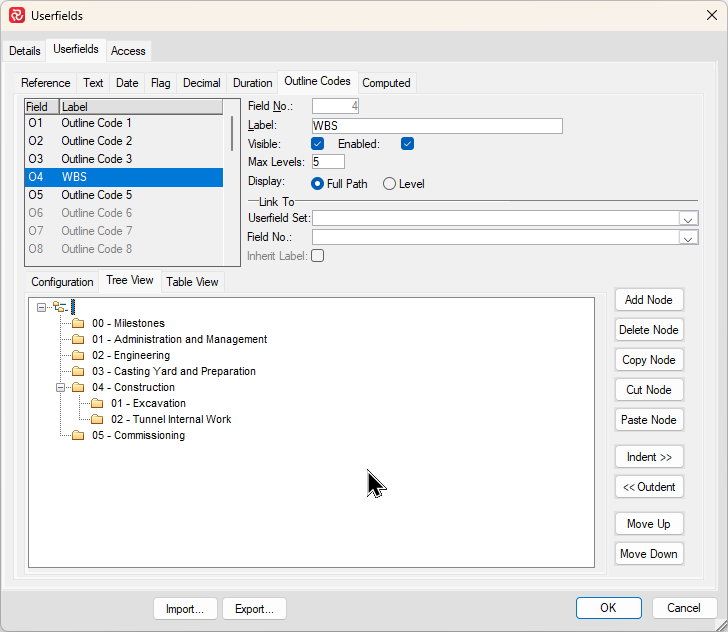
Repeat the steps above for further outline codes and press OK to save your modifications and close the window.
Establishing the list of Contractors & Projects
The Contractor Import configuration facility allows you to keep an overview of all source projects included in your Integrated plan(s). Multiple Contractors may be established, each potentially containing multiple projects, however in it's simplest form and depending your requirements, you only need to establish one 'Contractor' to attach your source projects to.
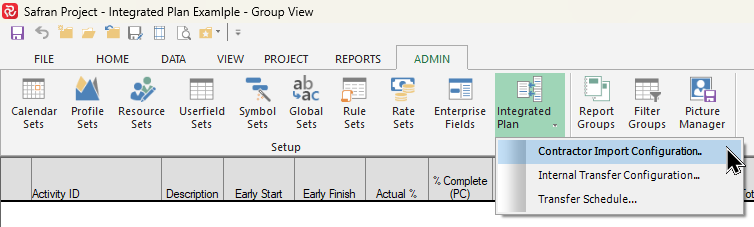
To establish your list of Contractors/Projects, start by locating Integrated Plan on the Admin ribbon and select Contractor Import Configuration:
When the Contractor Import Configuration window opens, you'll see a list of any existing configurations. To add a Contractor do a 'right click' in the left hand panel of the window and choose Add Contractor.
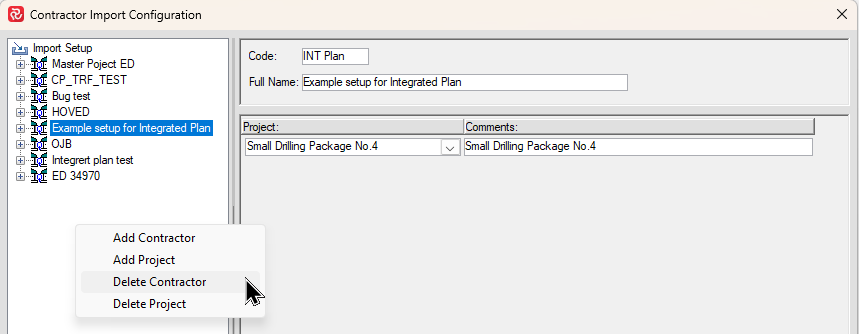
Give the new Contractor a 'Code' and a 'Full Name'
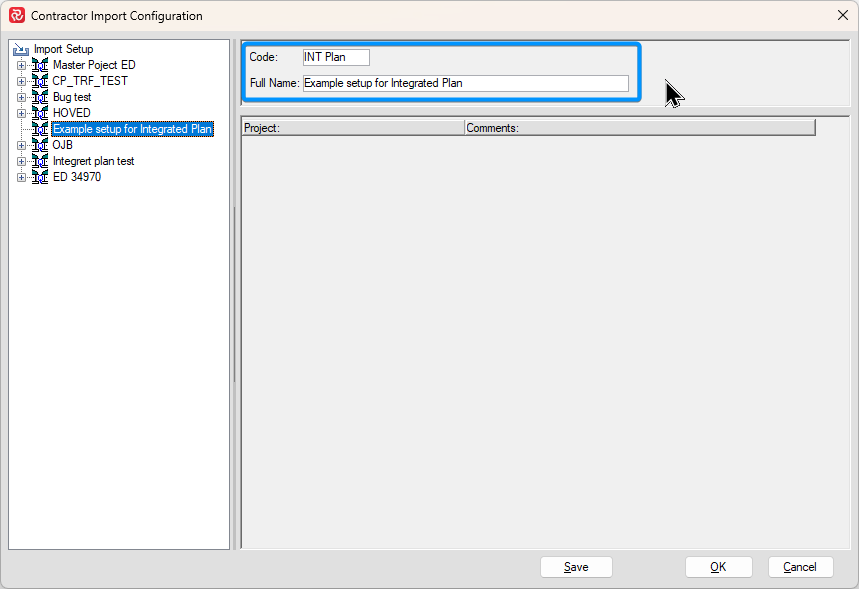
The projects in the Contractor list will be grouped by the Code you enter while the Full Name will be shown in the list of import setups.
Next, add projects by doing a 'right click' and selecting Add Project:
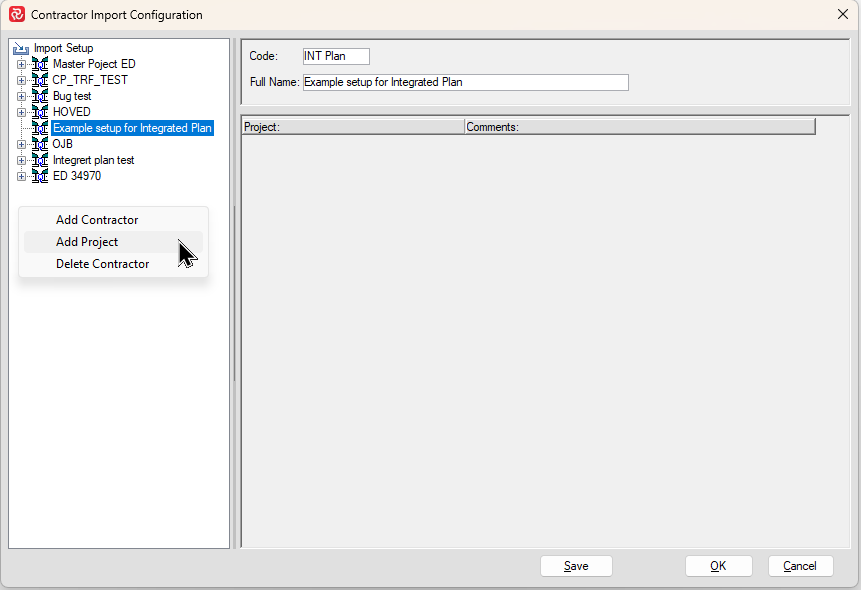
You can then select any existing project in your database from the dropdown.

You can repeat the process to add the projects that will be available for the Integrated Plan.
When you are finished selecting projects, press OK to exit the Import Configuration.
You can add or modify the list of Import Configurations at any time.
Keep in mind that the Internal Plan has a hierarchy of information (Contractor-Project-Mapping/Internal Transfer). If you elect to delete a Contractor with existing projects you will be given a warning and will have to delete all the Contractor Projects prior to deleting the Contractor. The same is true when deleting projects that have mappings defined, as they too would have to be deleted in order to delete a project.
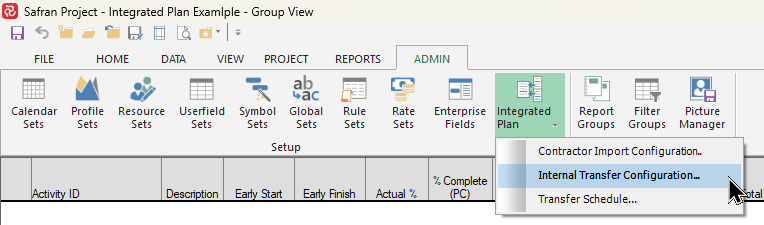
Configuring Internal Transfers (Mapping)
Once the Contractor Import Configuration is complete, you can continue to establish and configure the rules for the transfer of activities for each project.
Start by locating Integrated Plan on the Admin ribbon and select Internal Transfer Configuration:
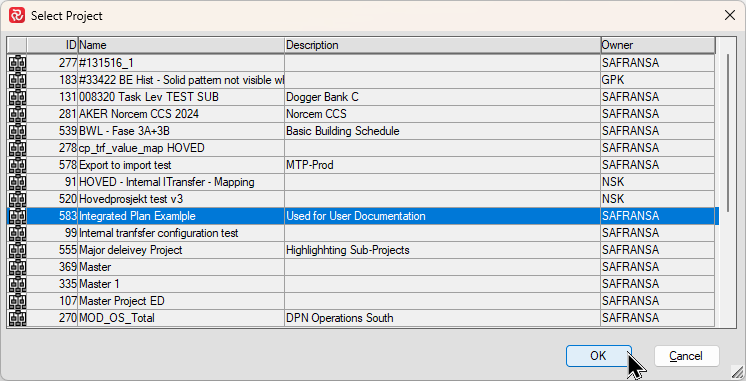
A list of all the projects in your database containing Sub-Projects will then be presented. Note that by default, if you are working with/logged on to the project you have established for the Integrated Plan, this will be hi-lited by default.
Next, select the project for the Internal Transfer and press OK.
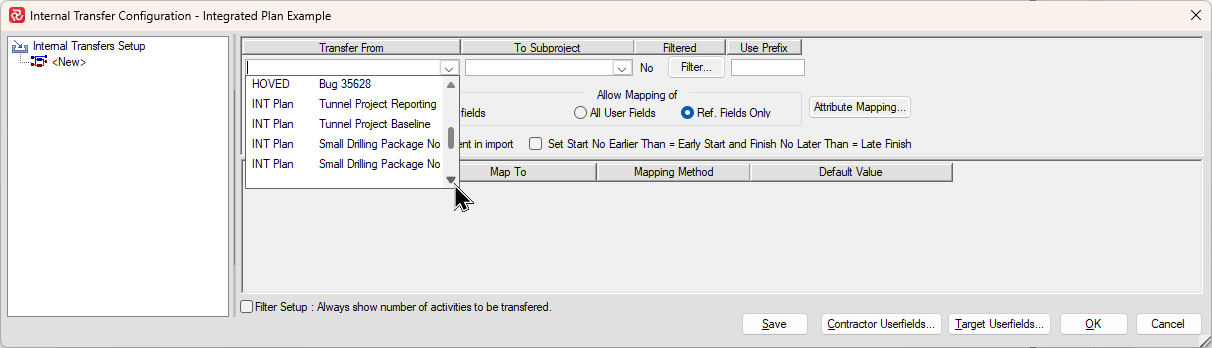
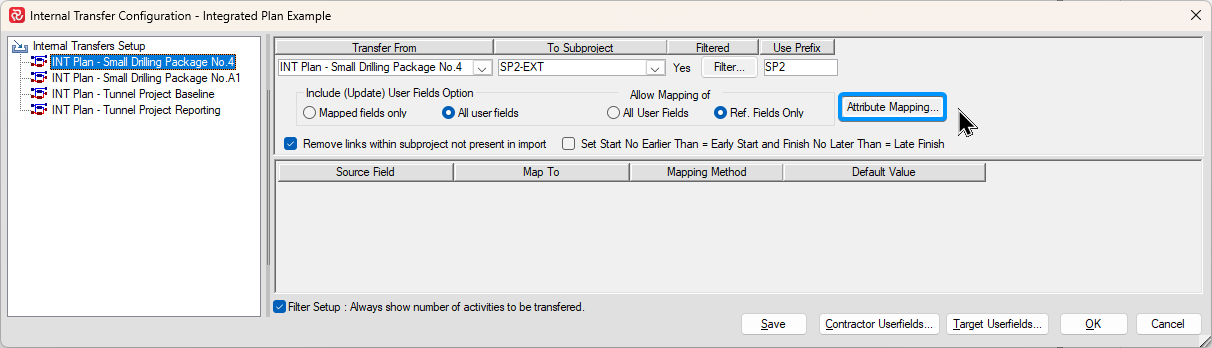
When the configuration window opens, do a 'right-click' in the left-hand section and choose Add Project.
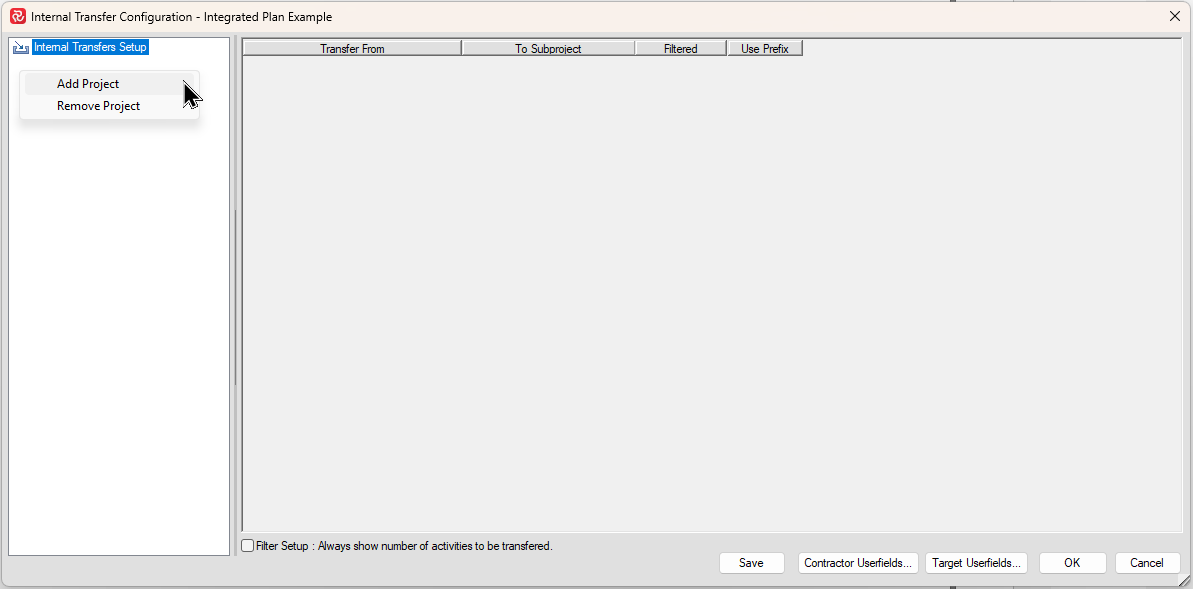
You can now select a project to be included from the 'Transfer From' dropdown. Note that this list only contains projects that have been defined in the previous step 'Establishing Contractors & Projects' and that projects are grouped by the 'Code' you defined for the Contractor which for this example is 'INT Plan'. This eases locating projects when working in databases with large amounts of projects.
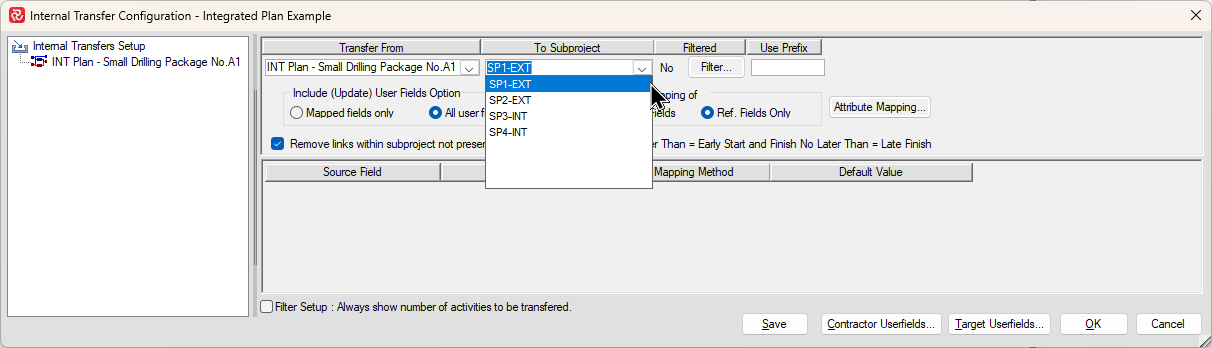
Next select the Sub-project to transfer the project's activities to from the 'To Subproject' dropdown:
Since all activity IDs must be unique within the 'total' project, you have the opportunity to add a Prefix to the Activity ID for the project.
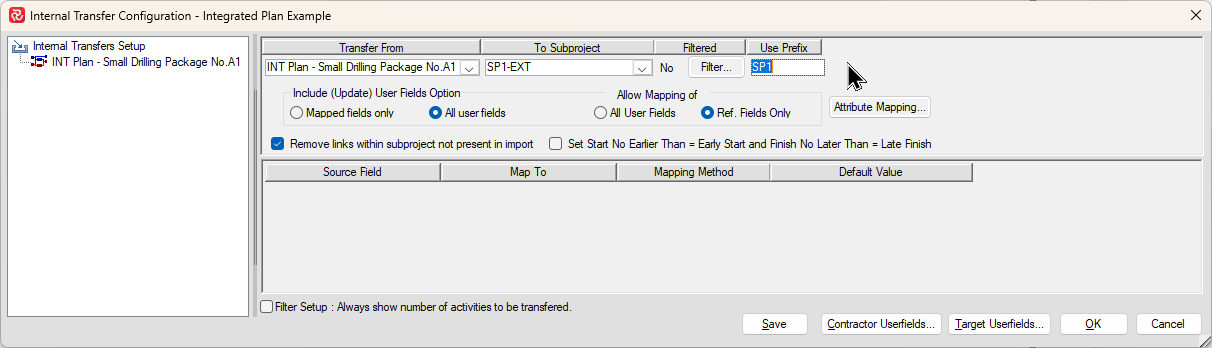
You also have the option of adding a filter to omit certain activities during the Internal Transfer process. If you choose to add a filter you'll notice the 'No' to the left of the Filter button changes to 'Yes' to make you aware that a filter is specified for the transfer.
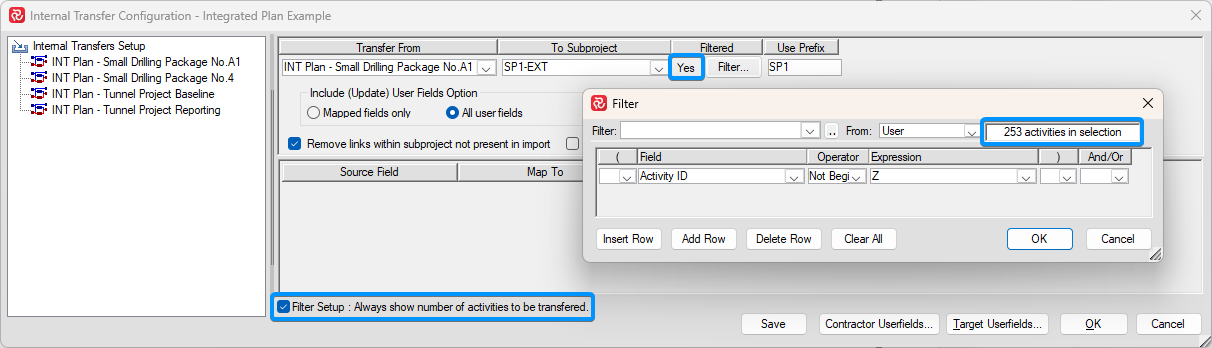
If you check the Filter Setup box, you'll notice that the Filter definition window informs you of the number of activities the specified filter will select.
Attribute Mapping
The next step is to 'Map' the Calendar, Resource, and Profile attributes for the project to the Integrated Plan equivalents.
Calendars
When you imported Calendar, Resource and Profile definitions to the equivalent sets for the integrated plan, each definition was assigned a new and in most cases different ID. The ID is the link between the activity and the relevant detail information in the Calendar, Resource, and Profile set. When you map this information you ensure that Safran will be using the correct detail information when the transfer process takes place.
To start, press the Attribute Mapping button.
This opens the Map Project Attributes window which has three tabs, one for each attribute category:
.png)
To the left of the window under Contractor/attribute type is a list of the attribute elements in the source project for the category, while on the right side under Map To, you'll find a dropdown containing an overall list of the attributes of that type present in the Integrated Plan.
For each element, select which 'Map To' element should be used when transferring. The list of Map To elements can often be quite extensive and challenging to locate and map the correct element to. The example above hi-lites the value/advantage of giving each 'Map To' element a descriptive name during the Calendar, Resource, Profile import process
In addition to the direct mapping options, you'll find certain additional options that will vary depending on the attribute category. For calendar mapping you can select a 'default' calendar in case the activity's calendar is missing. Additionally you can also select to use the chosen default calendar for any calendar element that you haven't nominated a 'Map To' calendar for.
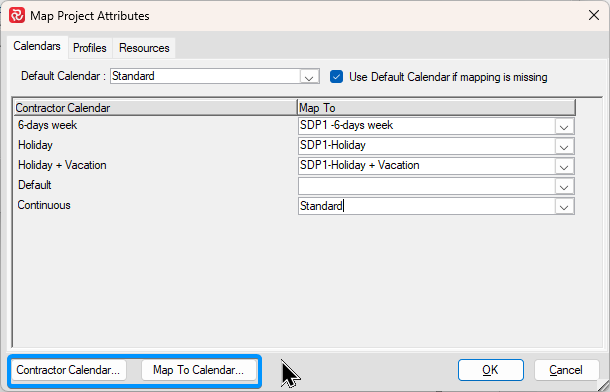
The two Contractor/Map To buttons on the lower left provide direct/easy access to the relevant attribute sets:
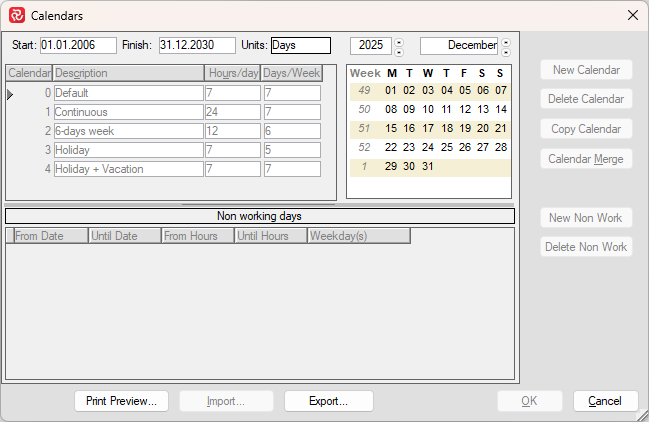
Note that you will not be able to review/make changes as this function only provides a 'read only' access to the attribute set. You do however have the option to both Print Preview and Export the relevant attribute set.
Resources
The attribute mapping facilities for resources are found on the Resources tab:
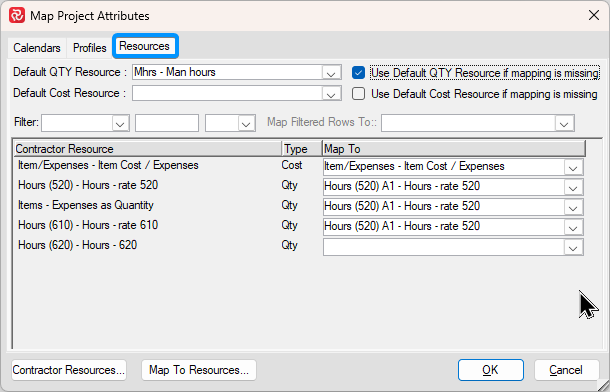
Resources can be mapped in the same basic way as Calendars, ie. as each 'Contractor' resource is matched to it's equivalent resource in the Integrated Plan resource table. Both a 'default' QTY and Cost resource may be specified and applied to resources without a defined mapping by checking the 'Use Default...if mapping is missing' options to the right of your choice of defaults.
This may be useful if your source projects contain/utilize multiple resources, while your Integrated plan only considers manhour quantities irrelevant of resource category as this would allow you to consolidate resource categories.
If you're working with resource mapping and the source project contains large numbers of categories, you'll also find the filtering capabilities quite useful:
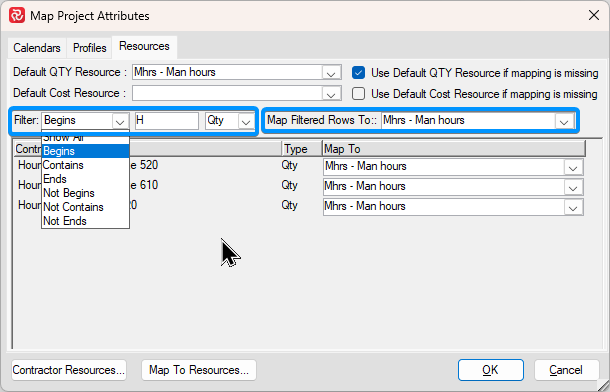
Applying a filter helps limit the list of resources. You can filter on resource description, as well as resource type (QTY/Cost). Once you have applied a filter, you can also select a common resource category to be mapped to the resources selected.
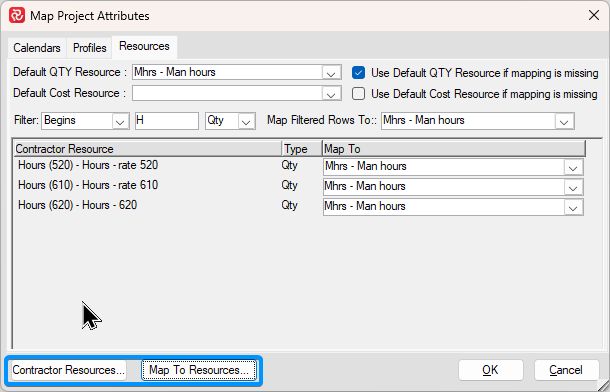
The two Contractor/Map To buttons on the lower left provide direct/easy access to the relevant attribute sets:
Note that you will not be able to review/make changes as this function only provides a 'read only' access to the attribute set. You do however have the option to both Print Preview and Export the relevant attribute set.
Profiles
The attribute mapping facilities for profiles are found on the Profiles tab:
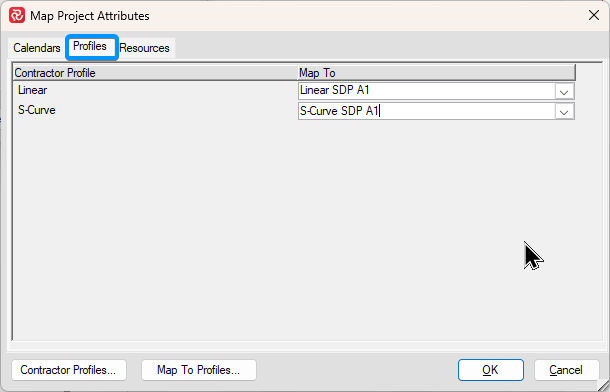
Profiles can be mapped in the same basic way as Calendars and Resources, ie. as each 'Contractor' profile is matched to it's equivalent profile in the Integrated Plan Profile table.
The two Contractor/Map To buttons on the lower left provide direct/easy access to the relevant attribute sets:
.png)
Note that you will not be able to review/make changes as this function only provides a 'read only' access to the attribute set. You do however have the option to both Print Preview and Export the relevant attribute set.
Mapping User-defined fields
The final stage of mapping definition is the mapping of the user defined fields.
Safran offers a wide range of options allowing you to configure which userfields are to be transferred, which type of user fields are allowed to be mapped, which field a source field is to be mapped to, as well as a range of 'mapping methods' controlling how source data is to be treated during the transfer.
The latter also has options allowing you to ‘merge’ reference code values from ‘incongruent’ sources. An example of this might be where different contractors use different reference codes for the same discipline, have different levels of detail for disciplines, or you have the need to consolidate or reduce the level of detail of information in a reference type field.
The Transfer Configuration panel below has two major options that control userfield mapping.
.png)
The Include/Update Userfields option allows you to control, in general, which userfields will be transferred (or updated after the initial transfer).
The default is to transfer all userfields whether they have a defined mapping or not. This may be useful when a source project's userfield setups are identical (or very similar to) to the integrated plan userfield setup.
The alternative is to transfer only the fields that have mappings defined. This option gives more control as to which fields are transferred and how they are mapped.
If the all option is selected and a mapping does not exist for a field, Reference and Outline fields values will be attempted transferred (ie. if a matching code id exists the value is transferred, however this will obviously give erroneous results), while Text, Date, Flag, Decimal, Duration will be be transferred non-critically (ie. the contents of the source Text 1 will be transferred to the target Text 1 and so on.)
The Allow Mapping option allows you to choose between Reference fields only (default) or All User fields. The reference fields only option has the direct effect of limiting the Source Field dropdown list to reference fields only making it easier to select fields.
| Mapping Method | Description/Action |
|---|---|
| Ignore | Selected source field will be omitted, ie. no transfer will take place. |
| Map, set missing to Blank | Source field value will be mapped to selected Target field value, non-mapped source field values will be set to blank/null. |
| Map, set missing to Default | Source field value will be mapped to selected Target field value, non-mapped source field values will be set to selected default value. |
| Match, set missing to Blank | Source field will attempt to find matching Target field value. Where source field is missing/null or source code field code is not found in Target, field is set to Null |
| Match, set missing to Default | Source field will attempt to find matching Target field value. Where source field is missing/null or source code field code is not found in Target, field is set to selected Default value. |
| Match, add new values | Source field will attempt to find matching Target field value. Where source code field code is not found in Target, a new code is added and used. If source field is missing/null or field is set to field is set to Null |
| Set all to Default | Target field will be set to selected Default value |
| Copy | Copies value from source field to target field |
| Method | Reference | Text | Date | Flag | Decimal | Duration | Outline Code |
|---|---|---|---|---|---|---|---|
| Ignore | X | X | X | X | X | X | X |
| Map, set missing to Blank | X | N/A | N/A | N/A | N/A | N/A | N/A |
| Map, set missing to Default | X | N/A | N/A | N/A | N/A | N/A | N/A |
| Match, set missing to Blank | X | N/A | N/A | N/A | N/A | N/A | X |
| Match, set missing to Default | X | N/A | N/A | N/A | N/A | N/A | X |
| Match, add new values | X | N/A | N/A | N/A | N/A | N/A | N/A |
| Set all to Default | X | X | X | X | X | X | X |
| Copy | N/A | X | X | X | X | X | N/A |
To add a field mapping, first highlight the project you would like to define a mapping for from the list of projects under Internal Transfers Setup, then right-click in the field panel and select Add Field.
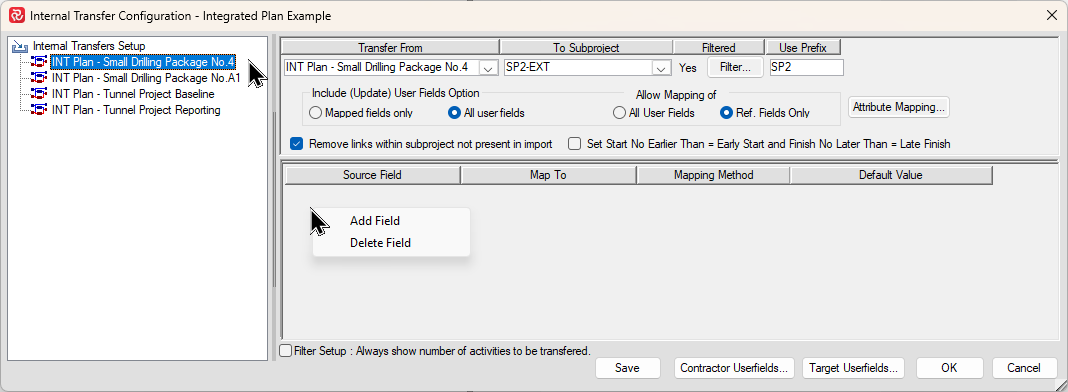
A new line is added allowing you to configure a field transfer. Select the Source field you would like to transfer, the Map To field, and Mapping Method you would like to use from the relevant dropdown.
Note that Ignore is the default mapping method, and that selecting all other methods will then enable you to choose a Map To field.
If you choose a method that sets missing values to 'Default', you will be able to choose the Default value from the dropdown to the right. For certain field types (Text, Date, Flag, Decimal, Duration) you are also allowed to enter the Default value 'manually'.
The list of Mapping Methods will obviously vary depending upon the field type you configure as mapping/matching is not relevant for all field types. The various mapping methods and applicability's are detailed in the tables below.
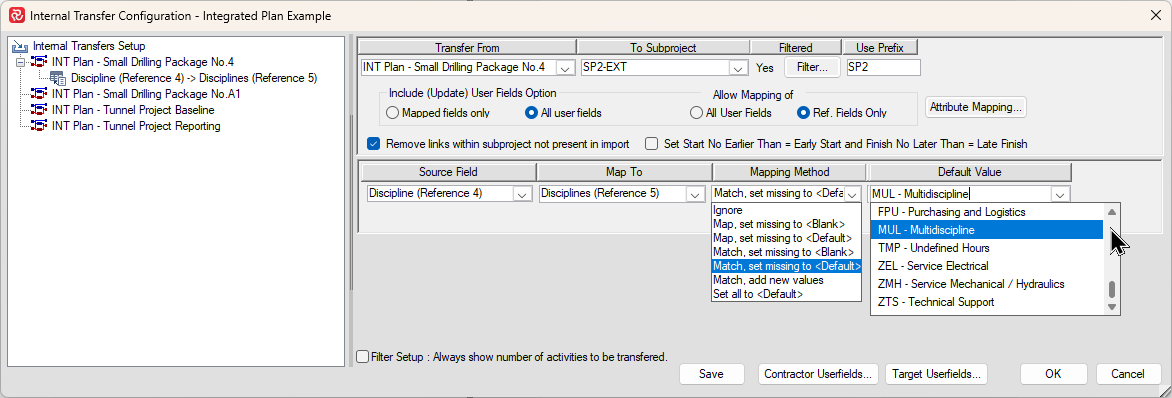
When choosing one of the 'Map' type methods you'll notice that the lower half of the mapping panel allows you map source values to specific target values. This is useful when a Contractor uses different codes for Disciplines/Systems etc. than those defined for the target project/integrated plan.

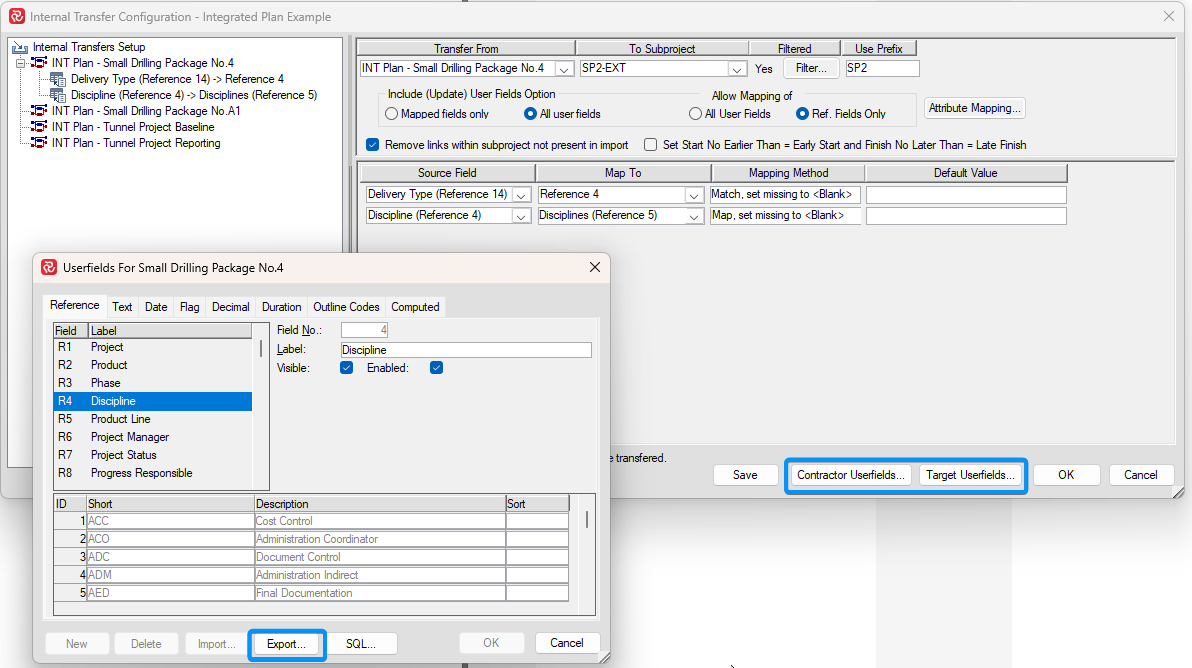
While configuring your Internal Transfer note the Contractor/Target Userfields buttons at the bottom of the Configuration window. These provide direct access to the relevant userfield definitions and are highly useful when configuring transfers. Both windows have capabilities for exporting code values for Reference/Outline code values to file in case you need to import additional values
Exporting/Importing Mapping configurations
Internal Transfer configurations are in some cases inevitably quite extensive as the number of userfields to be transferred increases.
If your integrated plan consists of multiple projects with the same (or very similar) userfield configurations, you'll find the 'export/import Total Mapping' facility quite useful. Instead of having to configure a transfer 'field by field', you can export the complete transfer configuration for a project to file and import it to another project.
This facility may also be also used if you need to make numerous modifications to a mapping configuration that is also valid for multiple projects.
In addition to all the field mappings, the export/import also copies the following:
- Any filter specified
- The Activity ID prefix
- Include Userfield/Allow Mapping options
- All Attribute mappings
- Remove Links/Set Start no Earlier options
If there are minimal differences between mapping setups, they can easily be modified to suit your requirements.
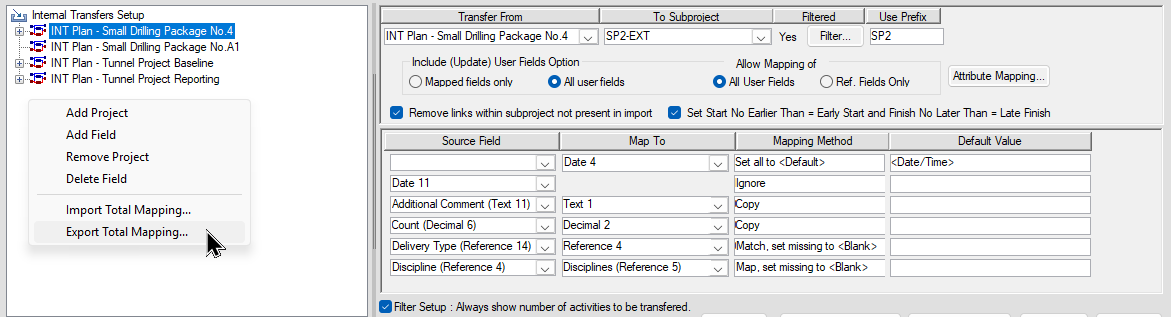
To export a Total Mapping set focus on a project in the 'Internal Transfer Setup' panel, then right-click and select Export Total Mapping. A standard file export window opens allowing you to specify a name and location for the file.
Importing a Total Mapping is done in much the same way. Set focus on the project you want to import the configuration to, then right-click and select Import Total Mapping. A standard file import window opens allowing you to locate and select your import file. You are then prompted to confirm that you intend to overwrite any existing mapping/configuration for the project.
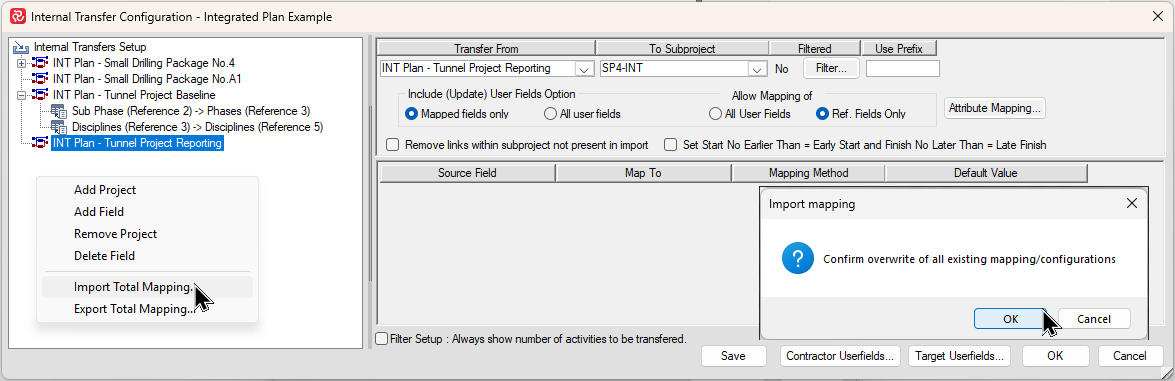
After pressing OK, the confirmation window closes and the imported configuration is shown:
.png)
Finally, press Save to save the configuration or OK to save and close the configuration window.
Running Internal Transfers
Once all the the configuration and mapping is complete, it's time to run the Internal Transfer.
Transfers are often run 'on demand/manually' one by one.
Alternatively, if your Integrated Plan consists of a large number of projects or you have multiple Integrated plans, transfers may be run in 'batch' mode using Safran's Transfer Schedule facility.
The Transfer Schedule facility also allows you to 'schedule' multiple recurring transfers at fixed intervals ensuring your Integrated schedule is kept up to date.
On demand transfers
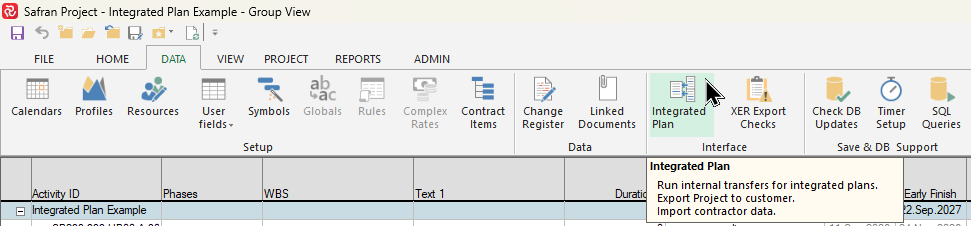
To initiate an on demand transfer, locate and select the Integrated Plan icon on the Data ribbon.
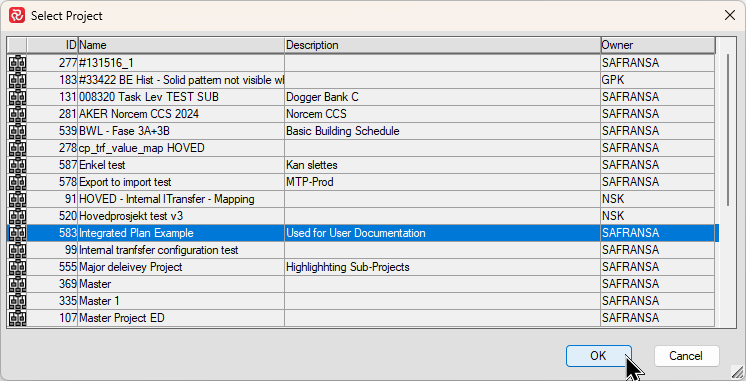
A Select Project window opens allowing you to select an Integrated Plan project. Note that the list of projects will contain all projects with sub-projects and not necessarily just projects containing Integrated Projects. By default, if you have the relevant project open/active, this project will be hi-lited. This is not really a pre-requisite as you can also run internal transfers without accessing a project.
Next, the Internal Transfer window opens with a list of projects/transfers. Set focus on the project you would like to start a transfer for and press Run Now.
Note that you can both check and/or modify the transfer configuration at any time when working with transfers if needed by hi-liting a project and selecting the Configuration button.
.png)
When the transfer has completed, a status window opens providing you with the location of the Log fil for the transfer.
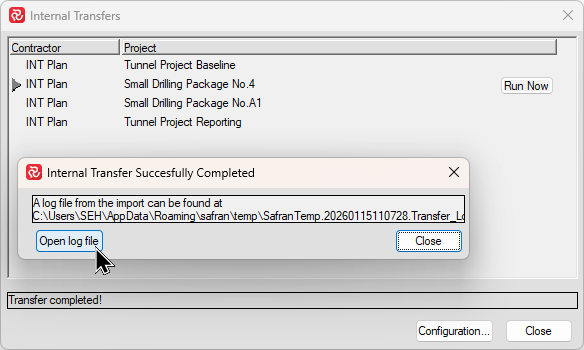
To view the Log file press Open Log File.
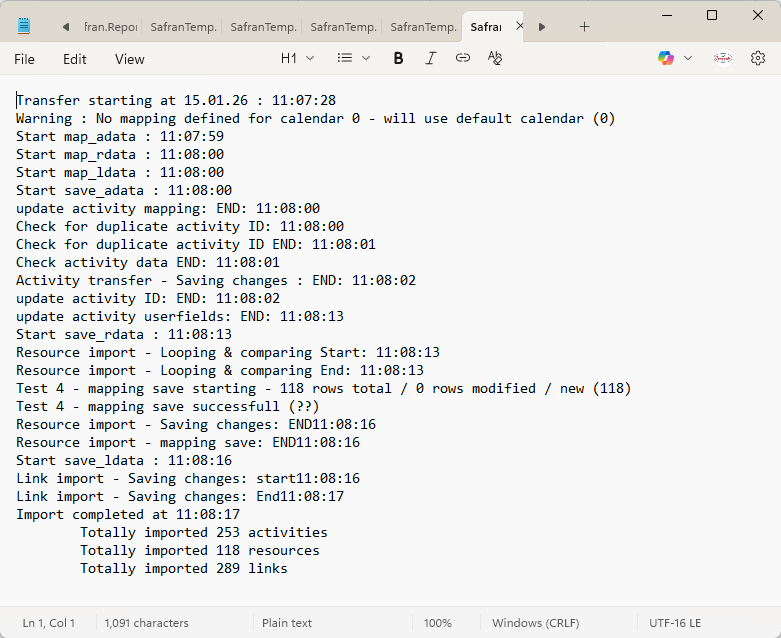
The Log file provides a wide range of status information regarding the transfer such as what has taken place, warnings, and potential error messages.
A brief example of a log file is shown below:
Batch/Recurrent transfers
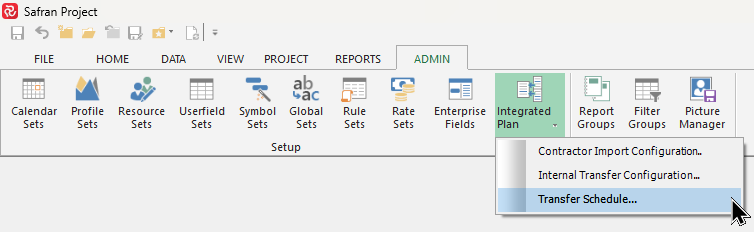
To configure a Batch or Recurring Transfer, locate and select Integrated Plan on the Admin ribbon and then select Transfer Schedule.
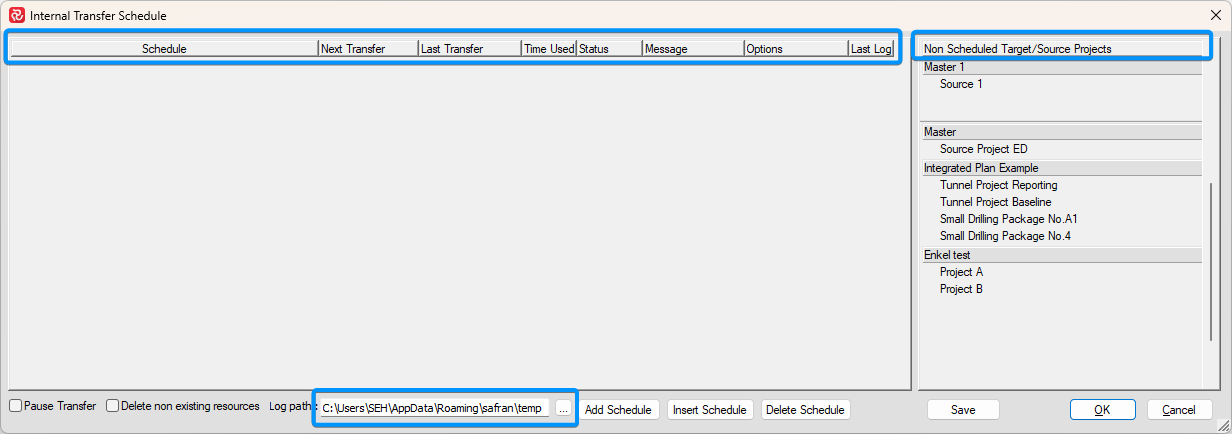
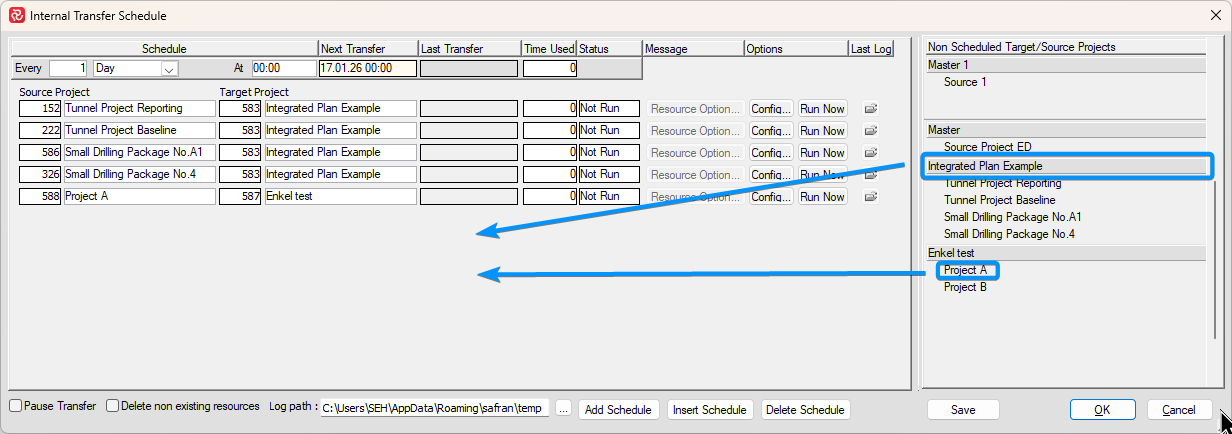
The Internal Transfer Schedule window opens with two separate panels. The panel to the right lists all defined transfers that are not part of a schedule (have not been scheduled). The left panel will contain all defined schedules and pertaining transfers. Once a project is added to a schedule it is removed from the 'Non-Scheduled' panel.
You may have multiple schedules to reflect differing transfer requirements, ie. some transfers need to be run weekly, while others are only run on a monthly basis.
Note that a project can only be included in one schedule.
At the bottom you'll find options to Add/Insert/Delete a schedule and to determine where transfer log files are to be placed.
New transfers can be created in multiple ways. The easiest method is to use a drag and drop technique and select the 'Header' for a Contractor/group of projects and drag it to the schedule panel. This will add a new default schedule for all projects in the group. You can also select specific projects one by one using the same drag and drop technique. A schedule may contain any number of projects also from multiple groups.
To delete or remove a project from a schedule, use the same technique and drag the project to the 'Non-scheduled' panel to the right.
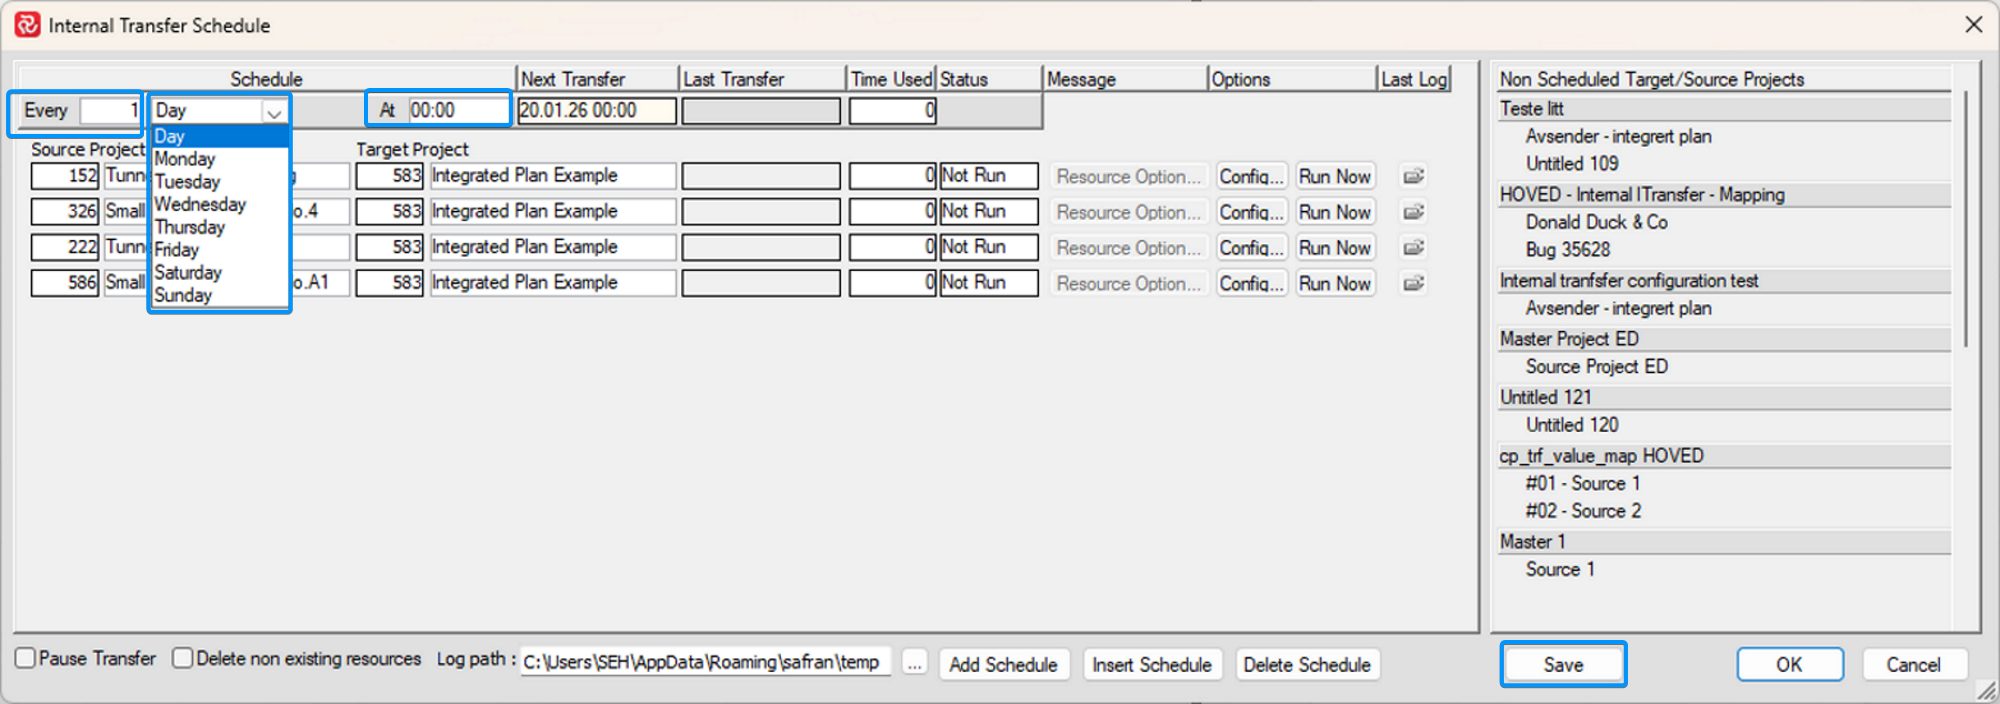
You can also add or delete a complete schedule by using the Add/Insert/Delete buttons at the bottom of the Internal Transfer Schedule window.
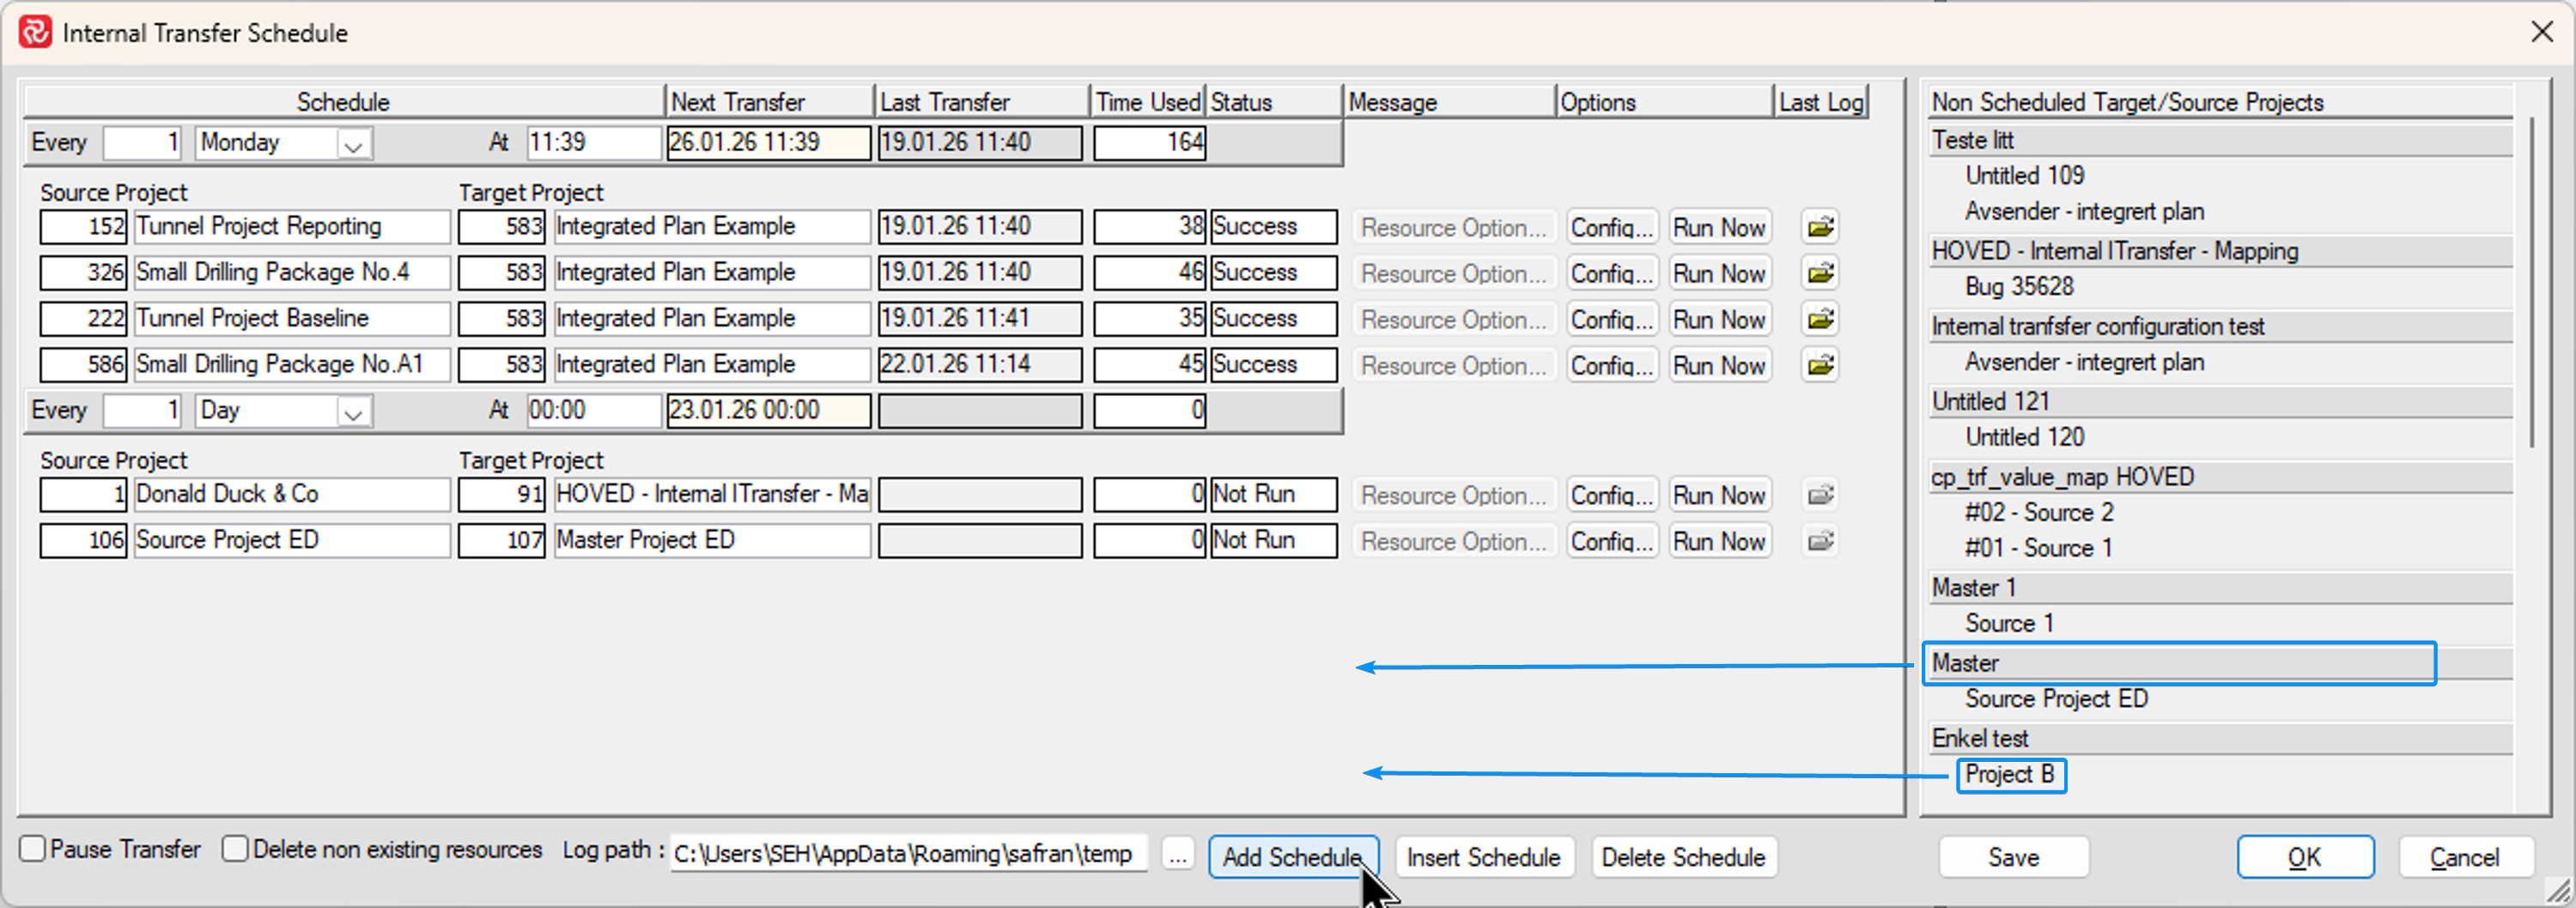
Add will add a new schedule at the bottom of the list of schedules, Insert will add a new schedule at the top of the list of schedules.
After you have established a new schedule, use the drag and drop technique to add a project/group of projects.
To delete a schedule first set focus on the schedule (point to the Every cell) and then press Delete Schedule.
Once you have selected the projects to transfer, you can continue to determine how often and at what time the transfers should take place. Once this is done press Save to save your schedule.
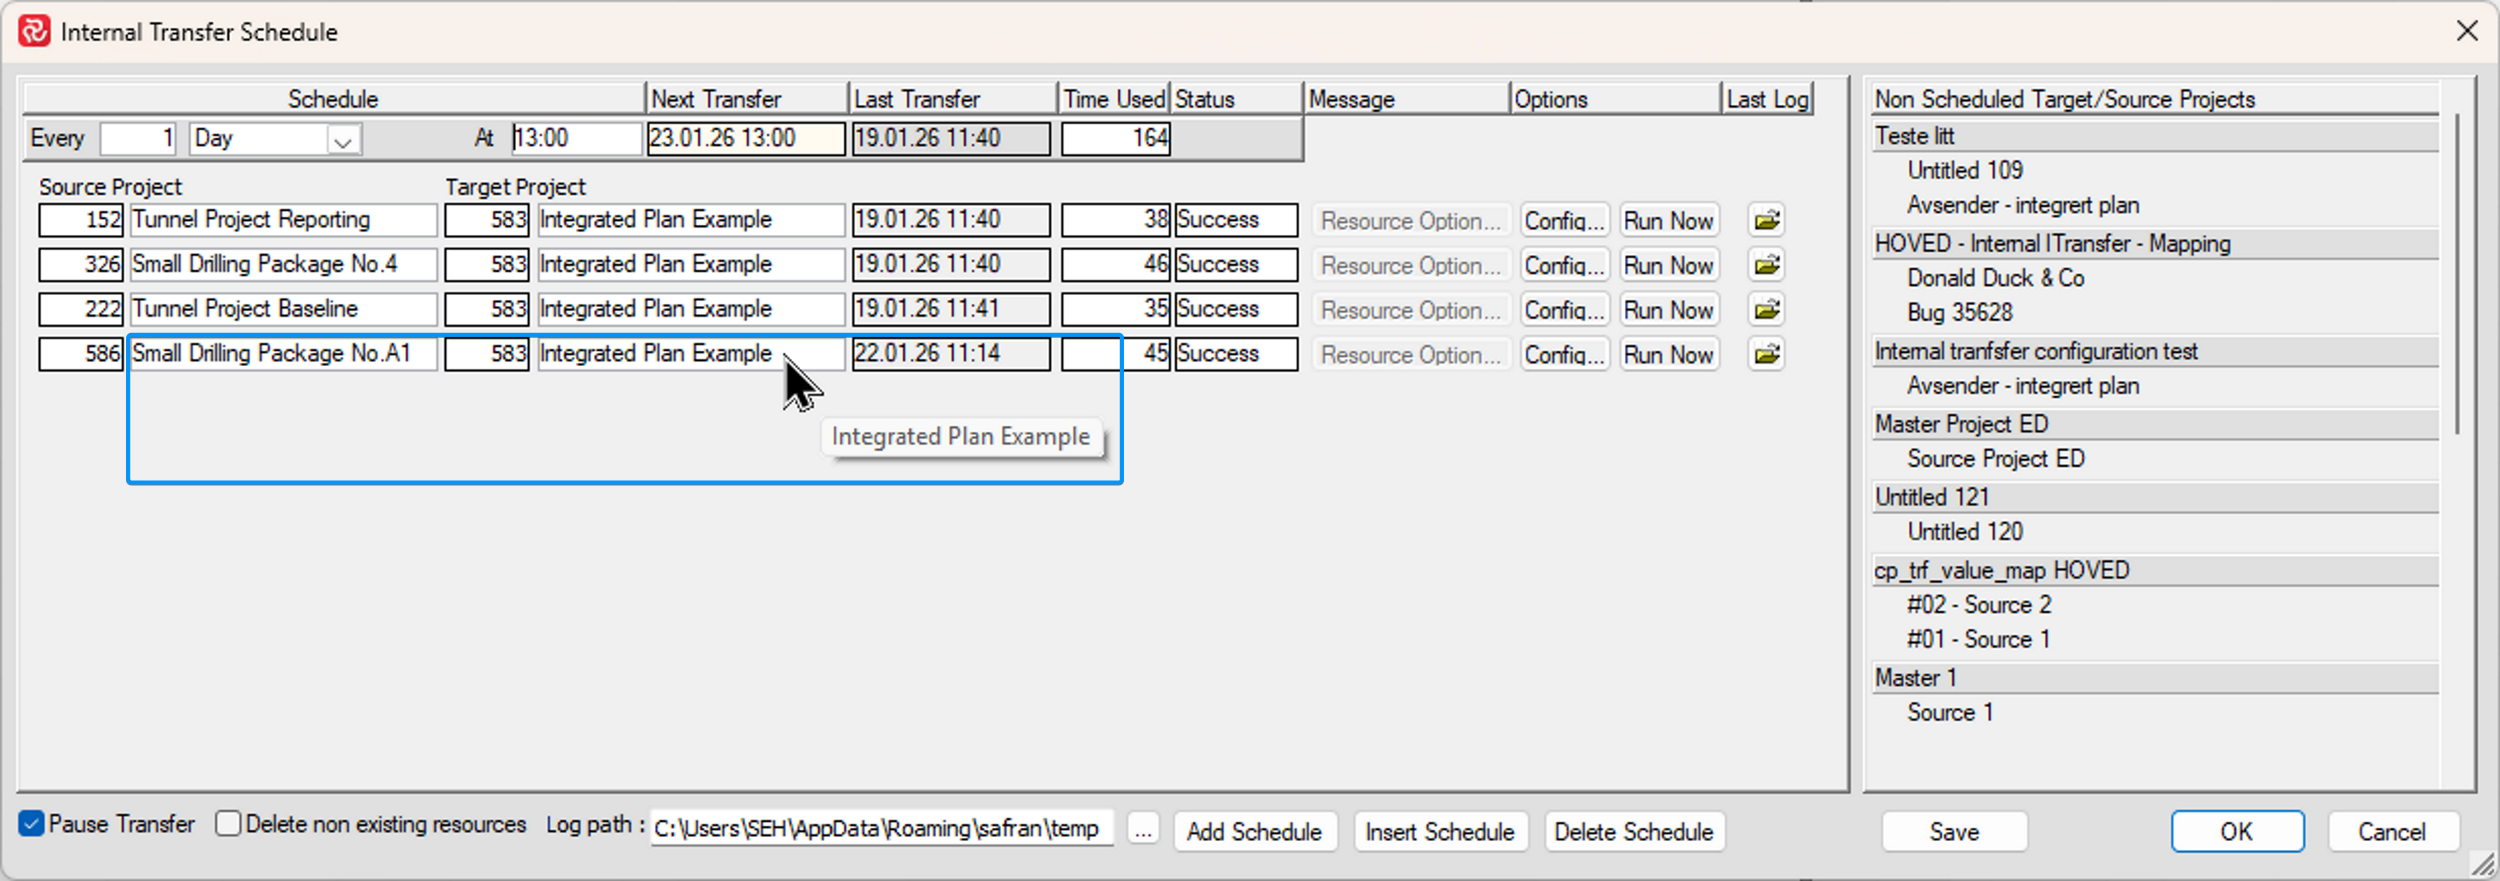
Note that if you find that your Source/Target Project names are larger than the data cell, you can 'hover' over the cell in question to see the full name.
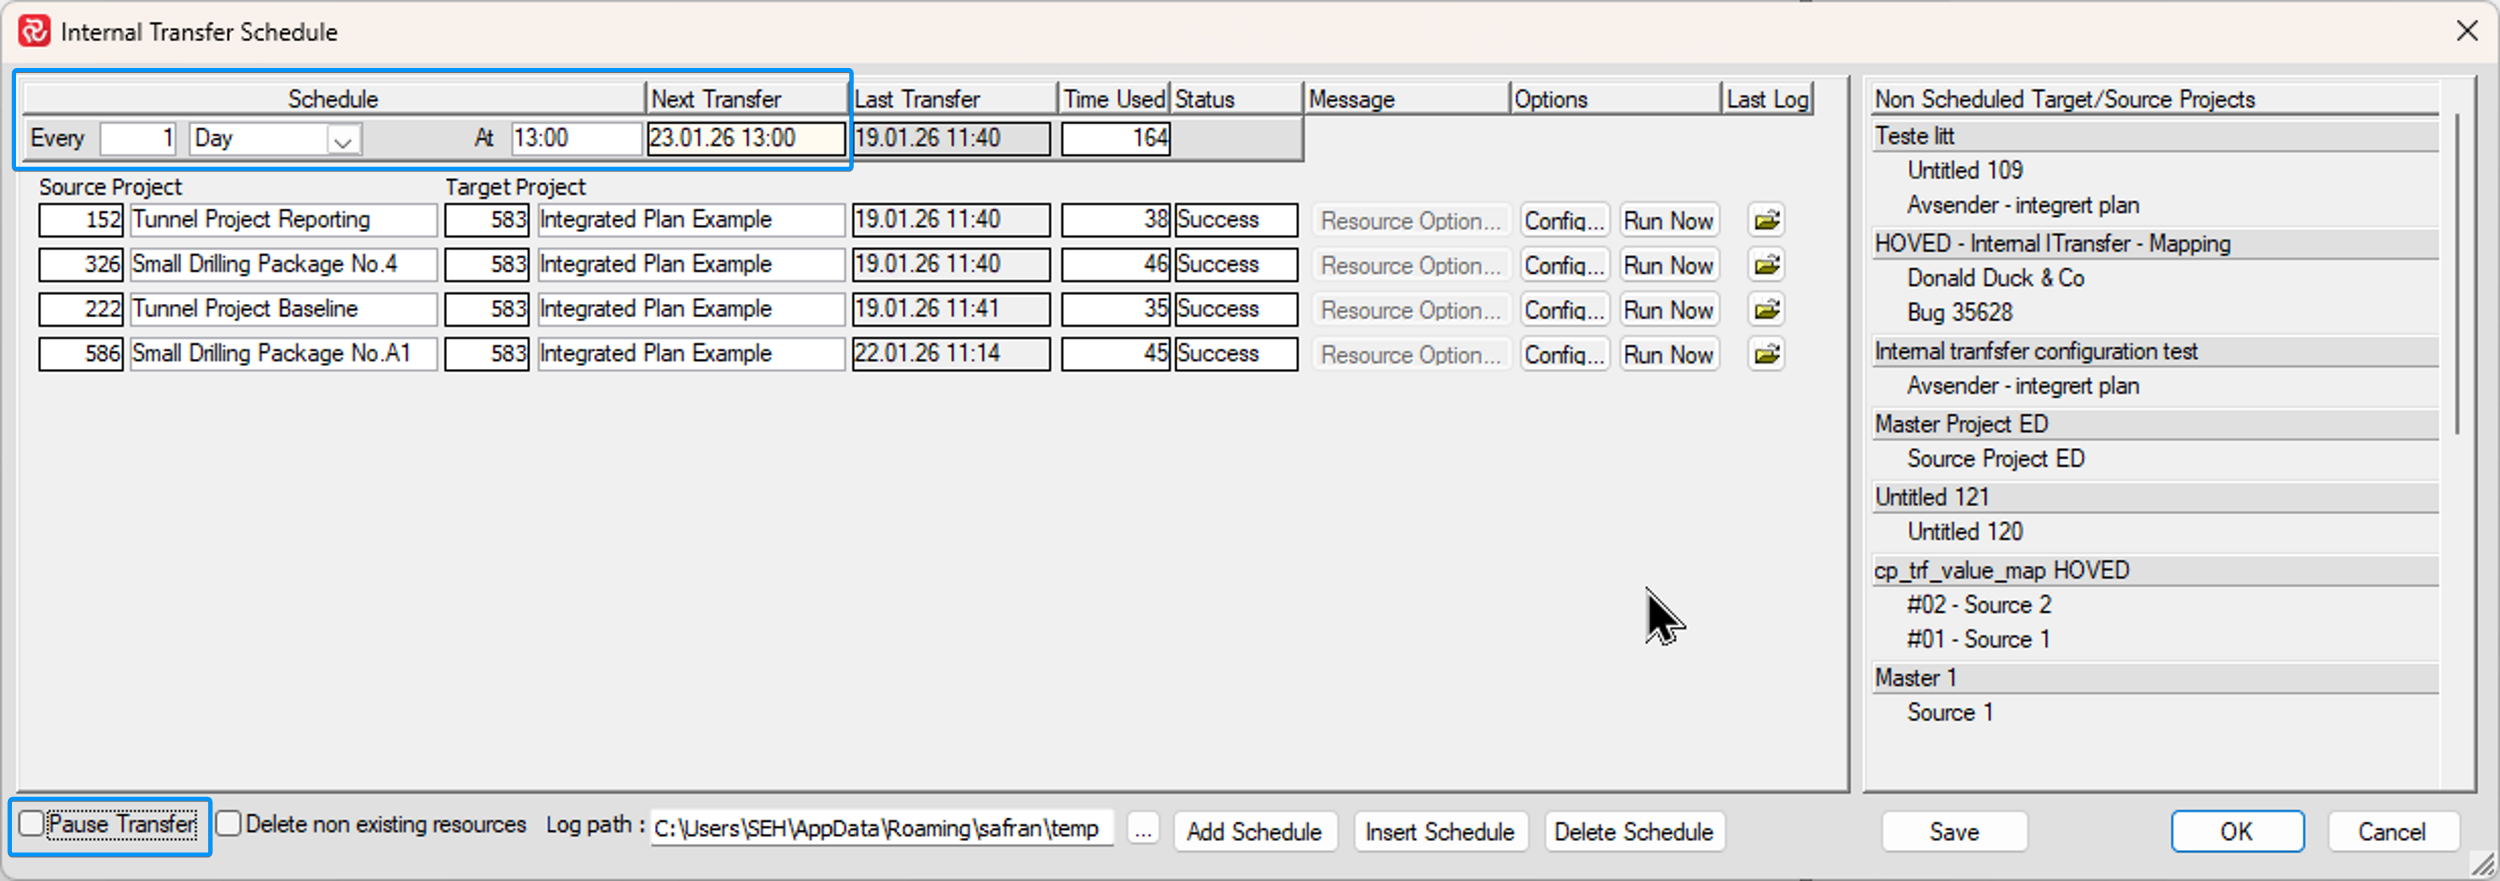
Once a schedule is defined, the scheduler determines when the transfer will take place and presents this in the 'Next Transfer' cell.
Keep in mind that scheduler does not run as a 'Background Session' ie. a Safran session must exist and the Internal Transfer window must be open for transfers to take place.
When you open the Internal Transfers window Safran will wait approximately 60 seconds before it starts to check the list of schedules to see if there are schedules to be initiated.
Note the 'Pause Transfer' checkbox at the bottom left corner. If you check this box, Safran will halt the checking process when you open the Internal Transfer window allowing you review and potentially make changes or amendments to your list of transfers before transfers are initiated. Remove the option when you are ready to resume the checking process.
Note the 'Delete Non-existing Resources' checkbox. If this is checked, Safran will delete existing resource entries in a target project that no longer exist in the source project. This option helps keep resource requirements aligned in both projects in case source requirements have been deleted.
Once a transfer is initiated, the Transfer Que window opens presenting status information regarding the current transfers.
.png)
When the transfers are complete the Internal Transfer Schedule window is updated with the Last Updated, Time Used and whether or not the transfer was successful.
Should a transfer fail, you can open the Log file by pressing the 'Last Log' icon for the transfer in question to get more information on why the transfer failed. Pressing the Config button opens the Internal Transfer Configuration window allowing you to make adjustments to the configuration after which you can press the Run Now button to to re-initiate the transfer.
.png)
Although the Transfer Schedule tool is primarily intended for use with recurring transfers, it can also be used to run 'one-off' transfers for integrated schedules containing large amounts of source projects as this might be more efficient than running the transfers one by one and having to wait for each transfer to complete before initiating the next transfer.
Batch Transfers are configured in the same way as recurring transfers described above. The only difference is that you configure the schedule to run 'Every 1 Day' and select an 'At' time that is a few minutes later than your current time. Remember to uncheck 'Pause Transfer' to allow the schedule to initiate.
When your transfers have completed you can change the schedule to run 'Every 999 Monday' which would prevent the schedule to run recurringly.
