Administrative access tools
This chapter explains how to both view and modify the contents and access rights to the various data/library sets utilized by each project, as well as configure the database-wide Enterprise fields.
The following are considered library sets:
Calendar set
Profile set
Resource set
Userfield set
Symbol set
Global set
Rule set
Rate set
The ADMIN-Setup functionality is basically the same as the DATA-Setup functionality, however the ADMIN-Setup allows you to work with all libraries you have access to and not just the libraries associated with your current project.
Each user is allowed to grant access to their own library sets to other users, while the Safransa user is allowed to control access to all library sets.
The chapter also discusses how to create/modify both Report and Filter groups as well as administer Picture and Logo files stored in the Safran database.
In earlier versions of Safran Project the majority of this functionality was a part of the System Administration module and then primarily available to the System Administrator user (Safransa), however this is now a part of the core product.
Setup Library Sets
The ADMIN-Setup ribbon presents the library sets in which you can work with content and define access rights.

Working with Library sets
By opening any of the library sets, you'll notice all library sets share a common interface. On the left side of each window, you can see a list of elements in the library that you have access to. The list may be sorted by clicking on the header of the field you would like to sort on.
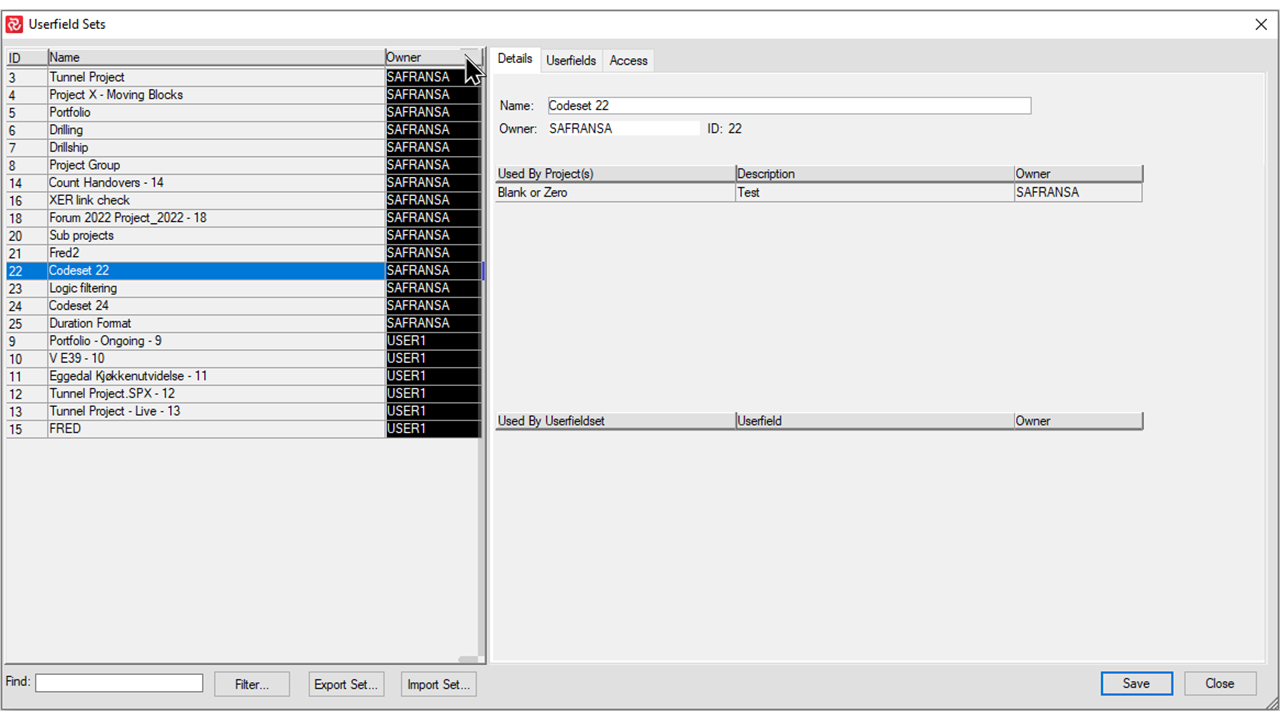
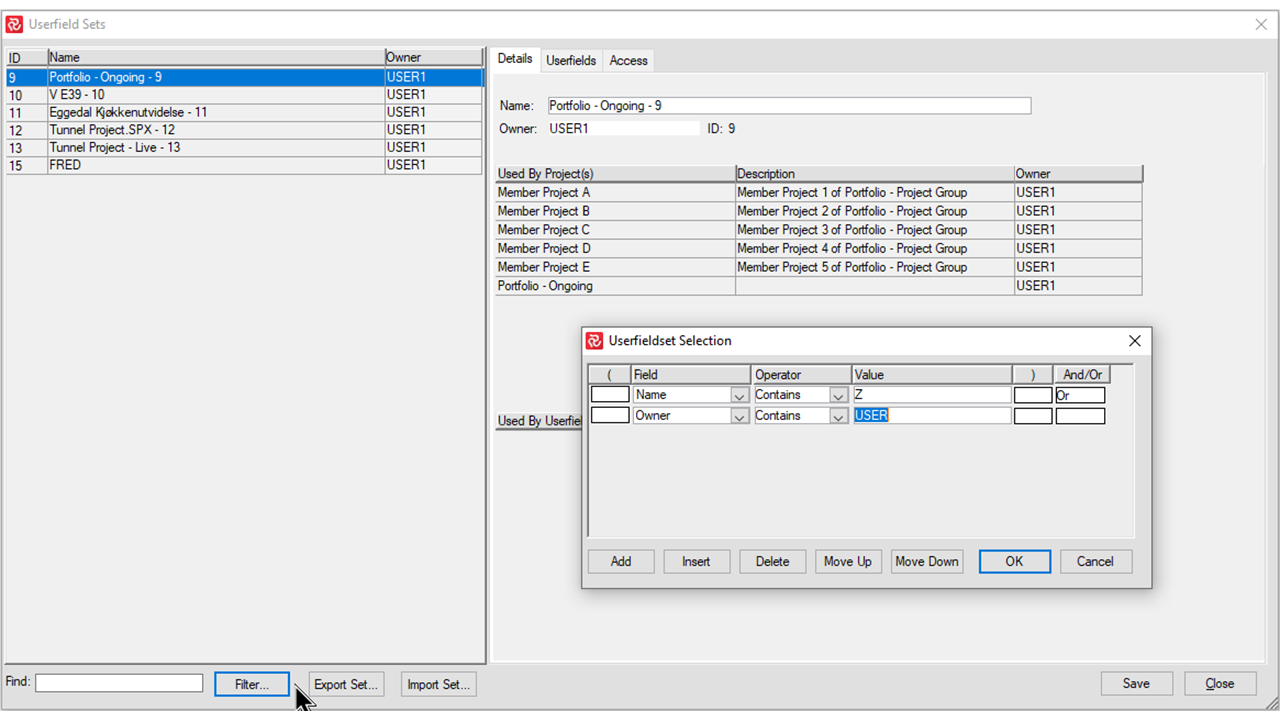
If the list is extensive, you can press the Filter button which allows you to filter on library name and/or owner.
Once you have set focus on a library you'll notice that the right-hand portion of the window has three sub-panels:
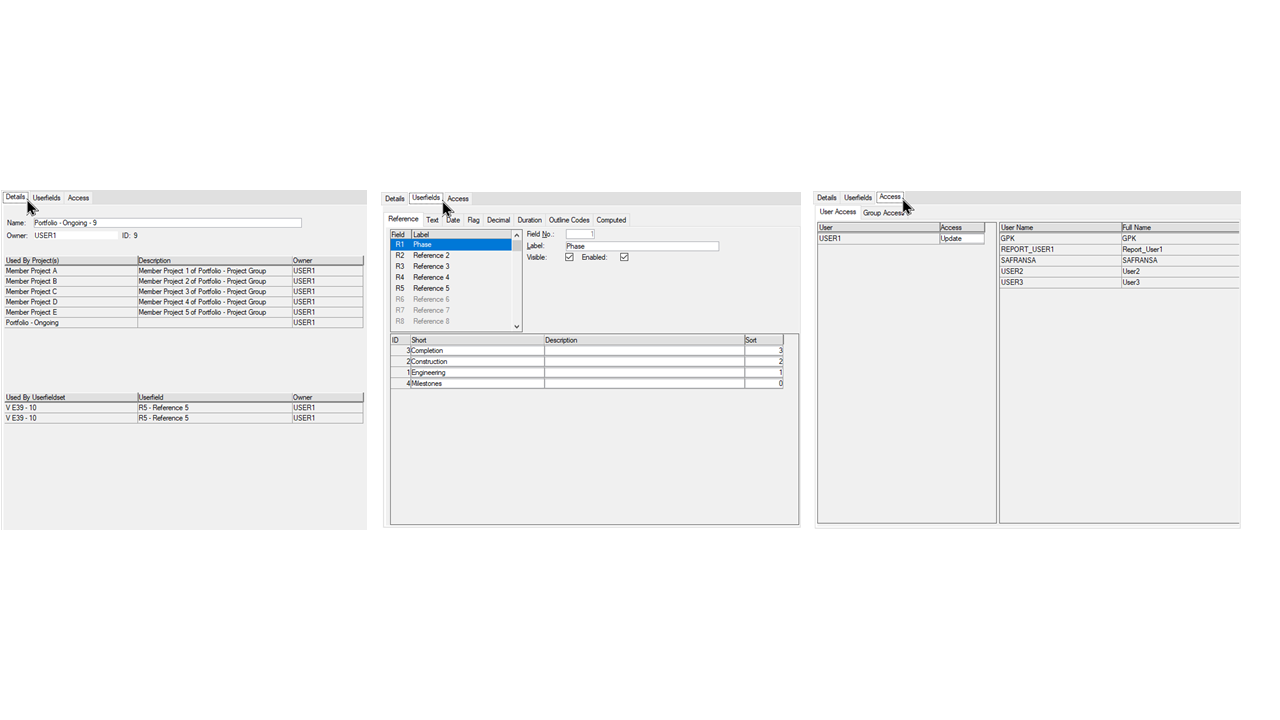
- Details shows basic information for the library and which projects currently use the library set. Details for Userfield sets also lists other Userfield sets/fields that inherit (share) field definitions.
. - Library type (ie. Calendar) shows the content of the library
. - Access shows a list of users that have access to the library and their access level
Granting access to library data
As the owner of your project plan you can grant access to other users or groups of users within the database allowing them to Read or Update each library set.
Only the owner of a project (or the Safransa user) can define access rights for other users.
Sharing useful library sets within planning teams boosts efficiency and supports company wide standardization.
To grant access to a user, use the drag and drop technique and move the user to the left portion of the panel and select the relevant Access level. To remove access select a user and drag and drop it to the right portion of the panel.
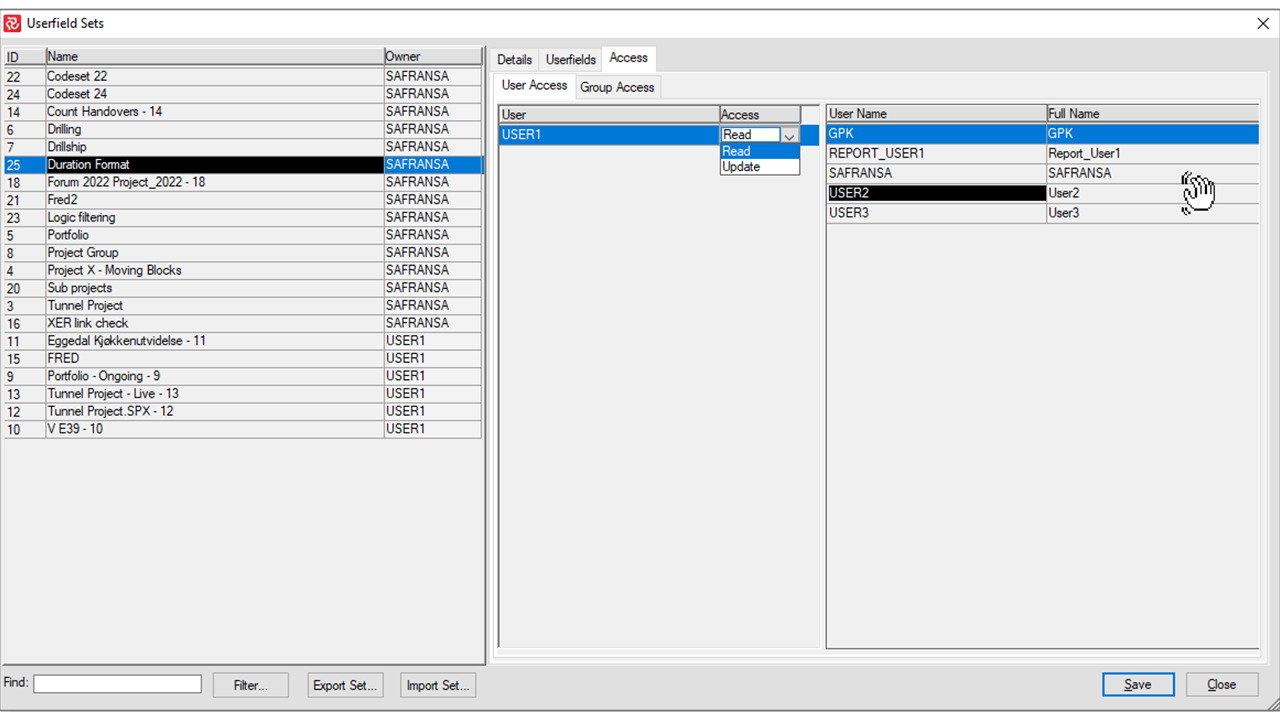
Read access - allows a user to view/export the library set and it's contents
Update access - allows a user to update/export/import the library set and it's contents
If no access is provided for a user the user will not be able to see the library or it's content's when using ADMIN-Setup.
When you set focus on the center tab you'll see the content of the library. You would also be able to add/delete or edit content and most properties manually using the relevant functions available.
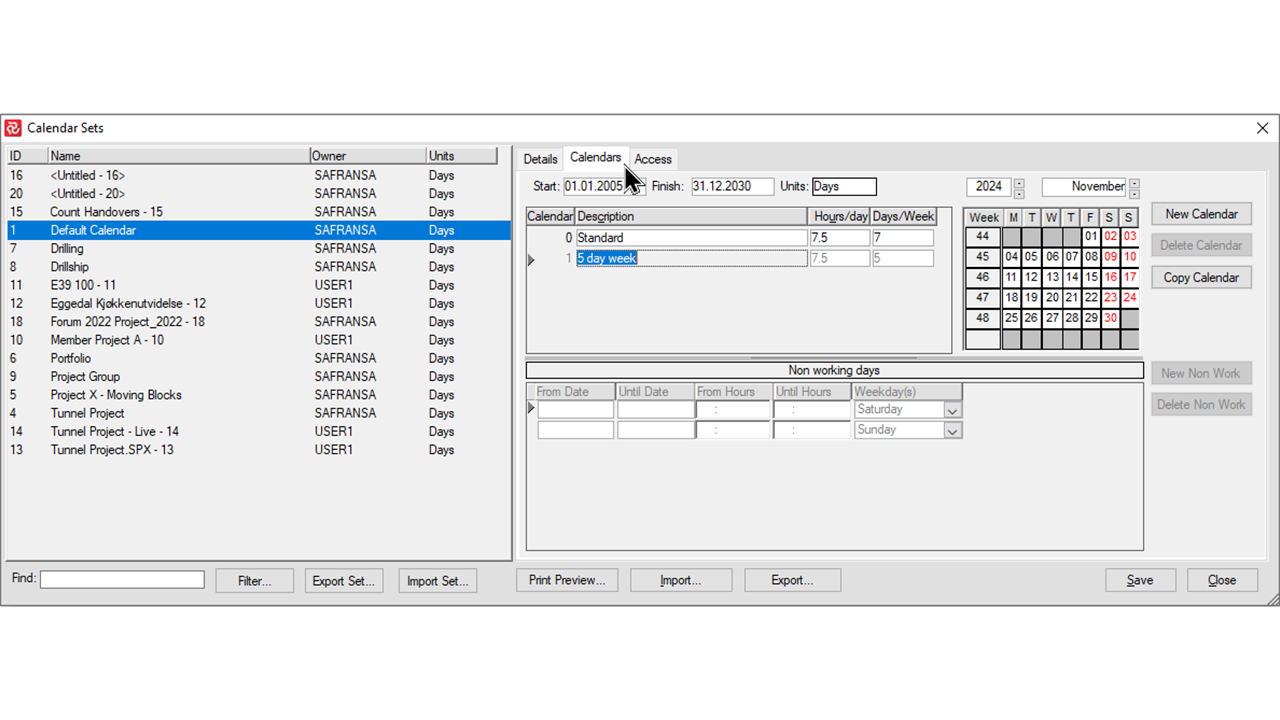
If you own or have Update access to the library you can both Export and Import library data either as a whole (ie. the complete library set) or as specific content from a particular library (ie. Resources to/from a Resource set, Calendars to/from a Calendar set, or values to/from a field in a Userfield set.
If you only had Read access in the above examples you would be allowed to Export data but not to Import data.
Report Maintenance
The Report Maintenance section allows you to define report groups and filter groups that can be of value when searching for reports/filters as the amount of projects/users increases in your database. Creating groups, in addition to saving time, have the advantage of sharing unified report configurations and filters among the project users.
Picture and Logo files may be stored in the database making them easy to access for others in the planning team for use in their reports.
Report Groups
As Safran Project is used on more and more projects or when the user community expands the number of reports defined in the database often increases which can make the search for a specific report challenging.
One way to of making the search more convenient or to group reports for a specific project or purpose is to establish so-called Report Groups.
The facility to establish and maintain report groups is located on the Admin ribbon in the Report Maintenance section.
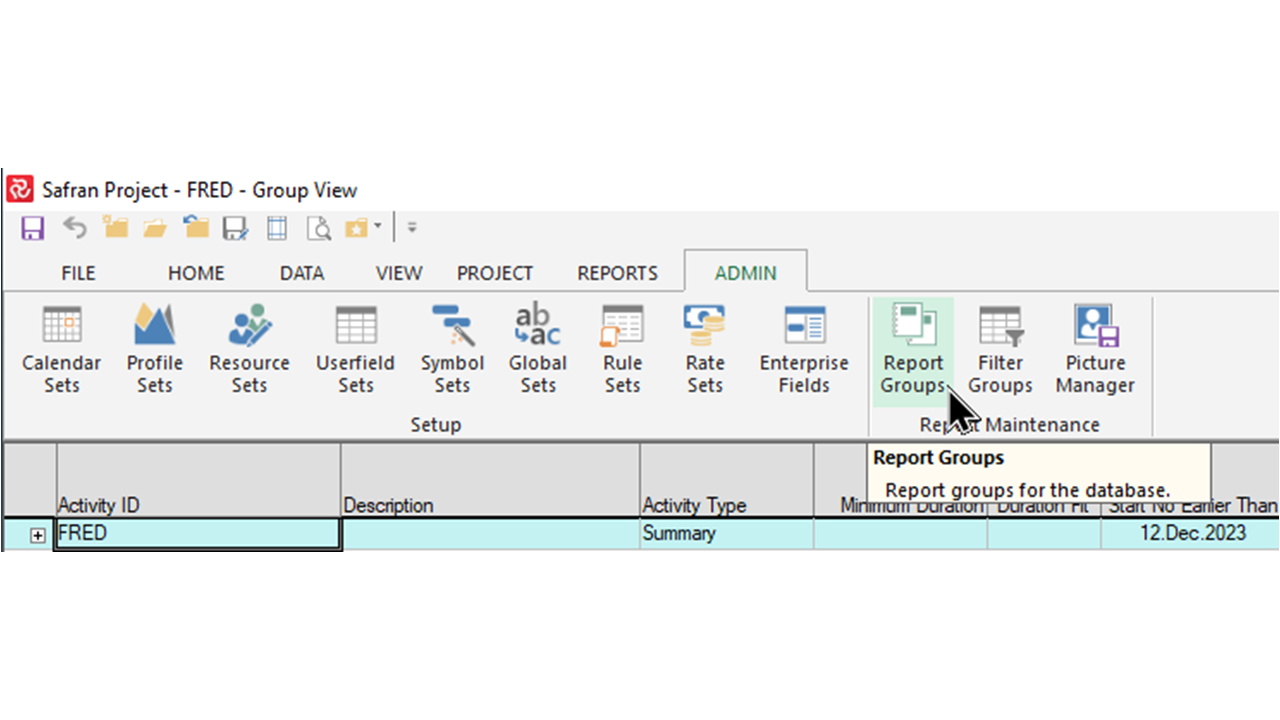
Press the Report Groups icon to open the Report Groups window.
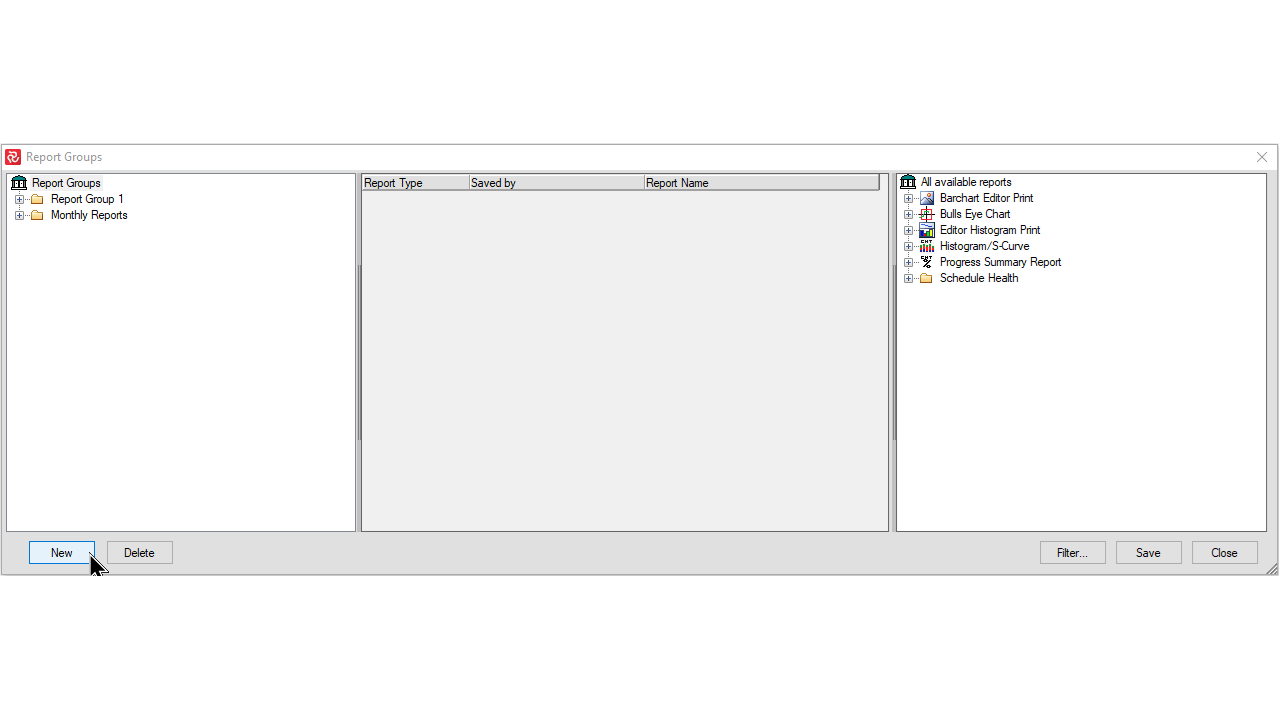
When the Report Groups panel opens, you can create a new report group by pressing the New button.
A new report group with a default name ‘New_n’’ will then be created. The name can be edited at any time.
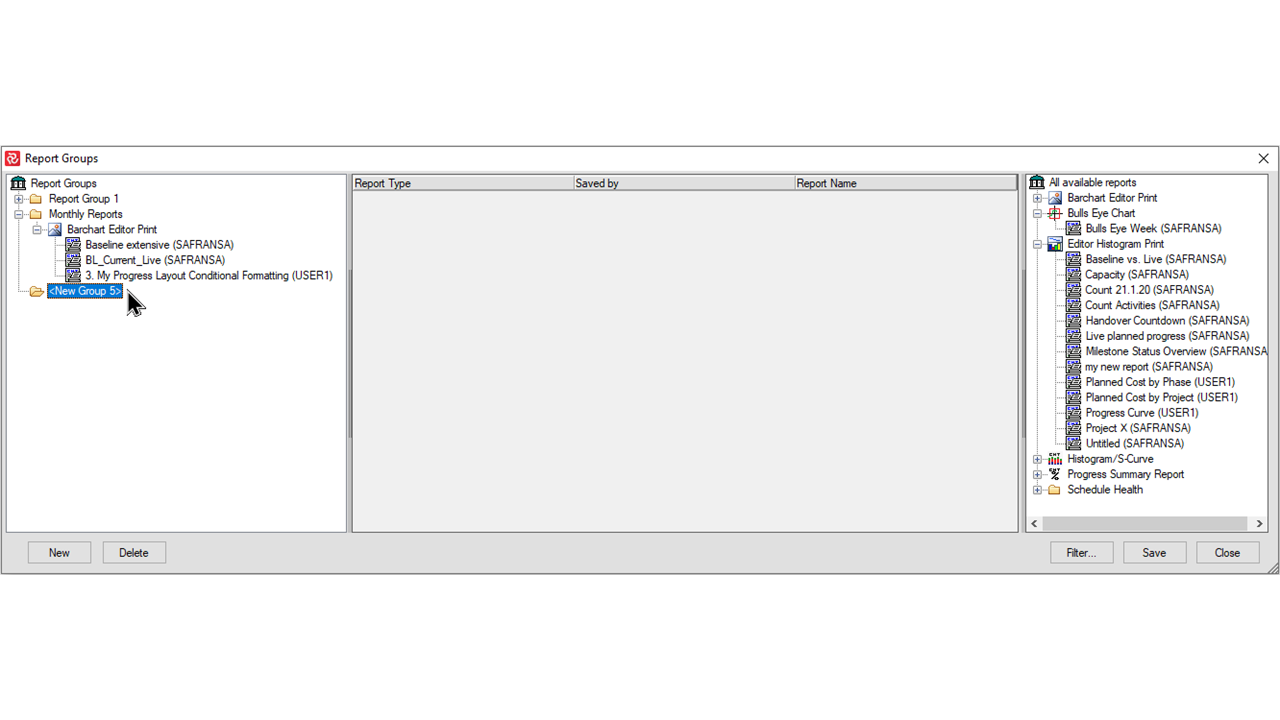
To the right of the window you will see a list of all available reports in the database, grouped by report style. Each report style may be collapsed and expanded to ease searching for reports.
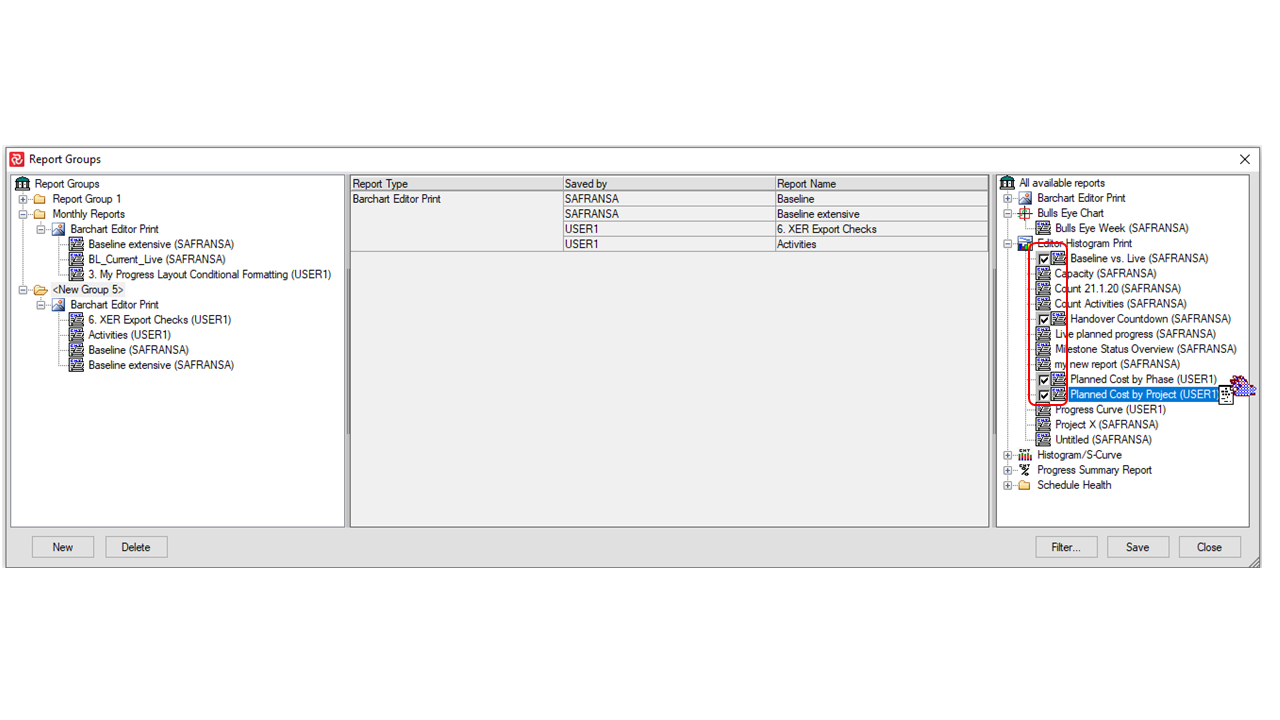
To add a report to your group use the drag ‘n’ drop technique and drag the report to the middle portion of the window as shown below. Note that a small 'check' symbol hi-lites the report you are selecting. Holding the CTRL key down while you select allows you to select multiple reports and add to your group in one operation.
You can add as many reports to the group as needed.
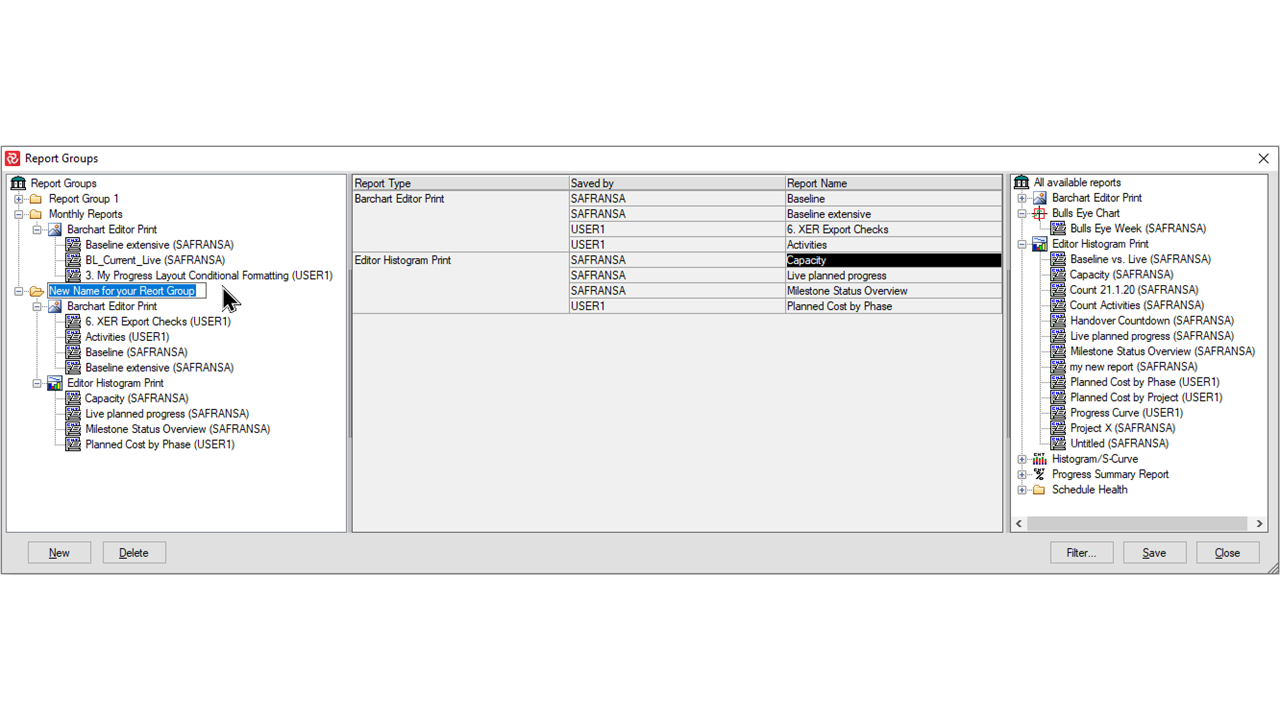
Remember to give the report group a name by setting focus on the name and then clicking again. You’ll then see an ‘Edit’ box allowing you to enter and change the report group’s name.
Finally press the Save button to save the report group and then press Close to close the window and return to Safran.
Examining and modifying a Report Group
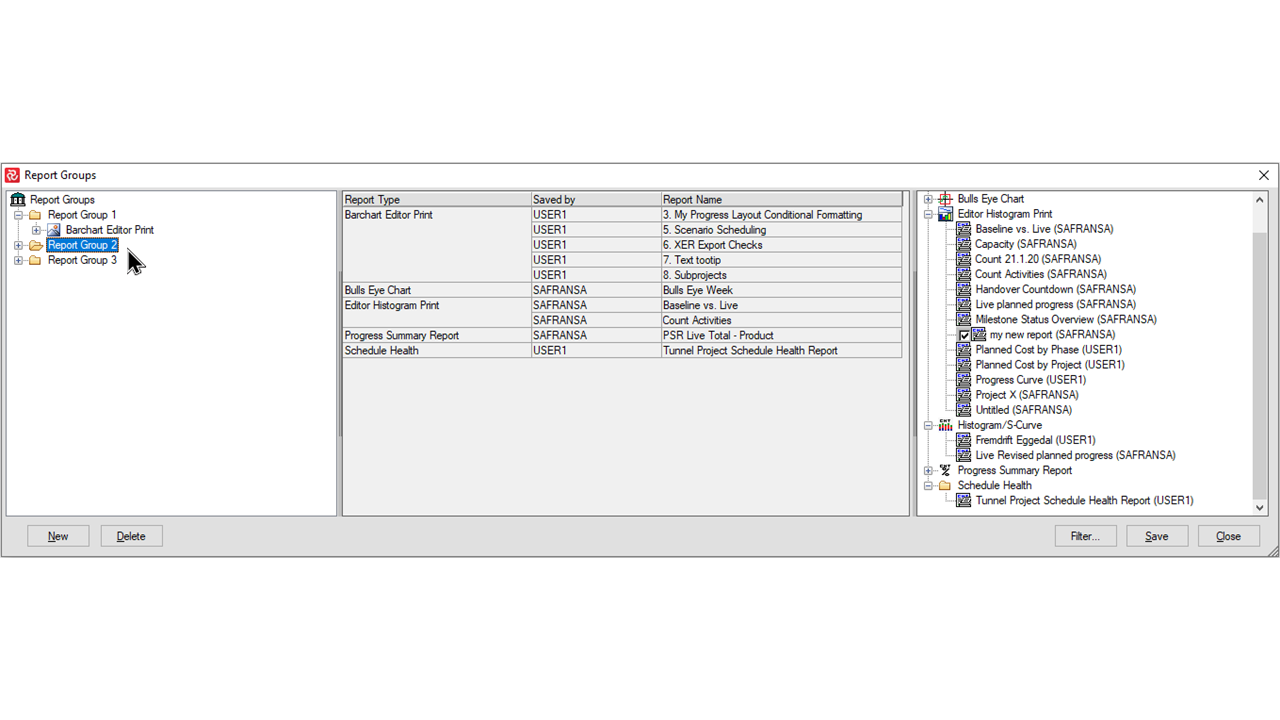
Once you have established one or more report groups you’ll notice that when you set focus on a report group name, a list of the reports in the group is presented in the center portion of the Report Groups window.
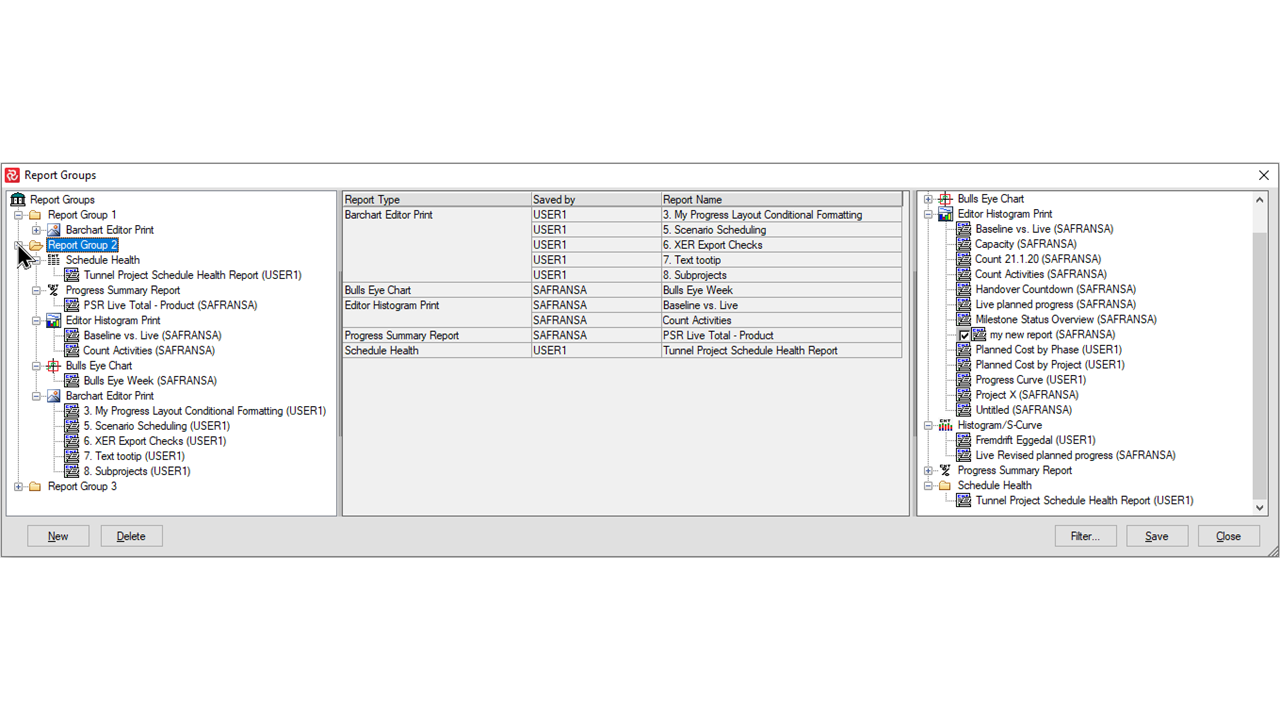
If you click the + sign to the left of the group name, a list of the reports contained in the group is also listed.
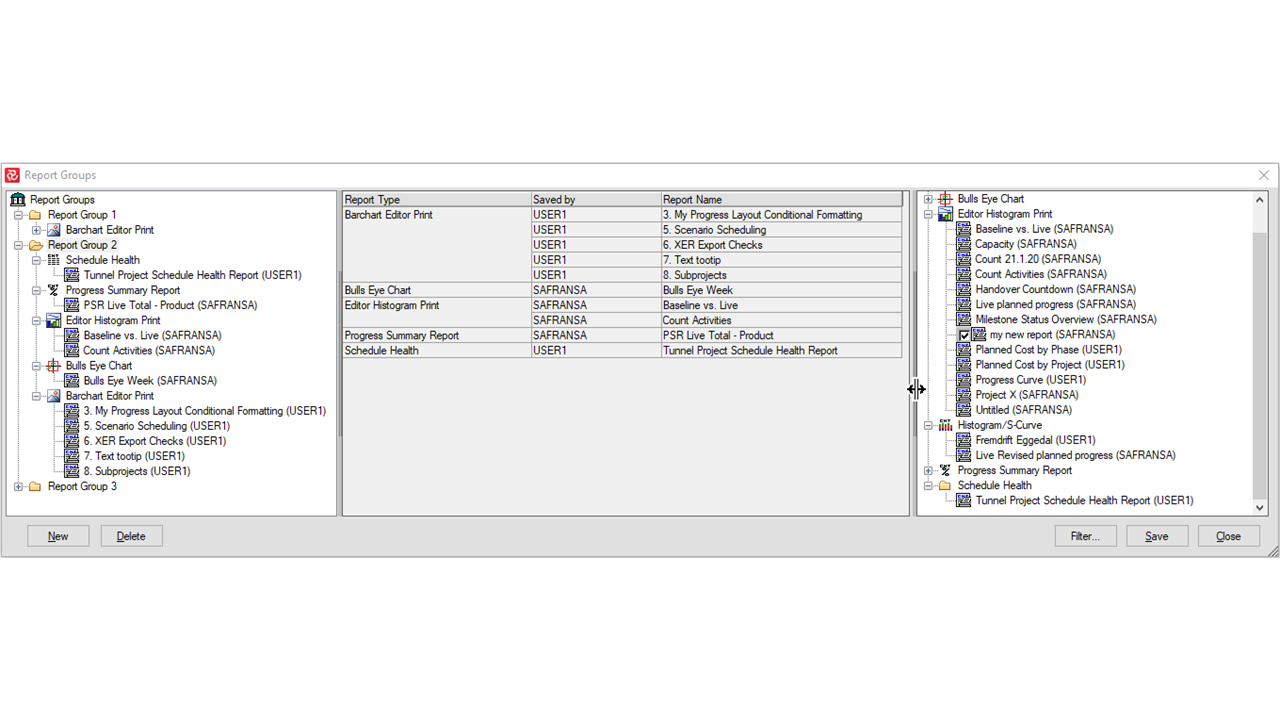
For ease of use the Report Groups panel is scalable. Additionally, the three portions of the Report Groups panel may also be re-sized.
Removing a report from a Report Group
To remove a report from a report group, first locate the group and expand the list of reports.
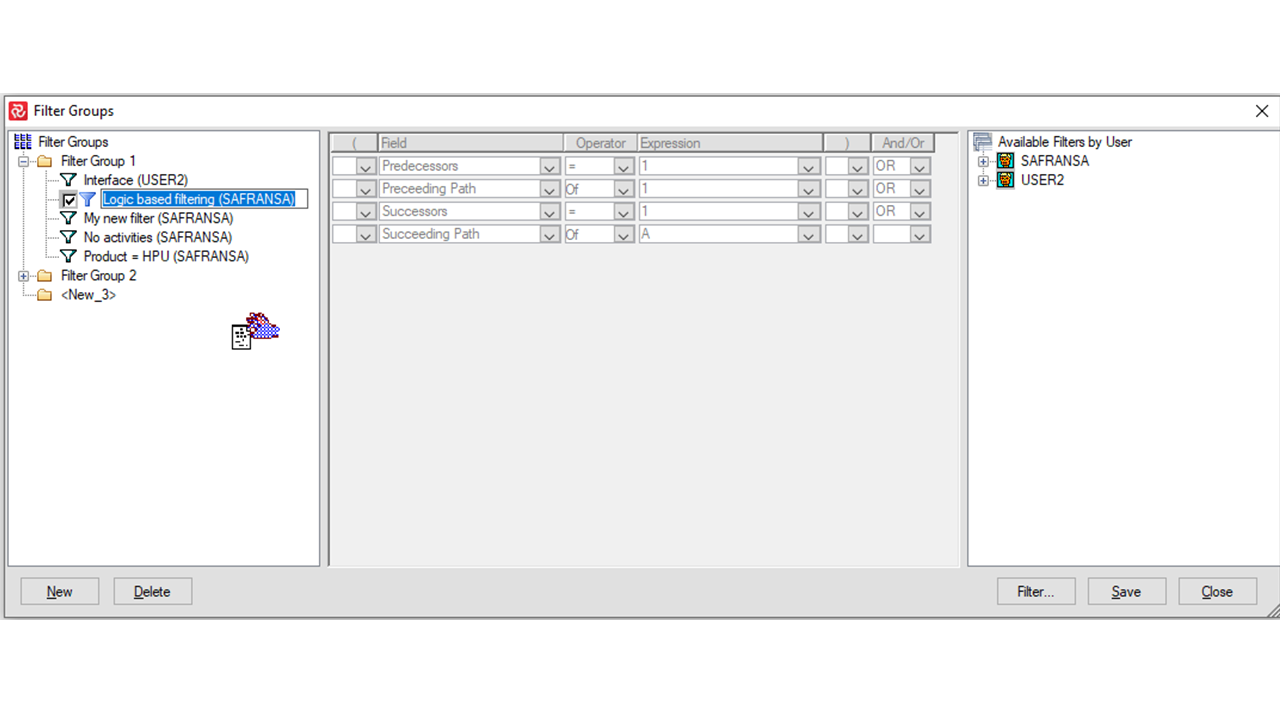
Then, set focus on the report (or reports by using the CTRL technique described earlier) you want to remove and using the ‘Drag n Drop’ technique, move it to the right-most, “Available Reports” part of the window.
Remember to press Save to save your changes. If you do forget this, Safran will still remind you and encourage you to save the changes.
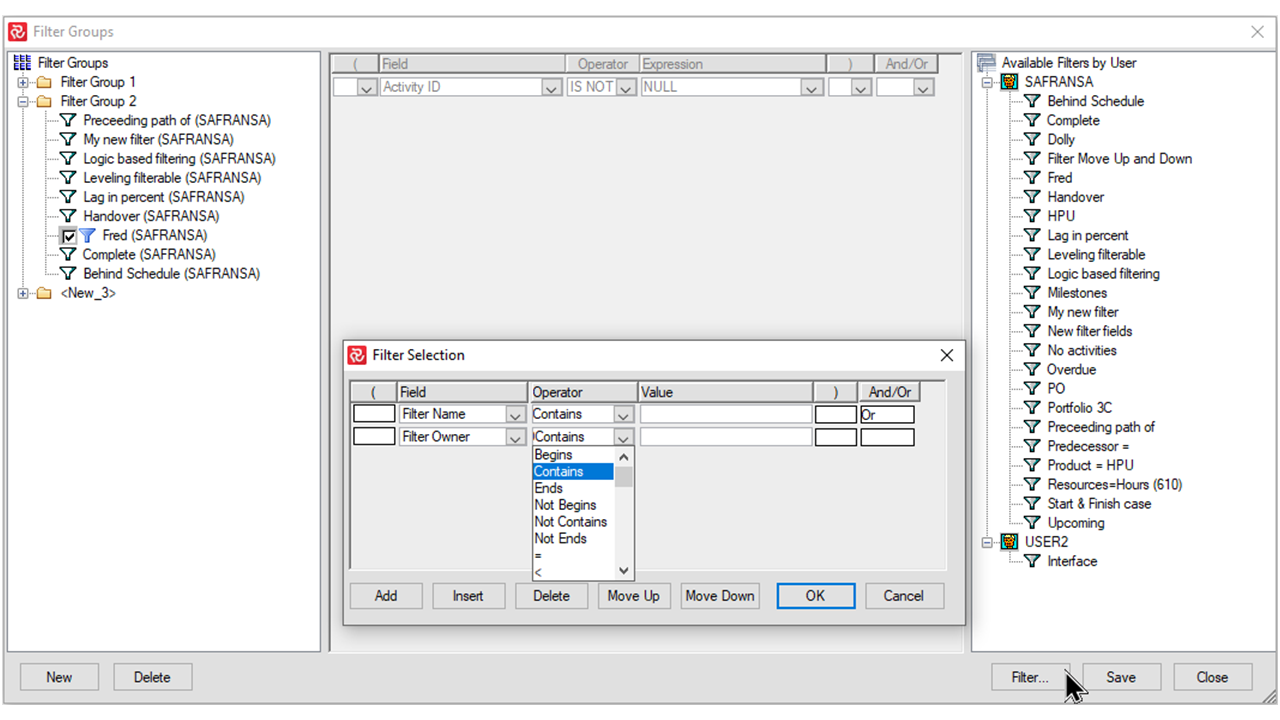
If your list of Available reports is extensive you can Press the Filter button found towards the bottom right of the panel to open the filter selection sub-panel and select your list of reports by Report name/Report owner/Report type as shown below
Using Report Groups
When report groups exist, you’ll notice that, when the ‘Users’ dropdown for Reports is selected, any report groups defined will also be included in the list.
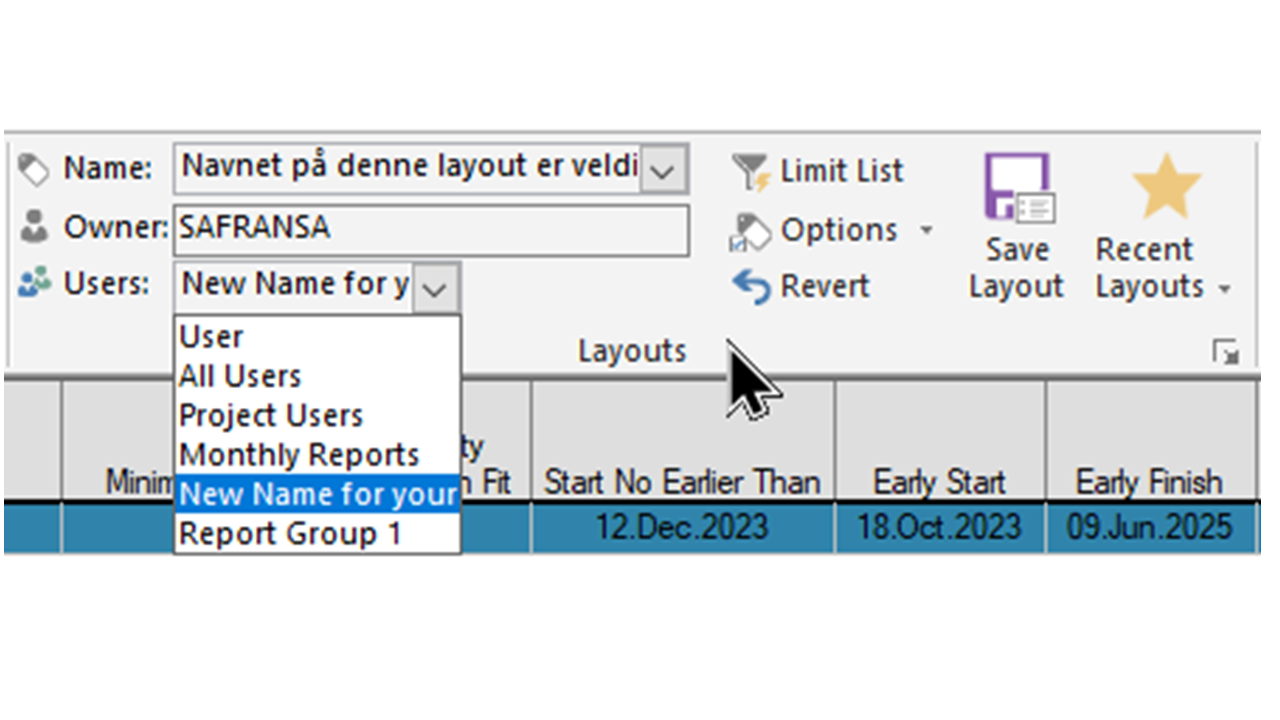
If you then select a report group, the list of reports in the Name dropdown will be reduced to include only the reports from the selected report group.
Filter Groups
As Safran Project is used on more and more projects or when the user community expands the number of filters defined in the database often increases which can make the search for a specific filter cumbersome.
One way to of making the search more convenient or to group filters for a specific project or purpose is to establish so-called Filter Groups.
The facility to establish and maintain filter groups is located on Admin ribbon in the Report Maintenance section.
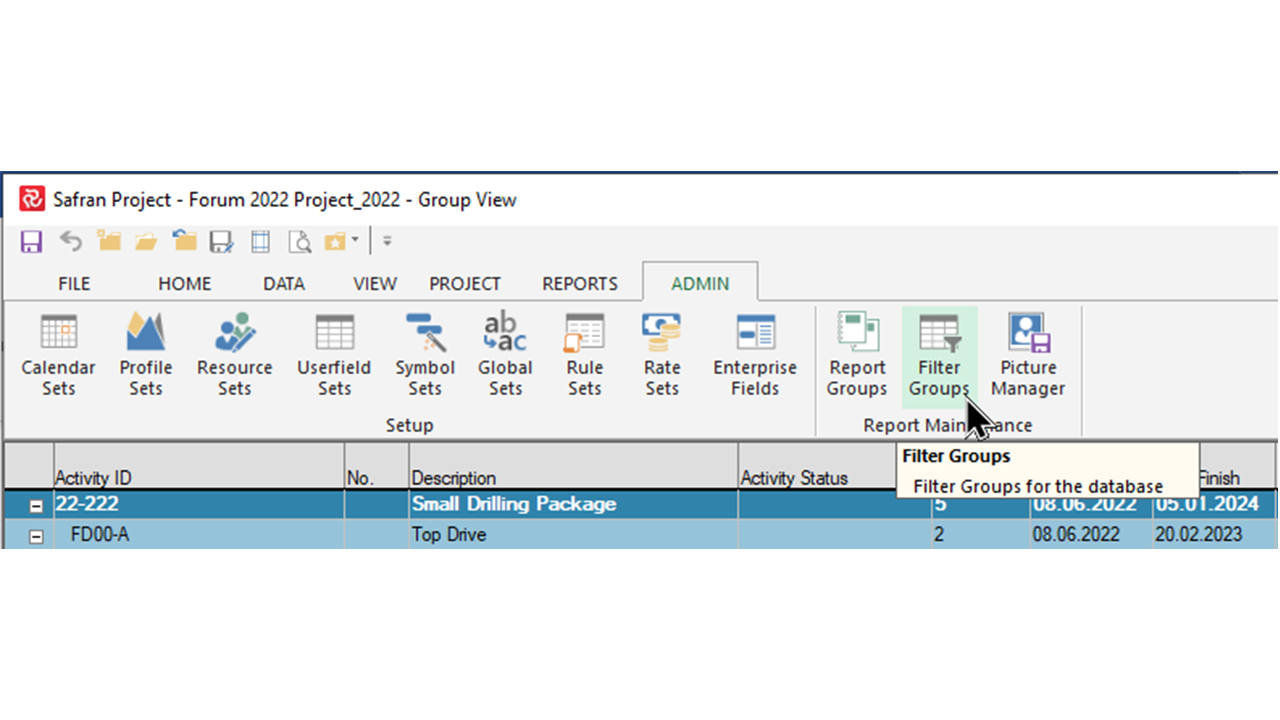
Press the Filter Groups icon to open the Filter Groups window.
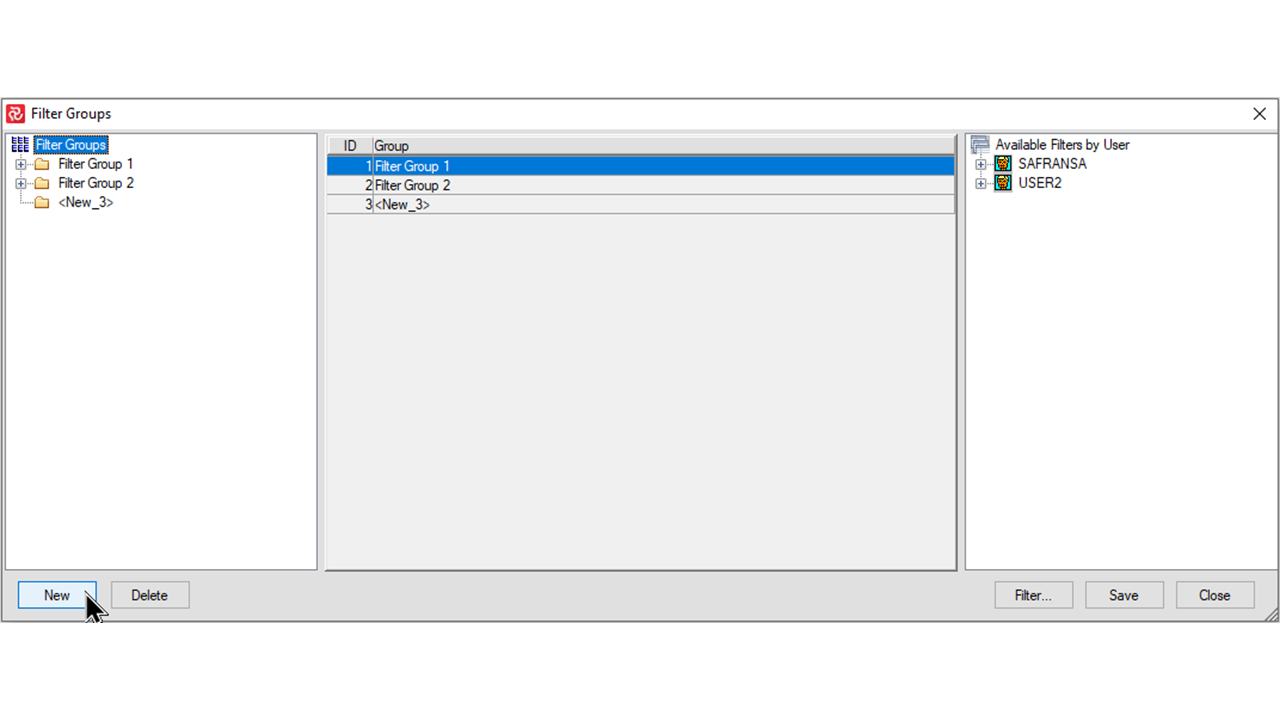
When the Filter Groups panel opens, you can create a new filter group by pressing the New button.
A new filter group with a default name ‘New_n’’ will then be created. The name can of course be edited.
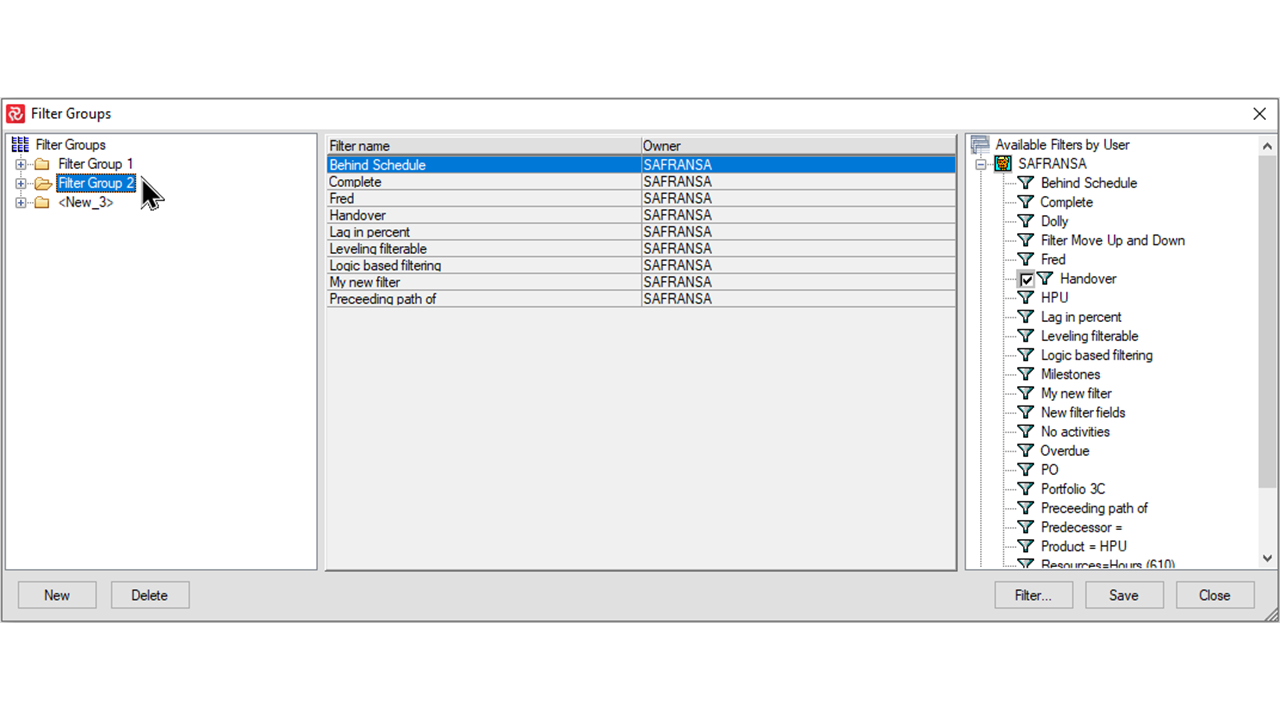
To the right of the window you will see a list of all available filters in the database, grouped by the users who created them. Each User may be collapsed and expanded to ease searching for filters.
To add a filter to your group use the drag ‘n’ drop technique and drag the filter to the middle portion of the window as shown below. You can add as many filters to the group as needed.
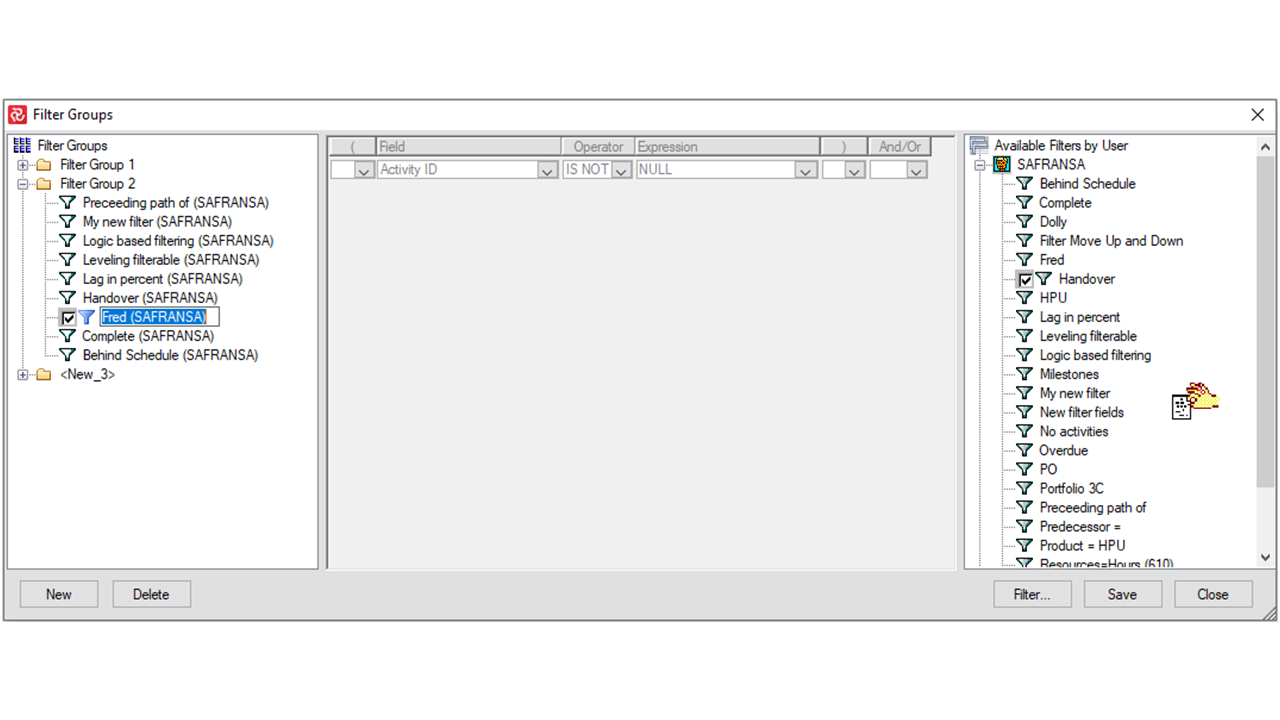
Remember to give the filter group a name by setting focus on the name and then clicking again. You’ll then see an ‘Edit’ box allowing you to enter and change the filter group’s name.
Finally press the Save button to save the filter group and then press Close to close the window and return to Safran.
Examining and modifying a Filter Group

Once you have established one or more filter groups you’ll notice that when you set focus on a filter group name, a list of the filters in the group is presented in the center portion of the Filter Groups window.
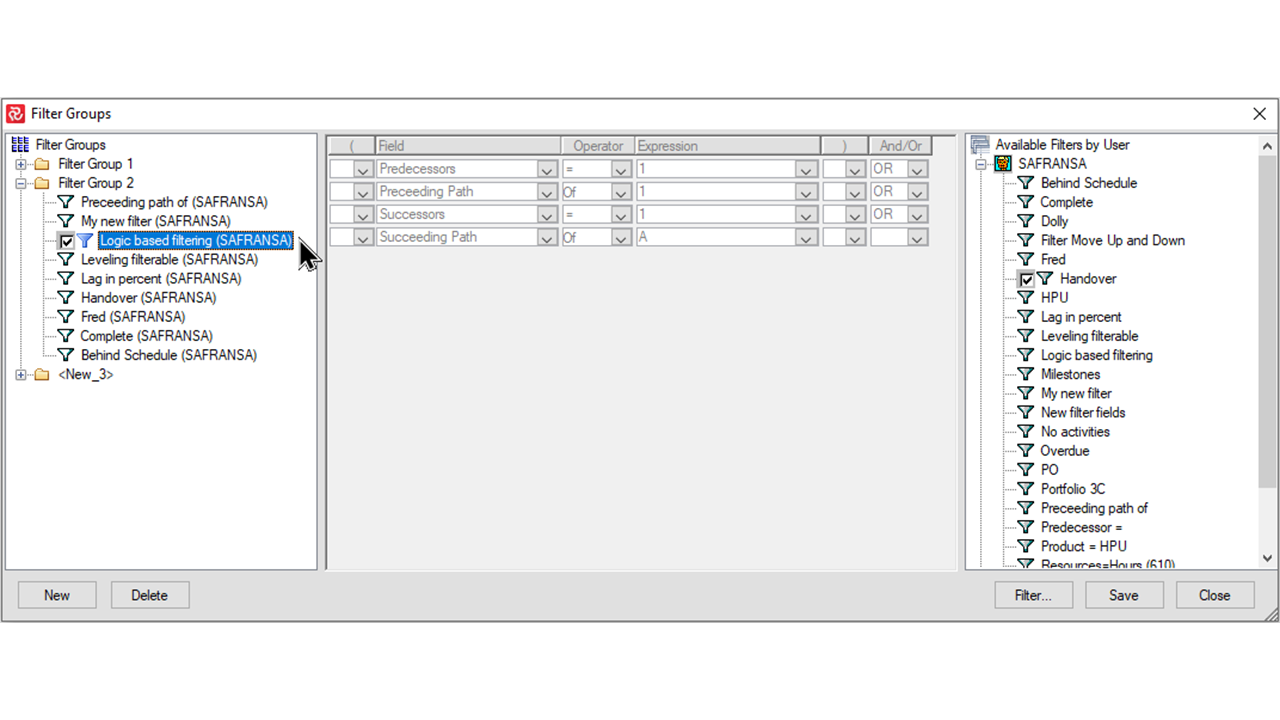
If you click the + sign to the left of the group name, a list of the filters contained in the group is listed.
If you then set focus on one of the filters, the filter definition is shown in the center portion of the filter group panel.
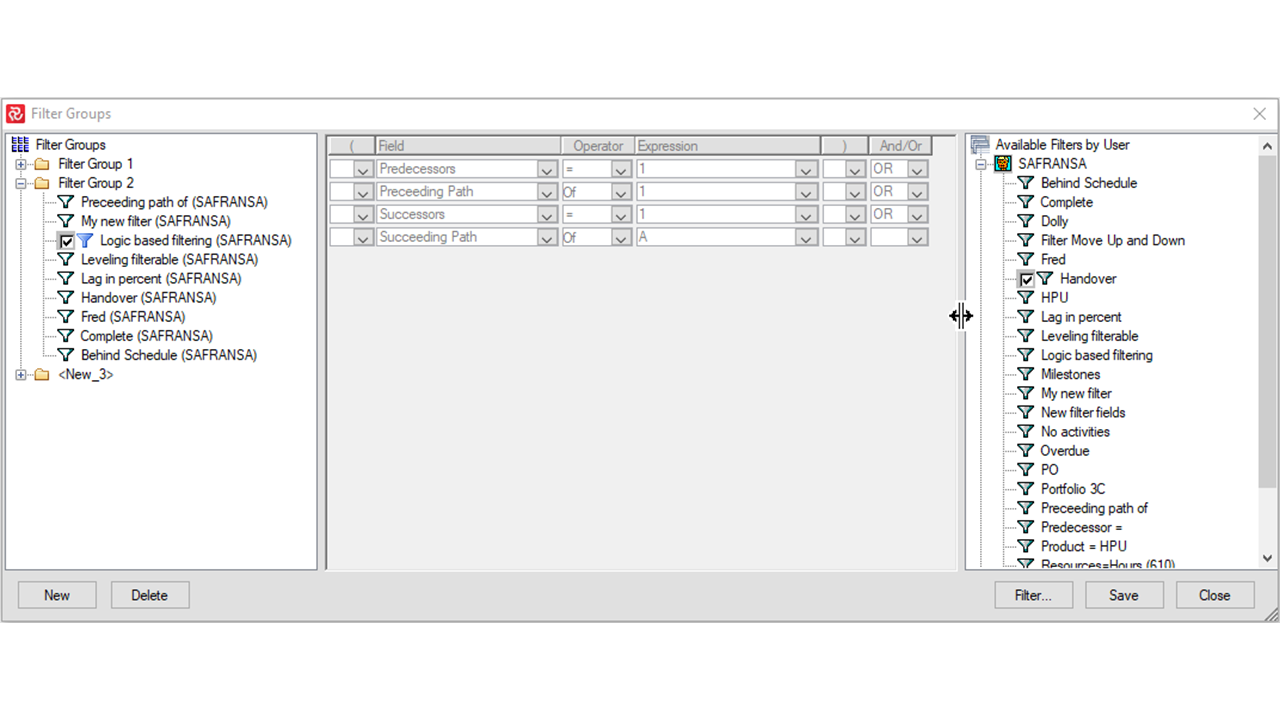
For ease of use the Filter Groups panel is scalable. Additionally, the three portions of the Filter Groups may also be re-sized.
Removing a filter from a filter Group
To remove a filter from a filter group, first locate the group and expand the list of filters.

Then, set focus on the filter (or filters by using the CTRL technique described earlier) you want to remove and using the ‘Drag n Drop’ technique, move it to the right-most, “Available Filters” part of the window.
Remember to press Save to save your changes. If you do forget this, Safran will still remind you and encourage you to save the changes.
If your list of Available filters is extensive you can Press the Filter button found towards the bottom right of the panel to open the filter selection sub-panel and select your list of filters by Filter name/Filter owner as shown below

Using Filter Groups
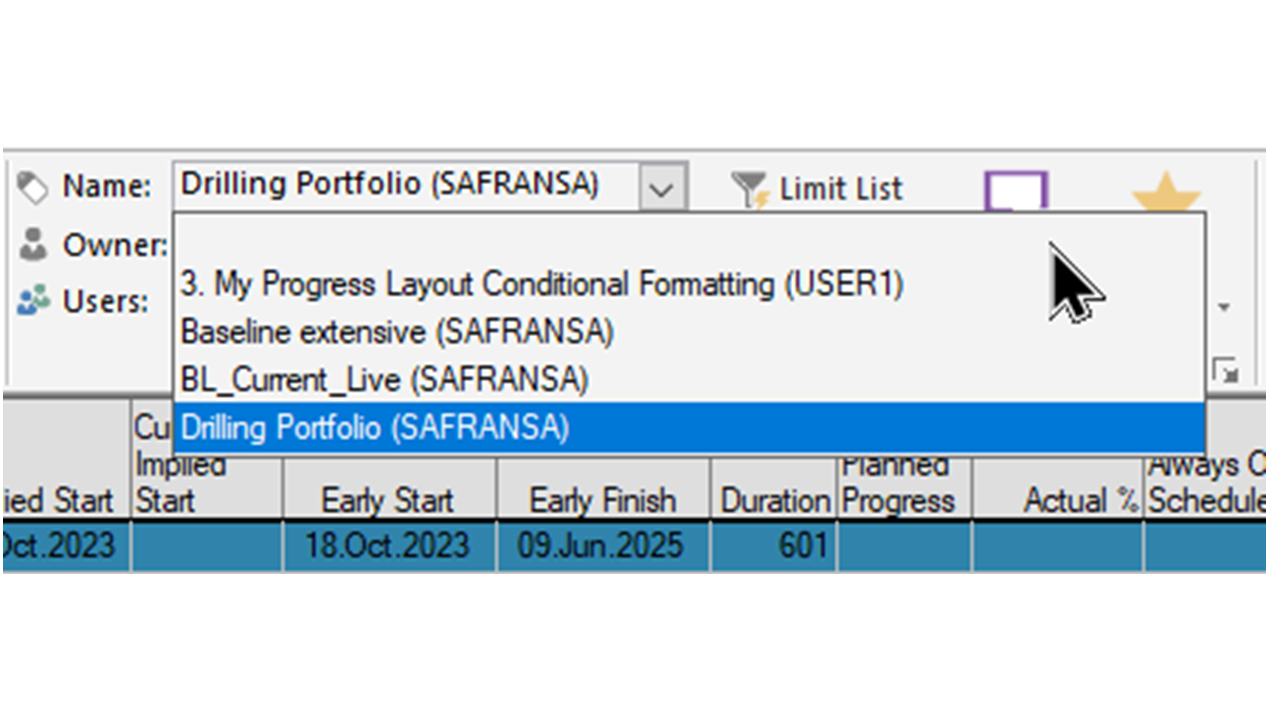
When filter groups exist, you’ll notice that, when the ‘Users’ dropdown for Filters is selected, any filter groups defined will also be included in the list.
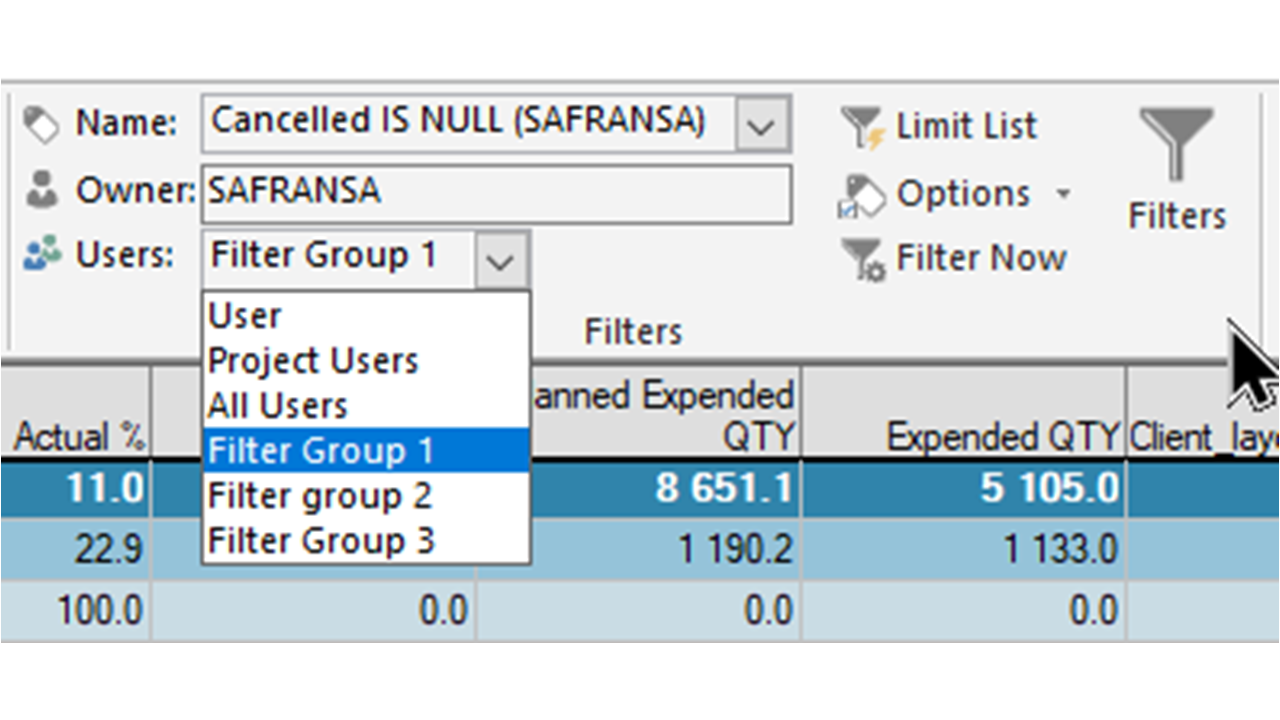
If you then select a filter group, the list of filters in the Name dropdown will be reduced to include only the filters from the selected filter group.

Picture Manager
Pictures or Logos are typically used in all types of Safran reports. Logos are most commonly used as a part of the report header information to identify the Project and Client, while pictures may be used as a background for Gannt reports. In both cases these graphics may be stored as/accessed from OS files, however Safran offers the capability to store graphics in the database making them more accessible to the users of Safran.
Pictures and Logos must be in either the JPEG Interchange format JPEG/JPG or the Bitmap BMP.
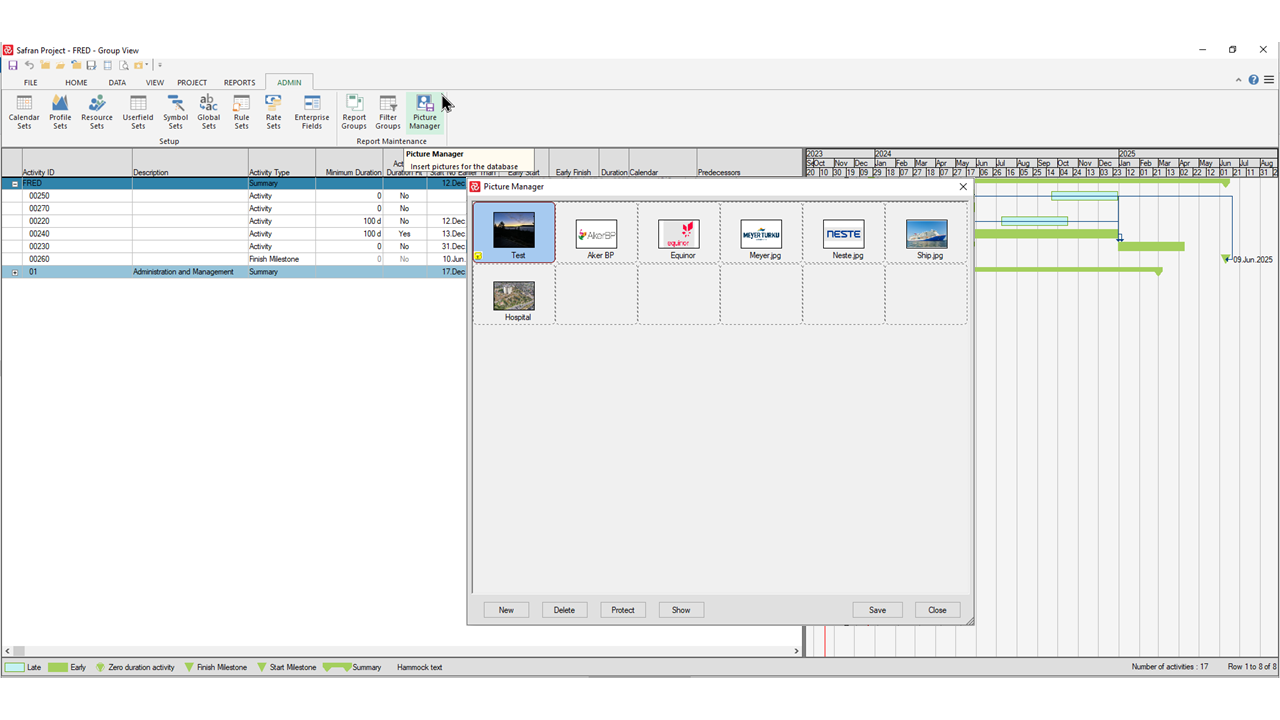
To manage pictures press the Picture Manager icon in the Report Maintenance section to open the Picture Manager window. You'll then see all picture files currently saved in the database.
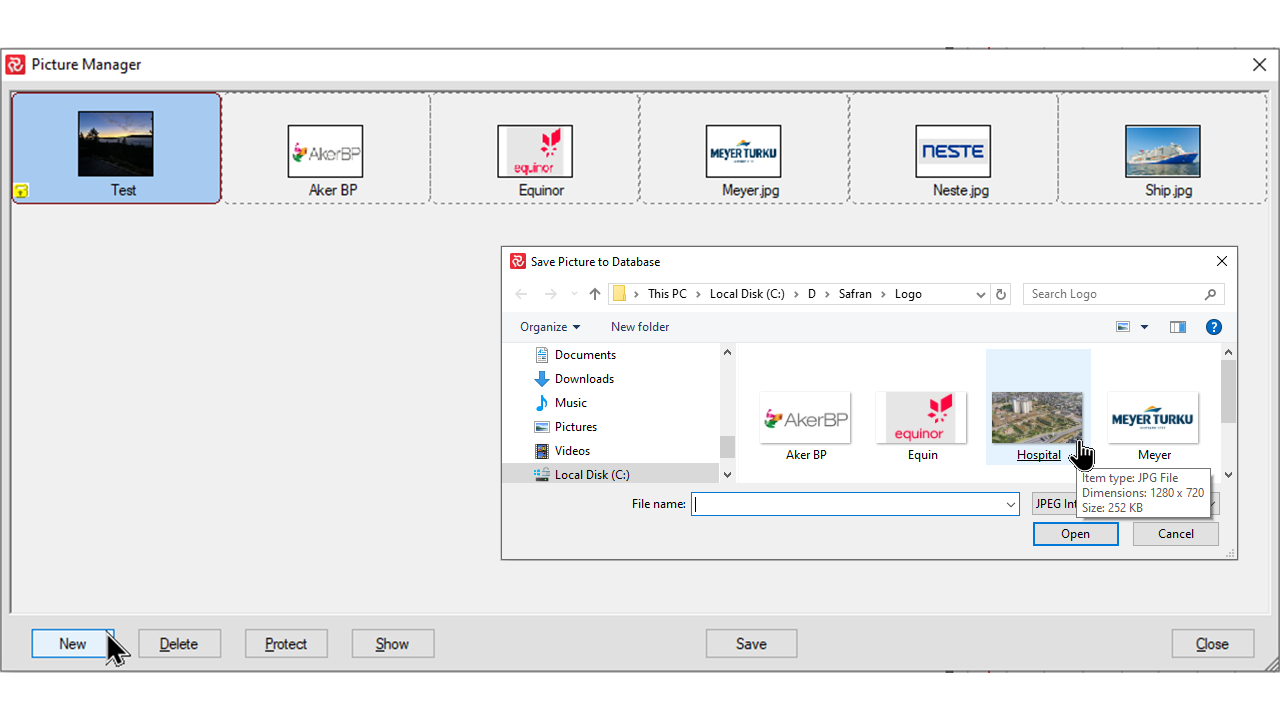
To add a new picture press the New button to open the the file selection window and navigate to find your file. The files listed will be all files of type BMP/JPEG/JPG.
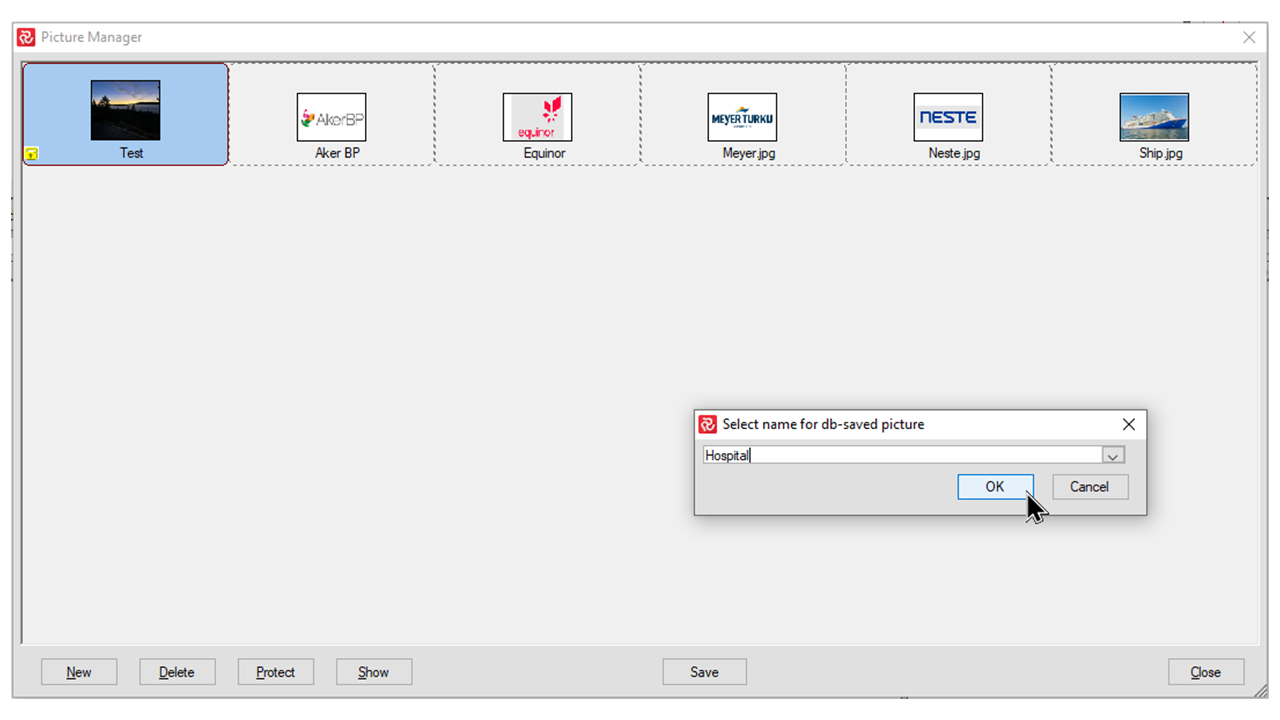
After pressing Open to select your file you'll have an opportunity to give the file a 'friendly name' instead of the file name.
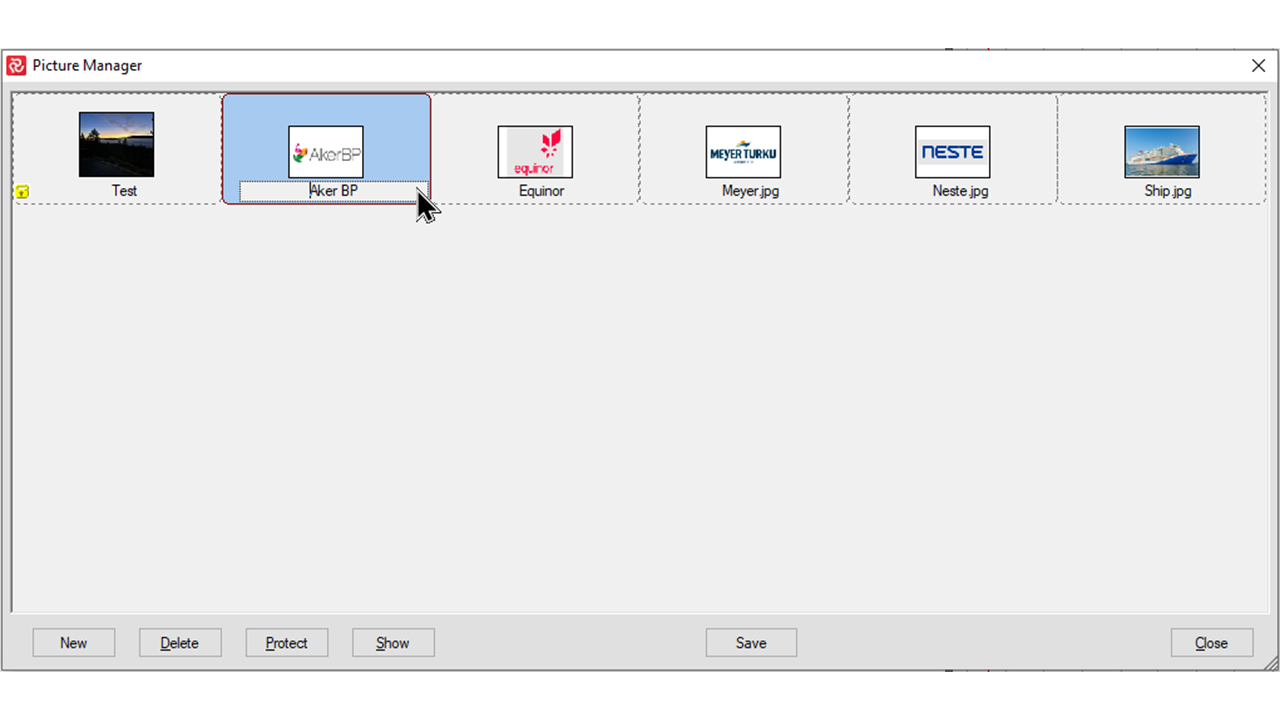
To edit the picture name once it's been saved in the database just click on the picture.
You'll then notice the existing name is hi-lighted in white allowing you to edit the name.
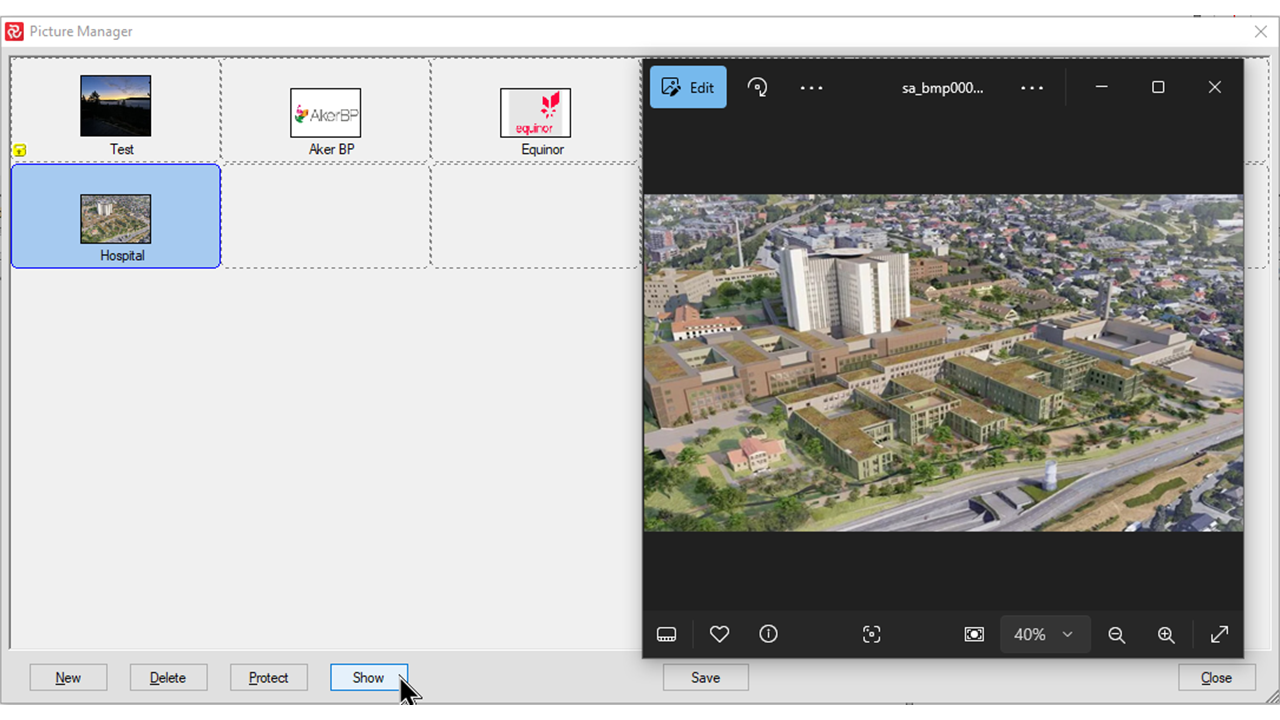
The Show button will open a new window larger window presenting a larger image of the selected picture.
Use the Delete button to delete a picture.
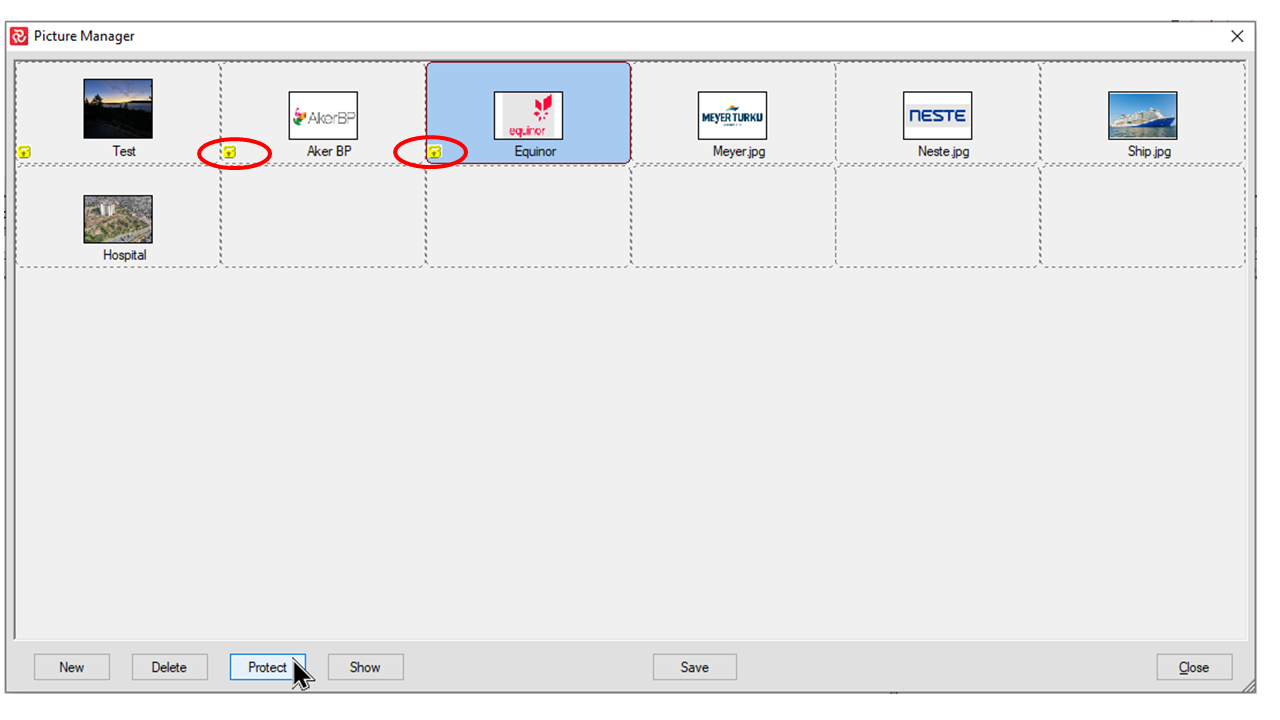
The Protect button allows you to apply a higher level of security to your pictures. You'll notice that once a picture is protected a small lock is visible to left in the picture.
If you try to delete a non-protected picture you will as usual be asked to confirm a deletion after which the deletion takes place.
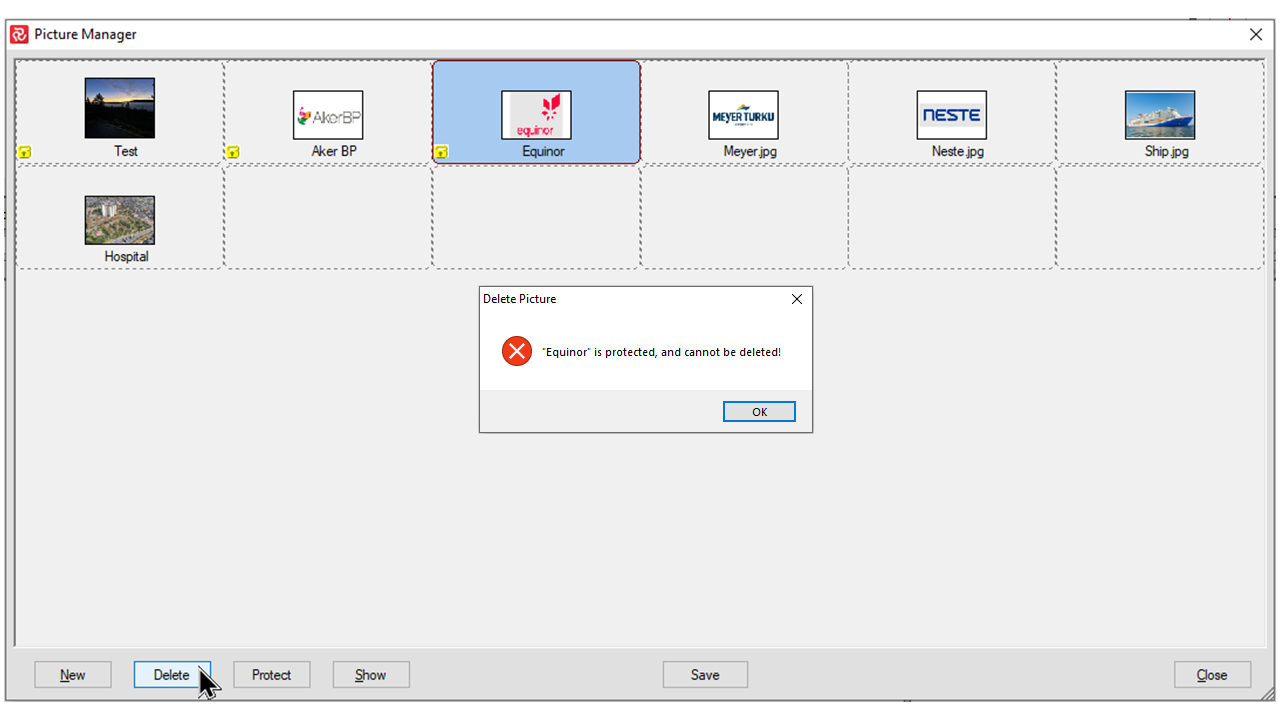
If your picture is protected and you try to delete you will be warned of this and will have to press the Protect button again to 'un-protect' the picture before you will be able to delete the picture in the normal way.