#Features and Functions: File import and system re-import workflow
Version: V26.0 (Beta)
Back To: Index
File Import and System Re-Import Workflow:
Use this consolidated feature to either upload completely new external risk records into the application database or to sync bulk edits back into existing risk records (Export-Update-Import workflow). All system parsing, mapping, and execution steps are identical for both entry points. Below are the main steps in this workflow:
Step 1: Navigate to Import
Click the Import menu on the side navigation panel.
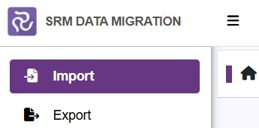
Figure 1.1
Step 2: Choose File
Click the Choose File button. Browse your computer to locate your target file, ensure its extension is .xlsx, and double-click it to load it into the application.
Step 3: Select Configuration (Optional)
If you have saved configurations, a dropdown menu containing these names is available near the Configuration. Select your preferred configuration here to automatically load your saved mapping fields and transform types when processing.
Step 4: Process File
Click the Process button to begin data parsing (Figure 1.2).

Figure 1.2
Step 5: Worksheet Selection
View the generated list of all available worksheets from your selected file on the screen under Available Sheets. Note that if the file contains only one worksheet, it is selected by default. Select your target worksheet manually if multiple sheets are available (Figure 1.3).
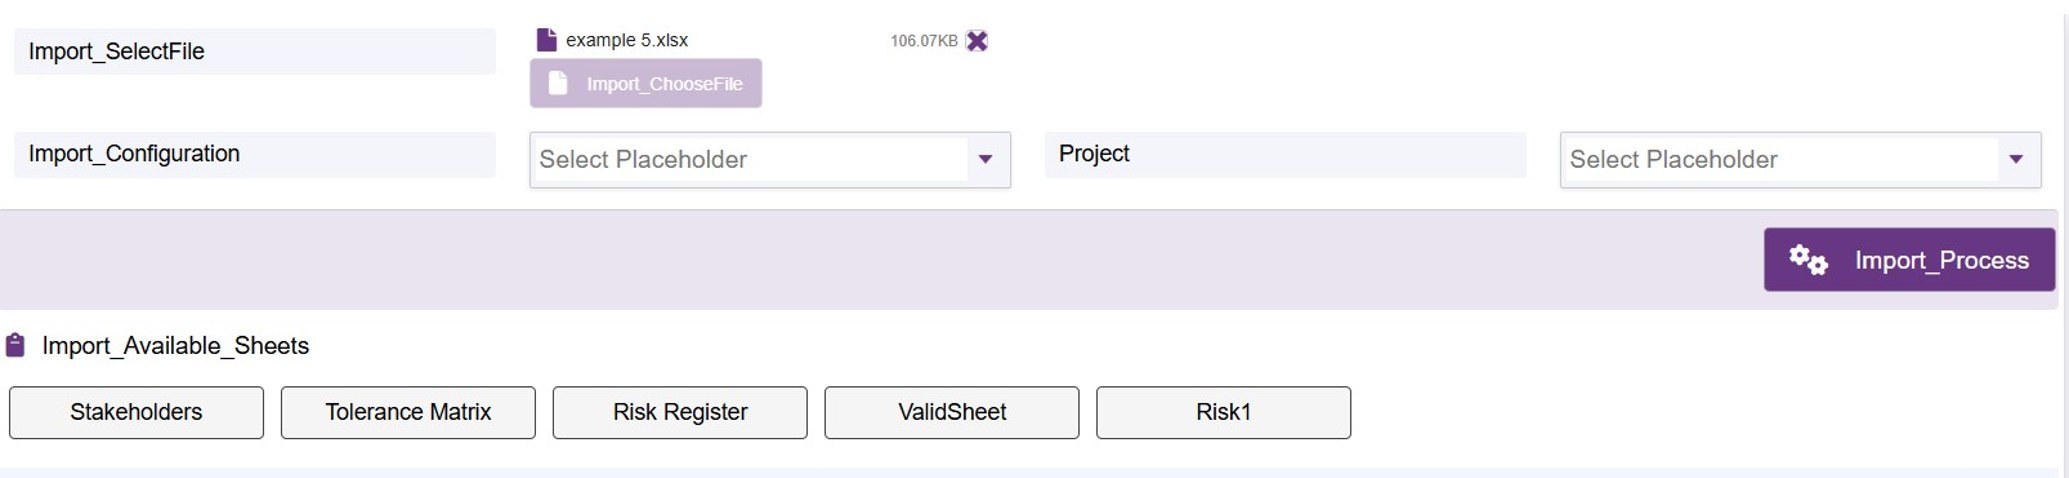
Figure 1.3
Step 6: Data Preview
View the interactive data preview, which opens as a tab displaying the first 5 rows of your selected worksheet content in a table format (Figure 1.4).
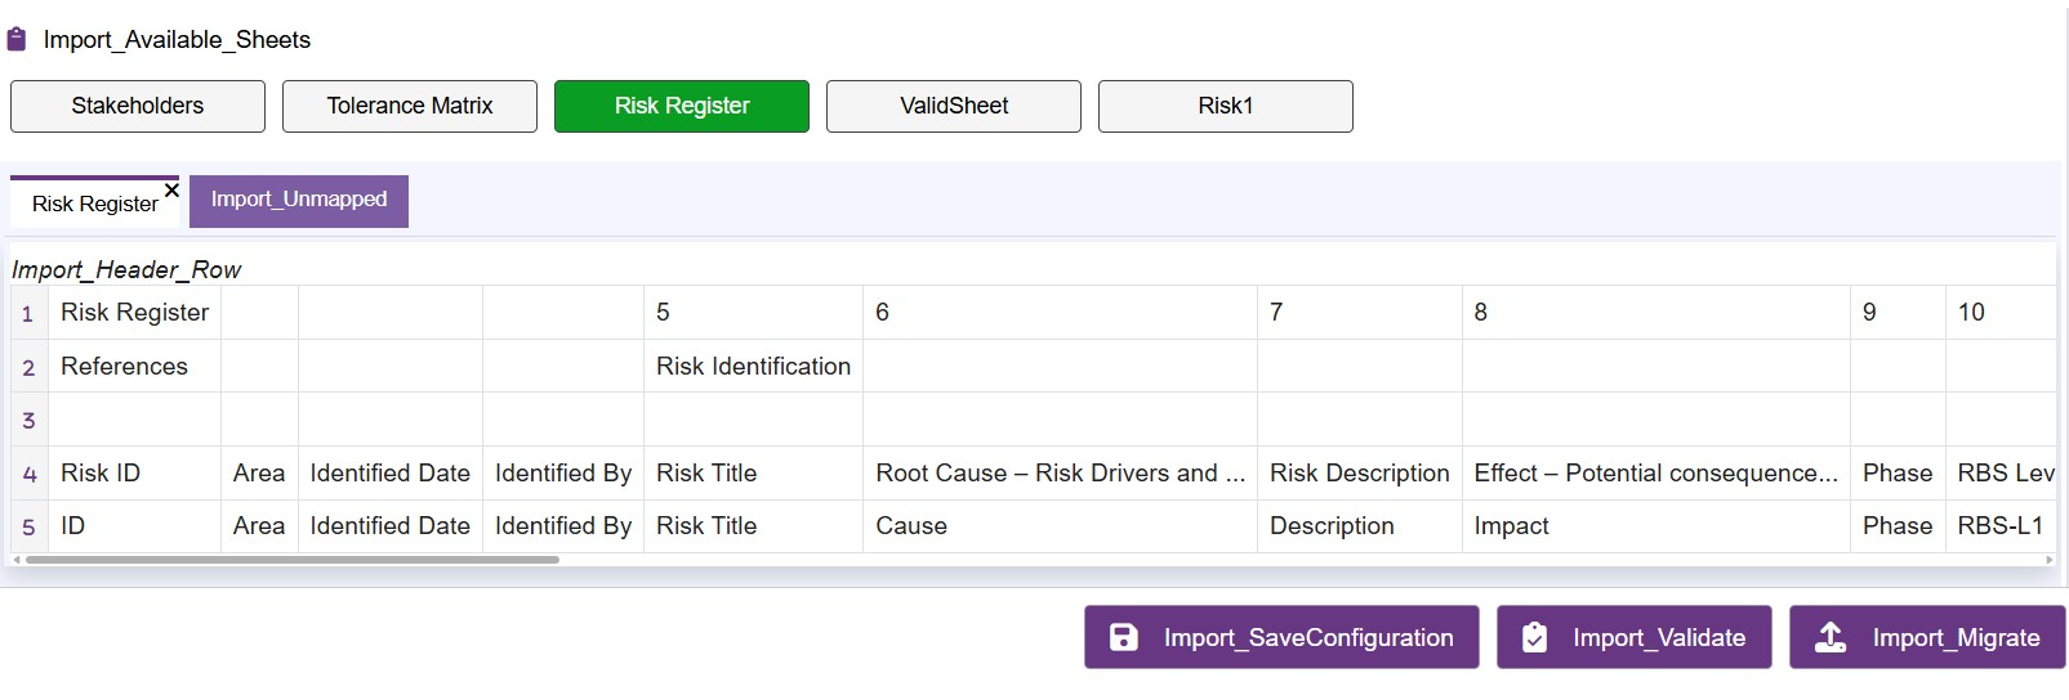
Figure 1.4
Step 7: Define Header Row
Click on the left column showing the row number to select it as your template header. Note that the chosen header row must contain values in all corresponding cells (for example, as in the figure 1.5 shown, Row number 5 is selected as header).
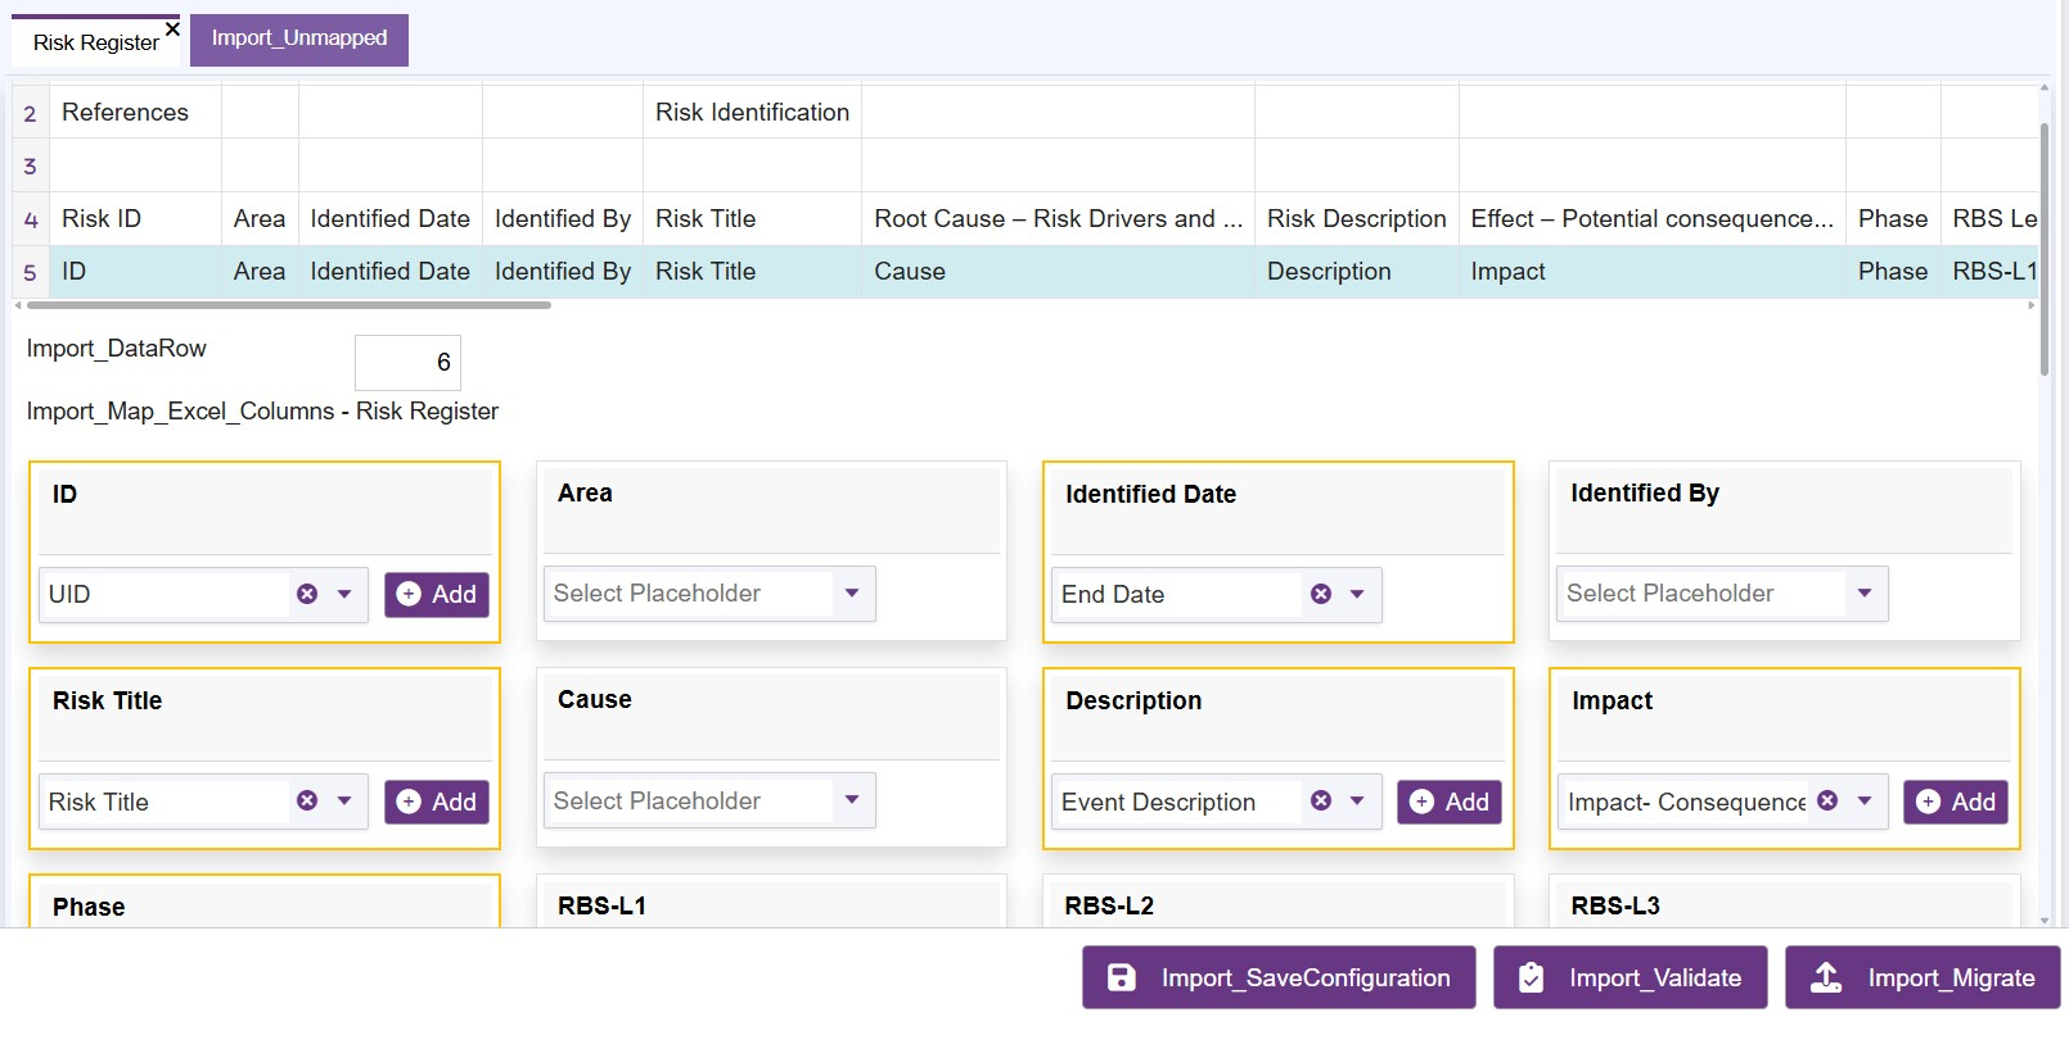
Figure 1.5
Step 8: Define Data Row
Locate the Import_DataRow text box in figure 1.6, which automatically displays the row number immediately following your selected header by default (as shown in the figure 1.6, the import data row has been set to 6) Change this number manually if needed, ensuring the entered value is strictly greater than the selected header row number.
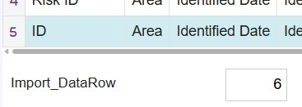
Figure 1.6
Step 9: Map Columns
View the mapping blocks where each box is titled after a cell value from your selected header row. The system tries to automatically map each cell value to a matching database field using partial string alignment.
Step 10: Review Visual Highlights
Note that dynamically matched or partially matched strings are highlighted with a yellow border, while strings matched via a loaded saved configuration are highlighted with a green border (Figure 1.7).
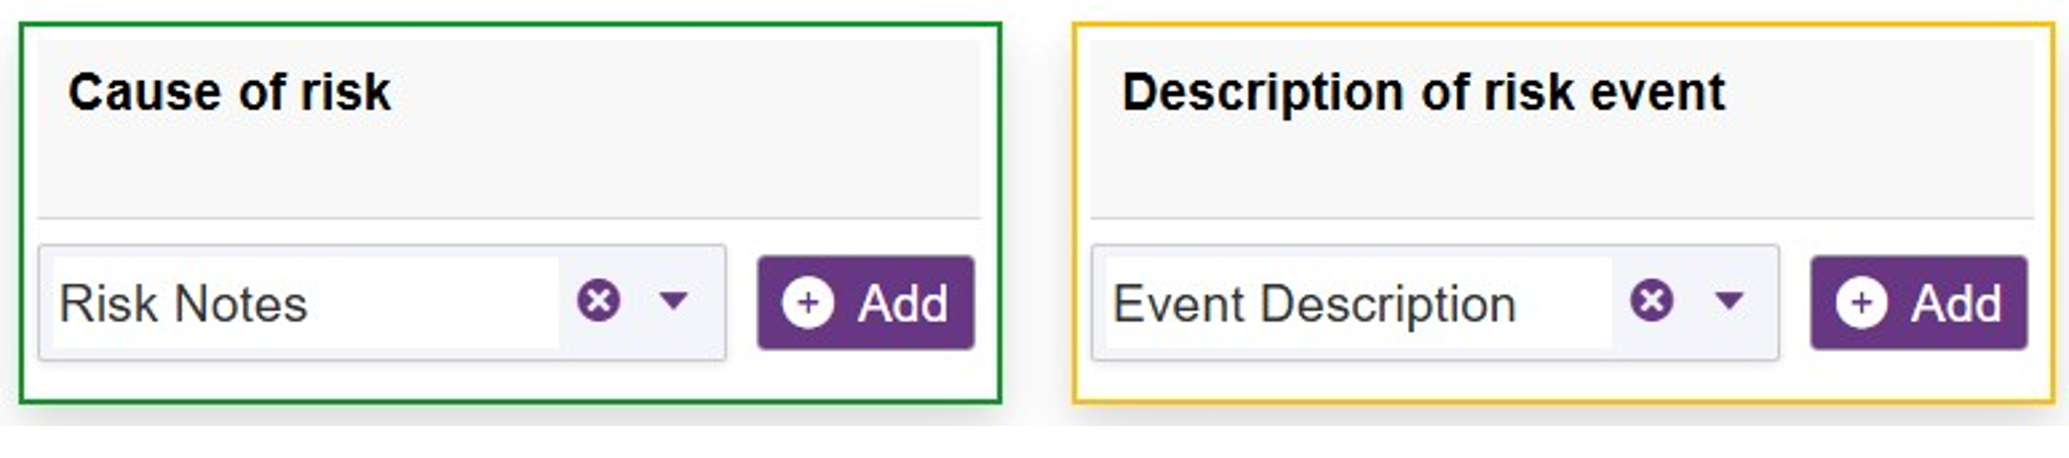
Figure 1.7
Step 11: Apply Transformations
Here we can view the list of transform types available when a cell is mapped with database fields. To see this list, click on the Add button next to the mapped database fields in the cell. Note that the list of transform types changes according to the type of mapped field. For example:
-
String-related fields: Only the Replace option is available (swaps the given string with a new given string) (Figure 1.8).
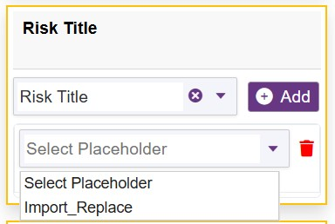
Figure 1.8 -
Master table-related string fields: Both Replace and Substitute options are available. Use Substitute to map any spreadsheet value directly to the application's master value (Figure 1.9).
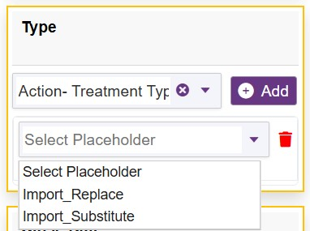
Figure 1.9 -
Numeric fields: Three options are available: Strip (removes prefix and suffix strings; turning "$10M" into "10", Multiply, and Add (applies arithmetic values to the stripped number) (Figure 1.10).
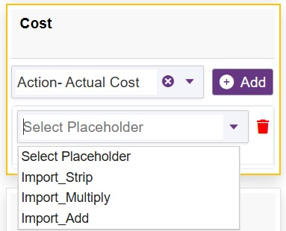
Figure 1.10 -
Stacking/Removing: You can stack multiple transformations using the Add button or remove them using the Trash icon located next to it.
Step 12: Reference Column Check
There are 2 types of reference columns used to import a standard Excel file: one containing only the state (Figure 1.11) and the other containing both state and type (Figure 1.12).
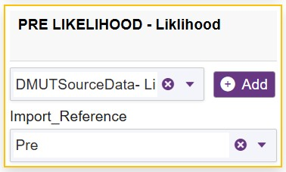
Figure 1.11
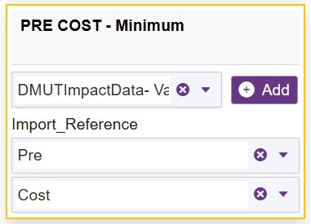
Figure 1.12
Step 13: Validation Alerts
If there are any invalid data fileds—such as required fields not being mapped or reference fields being null—a validation message will pop up (Figure 1.13), and those invalid fields will be highlighted with a red border (Figure 1.14).
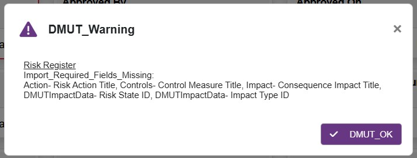
Figure 1.13
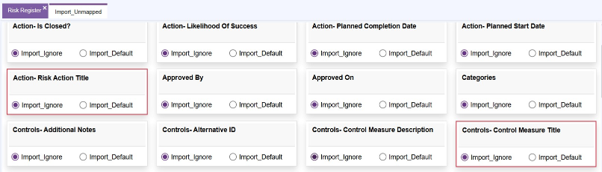
Figure 1.14
Step 14: Set Default Values
Map default values for any unmapped fields by navigating to the Unmapped tab, selecting Default, and entering the relevant values (Figure 1.15).
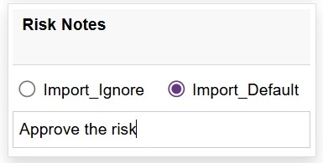
Figure 1.15
Step 15: Save Configuration
Click Save Configuration to save this custom mapping configuration for future use. A window will pop up where you must provide a name for this custom configuration and click Save button (Figure 1.16).
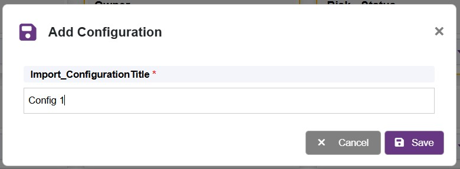
Figure 1.16
Step 16: Project Verification
Before running final actions (Validate and Migrate), the target project must either be selected from the project dropdown menu under Project shown in Figure 1.2 or Project must be explicitly mapped as a mapping database field.
-
If the project is explicitly mapped as a mapping database field, the application dynamically scans the specified column in your worksheet for existing and non-existing project names.
-
Existing projects will be auto-selected in the project dropdown (Figure 1.17).
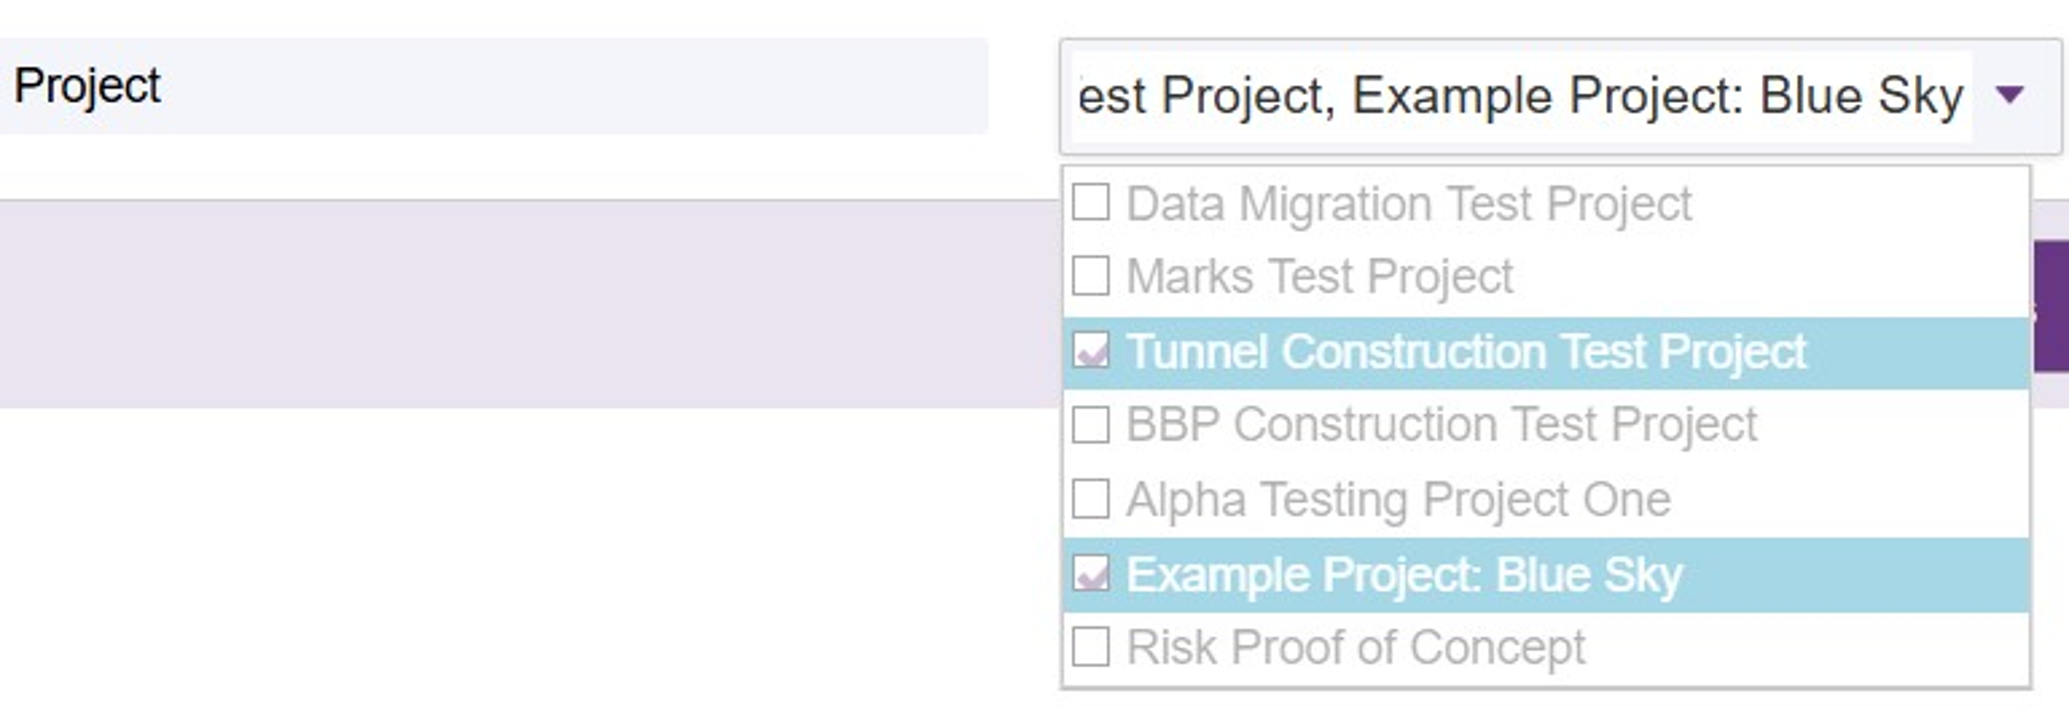
Figure 1.17 -
Non-existing projects will trigger a new tab showing each new project in subtabs where you must type in the required project details (Figure
1.18).
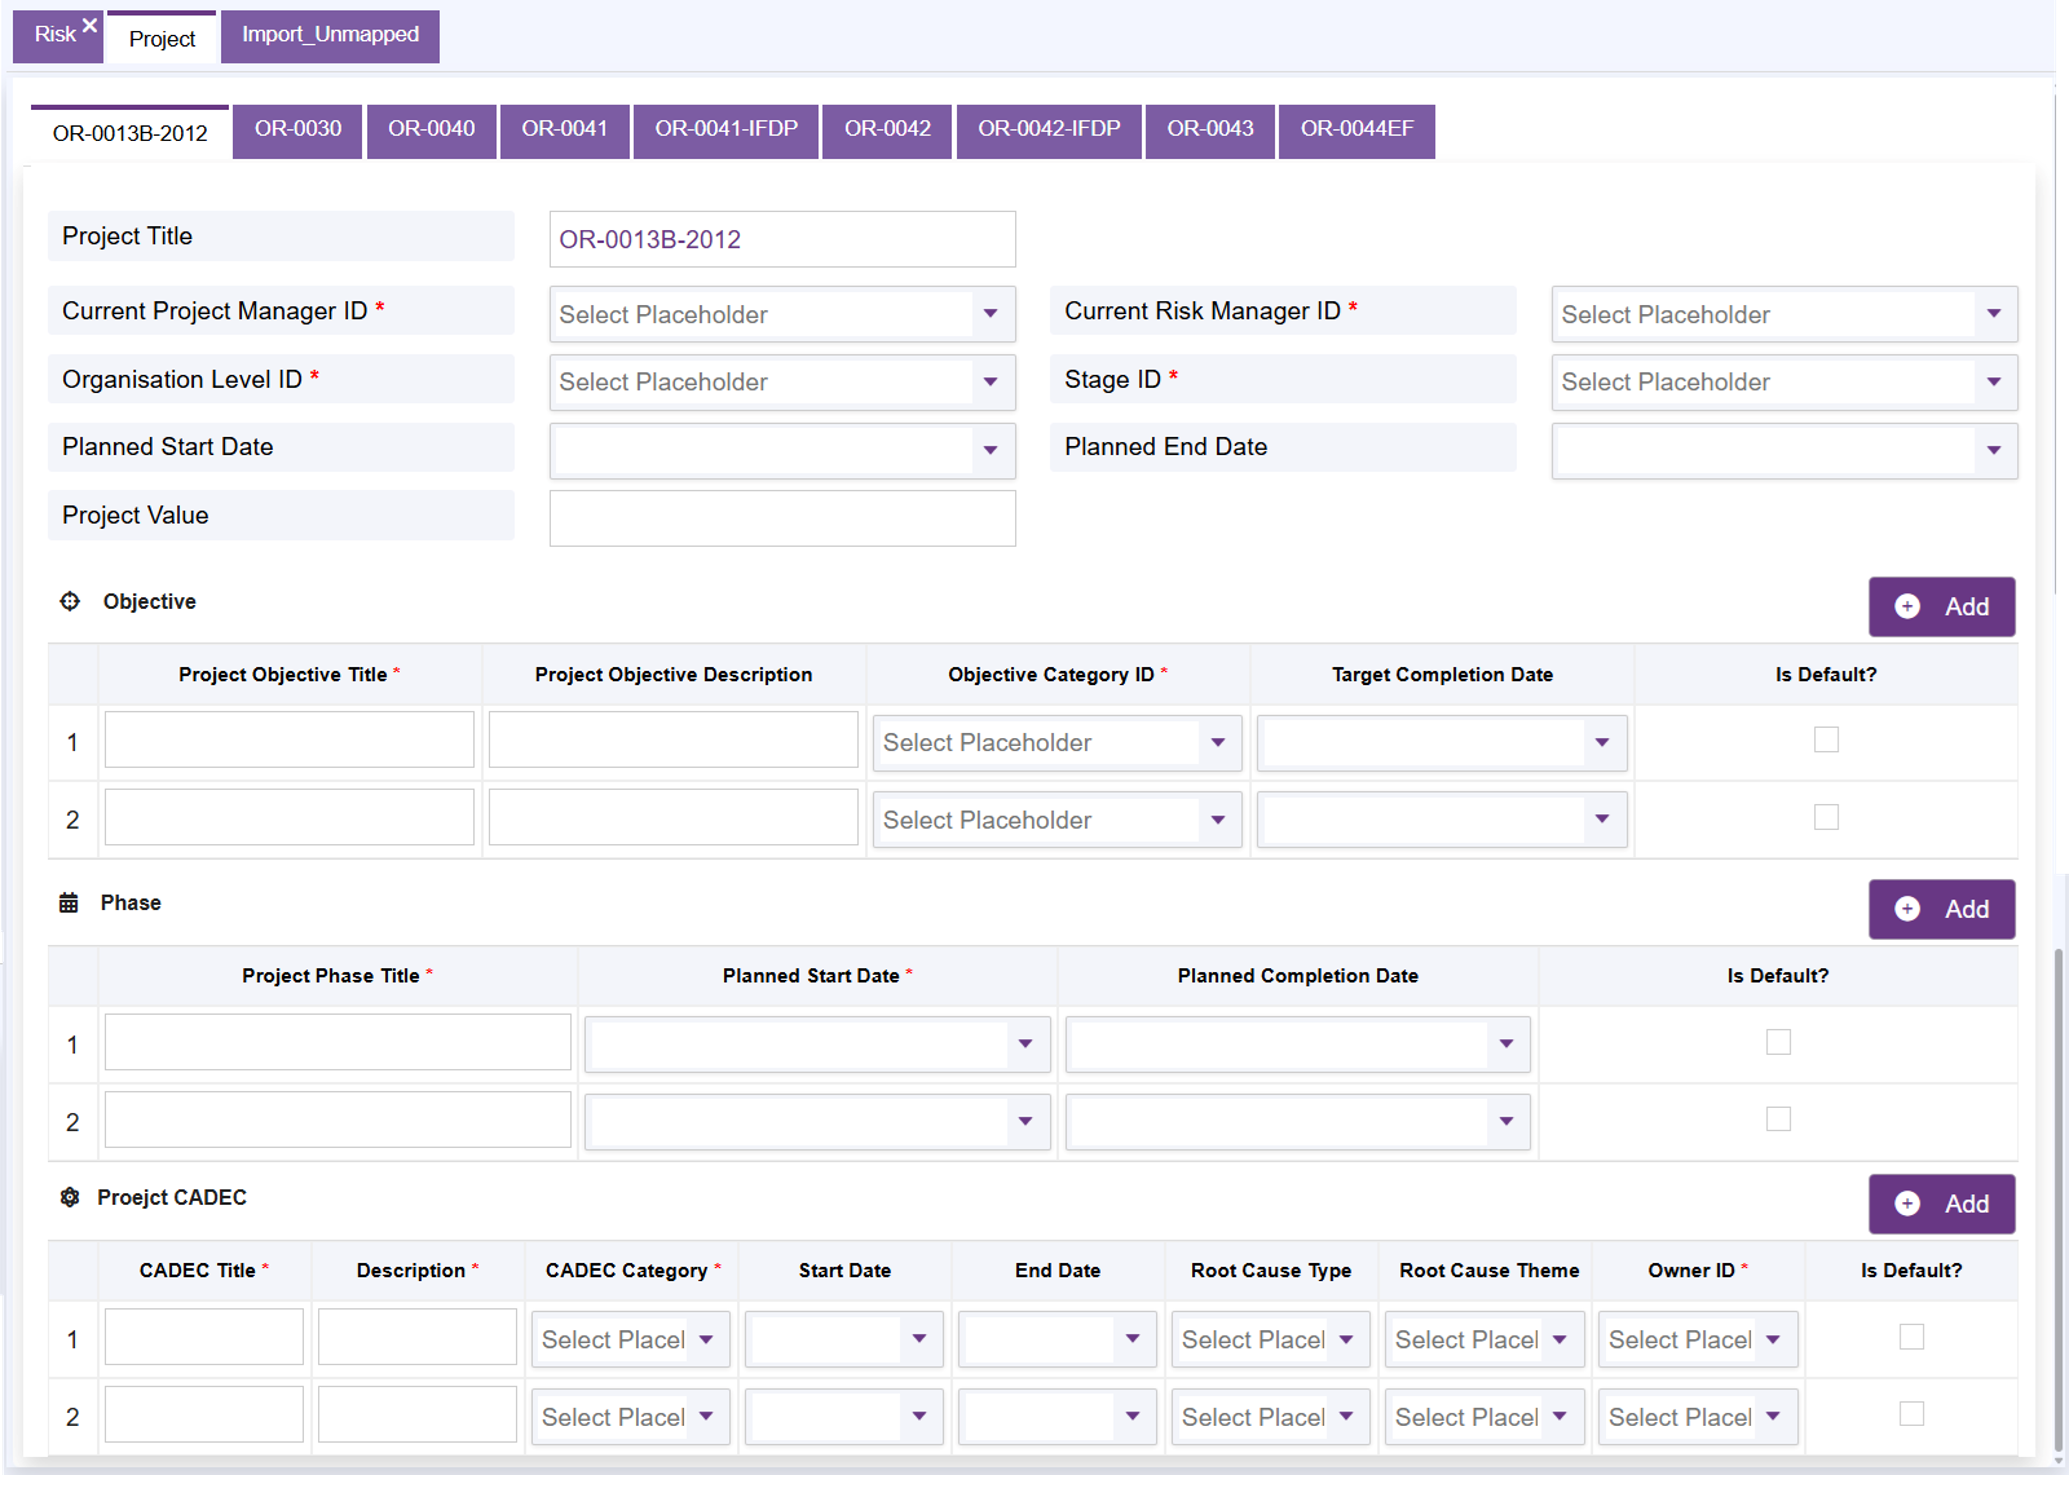
Figure 1.18
Step 17: Execute File Actions
Locate the 2 main action buttons on the screen:
-
Validate will check the files to ensure that
➢ All required fields have values
➢ No text values exceed the allowed database field size
➢ Master table values are referred correctly
➢ Each column follows the exact same format as the first data row,
➢ Field formats match the database field requirements.
If there are any validation issues, they will be displayed in a table format in the Result tab showing the issue name and the total number of issues for each selected sheet. Hovering the mouse over the issue number will display the exact cell addresses where the errors occurred.
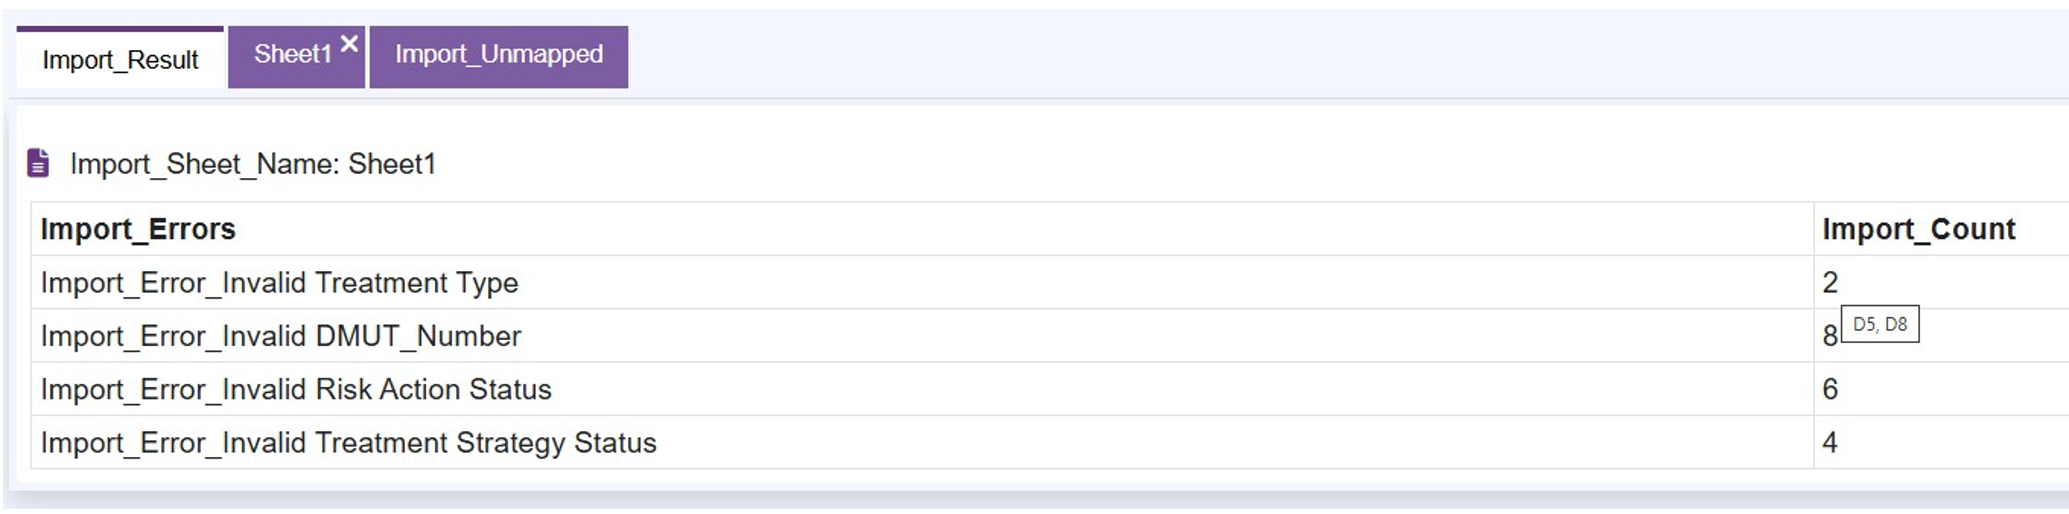
Figure 1.19 -
Migrate will actively migrate the processed data directly into the database under its respective mapped fields only if there are no errors detected. Import_Migrated message appears at the top-left corner of the screen after the records are migrated successfully (Figure 1.20).
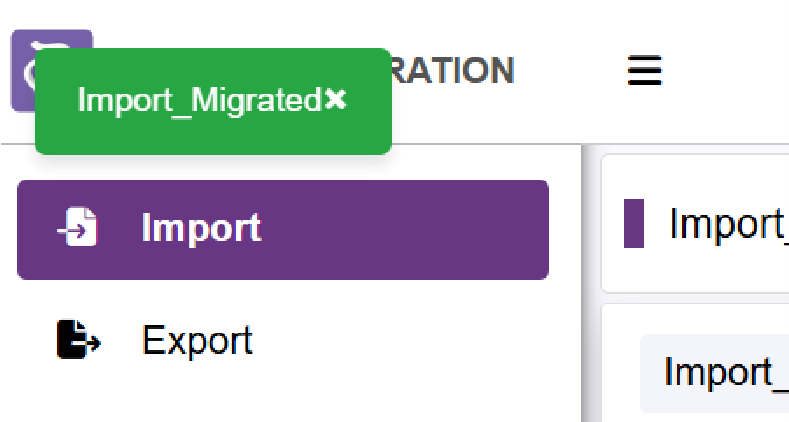
Figure 1.20
Next: Export Data
Previous: Features and Functions Introduction
Back to: Index