Working with the Barchart Editor
The Barchart Editor combines the Activity Columns area with the Bar Area, allowing you to use both panes to add, edit, or view activity information. There are several ways to add an activity using the Barchart Editor. You can either use the Add Activity option in Home>Rows> Insert, the shortcut menu displayed by a click with the right mouse button, the ‘Insert’ option or the insert key on your keyboard, or by adding activities graphically in the bar area. Alternatively, use the Alt+A keyboard shortcut to add activities at the end of your list.
You can also change Activity IDs, descriptions, and other activity information within the Activity Columns. You can graphically move activities along the time-scale axis or change activity duration in the bar area. For editing Activity Information, you may also use the Activity Information View.
When you add or Insert Activities within the Activity Columns, Safran Project adds activities with a default duration of 10 days. However, selecting ‘User Settings’ from the PROJECT ribbon may change the default values.
Safran Project supports the duration of mixed units within the same project. Units may be entered as a number with an abbreviation—for example, 12d, meaning 12 days, or 12w, representing 12 weeks.
Each Activity ID in a Safran Project schedule must be unique. Enter your Activity IDs or use the IDs created by Safran Project.
You may want to structure the activity IDs to reflect some intelligent coding, such as type of work, project codes, discipline, department, cost center, etc. Activity IDs can consist of up to 20 alphanumeric characters.
Barchart Editor User Settings
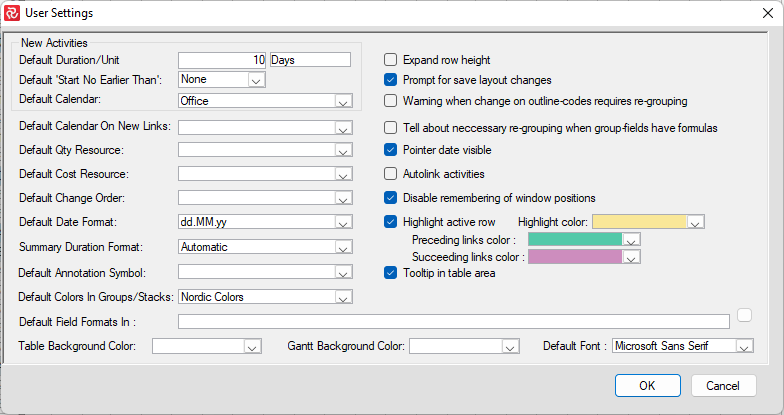
Safran Project allows you to define standard options for the Barchart Editor, including default date format, editor background color, default duration for new activities, and more. To modify your settings, click the ‘Options’ button in the PROJECT ribbon.

| Setting | Description |
|---|---|
| Default Duration/Unit | Default duration and unit/format for new activities. The unit may be Day/Week or Day qualified by 'd' (For day based calenders). |
| Default 'Start No Earlier Than' | Default start date for new activities. Options are None, Timenow or Today. If none is chosen, a non-linked new activity will be placed on the Timenow date. |
| Default Calendar | Default Calendar for new activities. |
| Default Calendar on New Links | Marking this checkbox, Safran adds the default Calendar to all new links. Some users may not want the default calendar on links, so you can set this. |
| Default QTY Resource | Default QTY resource for new activities. |
| Default Cost Resource | Default Cost resource for new activities. |
| Default Change Order | Default VO/Change Order for new activities. |
| Default Date Format | The default format for date fields. |
| Summary Duration Format | The default format for duration fields at Group/Summary levels. |
| Default Annotation Symbol | Default symbol for use when adding Annotations. |
| Default Colors for Groups/Stacks | Choose the Nordic style or Classic colors as your default for 'New' reports. |
| Default Field Formats in | See the chapter on Formatting the column area. |
| Table Background Color | Select a background color for the Table area. |
| Gantt Background Color | Select a background color for the Gantt area. |
| Default Font | The default font for columns in the table area of the barchart editor. |
| Expanded Row height | Mark this checkbox if you want rows displayed with a raised row height. This option does not affect the printed output. To adjust the row height for printed results, you must adapt the table row height value on the page setup pane. |
| Prompt for save layout changes | When checked, Safran lets you save changes to your project when changing the layout, save data, or close the project. |
| Warning when change on an outline code requires regrouping | When checked, Safran will warn if you shift an outline value so that the activity "moves" to another node in your group structure. |
| Tell about necessary regrouping when group fields have formulas | When checked, Safran will warn if editing or modifying a value results in a value change of the area specified for one of the group levels. |
| Pointer Date Visible | If this checkbox is marked, the pointer date note shows in the lower right corner of the Gantt area when you add or modify activities interactively. |
| Auto Link Activities | When switched on, Safran will automatically add links to preceding/succeeding activities when a new activity is inserted into a chain of linked activities. Similarly, when an activity in a chain of linked activities is deleted, its predecessor/successor will be linked, maintaining the network integrity. |
| Disable remembering of window positions | By default, when working with external/multiple screens, Safran will remember which screen Safran was used on and will open Safran on that screen upon re-start. When selected, Safran will always start on your 'home' screen. |
| Highlight active Row | Check to highlight the selected row with a specified colour to be drawn across the column and Gantt areas. |
| Preceding links color | If you have chosen the Highlight active row options. You can also display the preceding links in a specific, user-selected colour. Note that this only applies to the Barchart Editor workspace. |
| Succeeding links color | If you have selected the Highlight active row options, you can also display the succeeding links by a specific, user-selected colour. Note that this only applies to the Barchart Editor workspace. |
| Tooltip in table area | When checked, Safran will open a tooltip when you hover over a field not formatted wide enough to show its complete value. |
Default duration/unit
Keep in mind that the ‘Default Duration/Unit’ choice in the User Settings (ref. above) will be valid for all your new activities, however it has no effect on existing activities or activities entered by other users in the project.
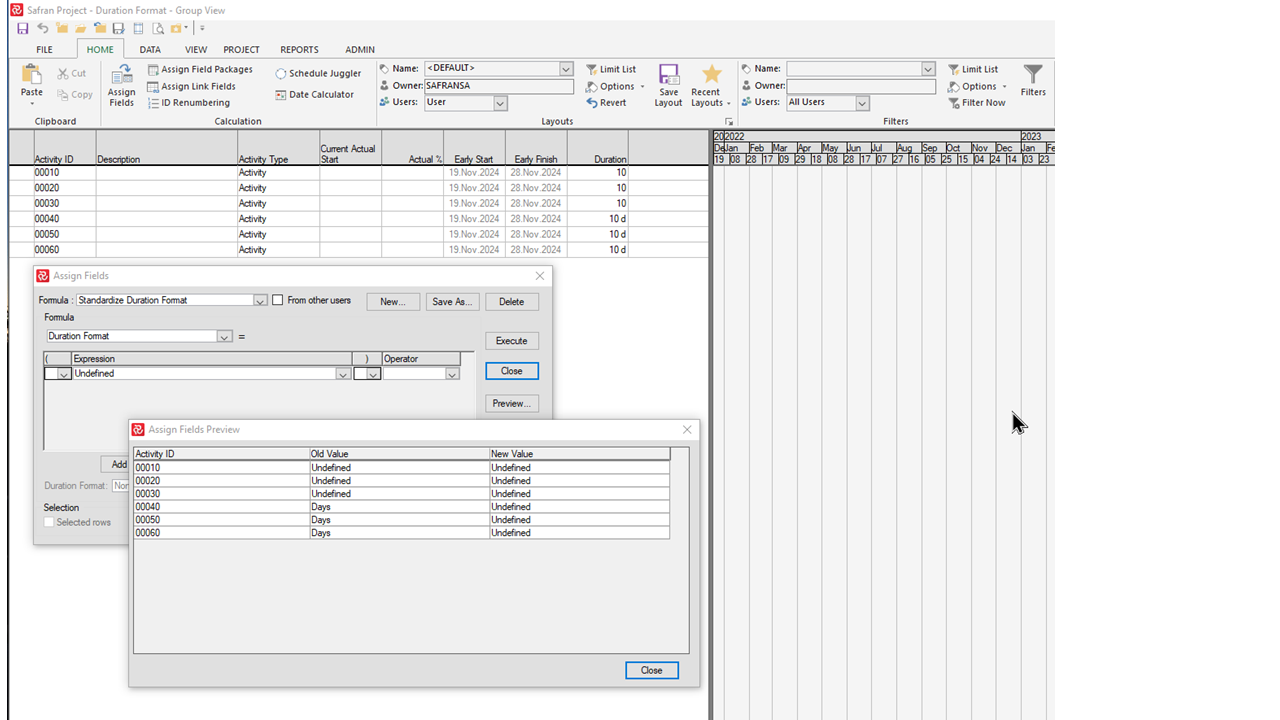
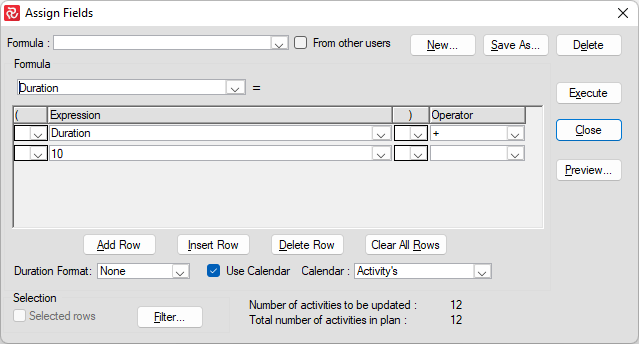
In order to enforce a standard type of duration format for your project you might consider using the Assign fields function to set the Duration Format field for all activities. You can easily store your Assign fields function as a Formula with a name for easy access and include it in an Assign field package run weekly in order to ensure consistency.
In the example shown below, choosing the 'Unassigned' value would remove the 'd' qualifier in the Duration field from the activities shown in the barchart.
Activity Types
In general, each line/entry in your schedule is considered to be an activity, however Safran has the capability to specify an Activity Type where each type has specific characteristics.
By default, each new activity is assigned the Activity Type = Activity, however you may change the activity type at any time.
Activity
An Activity usually has a duration equal to or greater than 1 unit (ie. minute/hour/day depending on your choice of Calendar type).
An Activity may also have a duration of 0 and in this case will be considered to be a (legacy) Milestone.
When using a duration=0 (on a day based calendar) to determine a Milestone, you’ll notice that your Start/Finish dates at first look may seem ‘strange’ ie. the Finish date will be the day before the Start date. If the Start date is on a Monday and your calendar has Saturday/Sunday as non-working periods, the Finish date will be the preceding Friday and so forth for greater non-working periods.
The reason for this, is the fact that the starting point for an activity on a day based calendar is always at the start of the day ie. ‘00:00’. Similarly, the ending point for an activity on a day based calendar is at the end of the day ie ‘23:60’. In order to honor the duration=0 the Finish date will be prior to the Start date as these two dates are in fact the same point of time and thus has a duration=0.
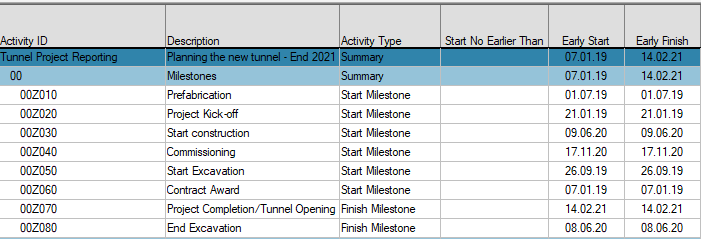
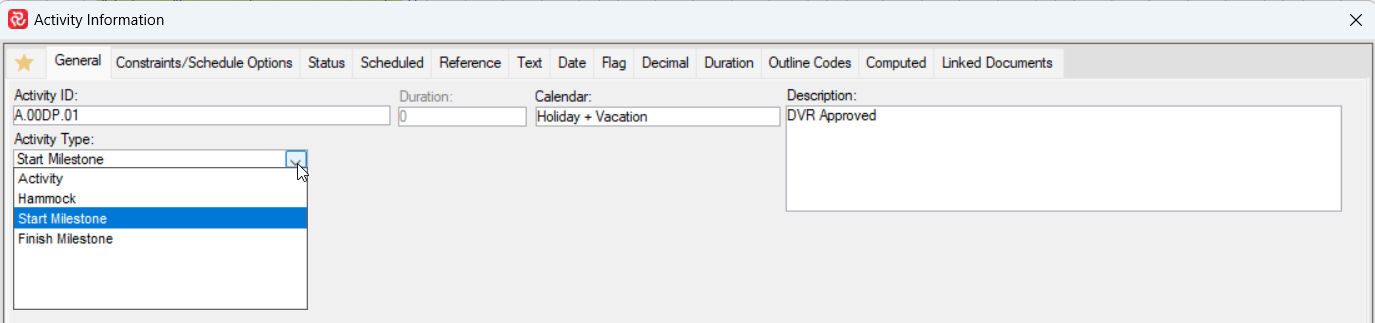
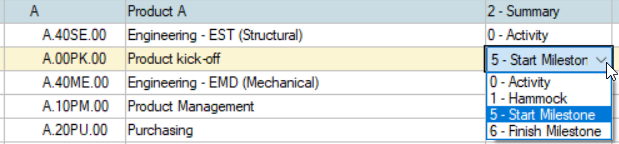
Start Milestone
If you select the Activity type = Start Milestone, Safran will ‘hard code’ the duration to 0 and present it in grey. You will not be able to change the duration. On a day-based calendar both the Start and Finish dates will be the same date.
The Start Milestone type is often used to kick off a group of activities simultaneously. ‘Contract Award’ is a typical Start Milestone.
Finish Milestone
If you select the Activity type = Finish Milestone, Safran will hard code the duration to 0 and present it in grey. You will not be able to change the duration. On a day-based calendar both the Start and Finish dates will be the same date.
The Finish Milestone type is often used to mark the completion of a group of activities. ‘Contractual Delivery date’ is a typical Finish Milestone.
In both cases the activity will be represented internally in the database, with reference to it’s start and end dates, ie. Early Start/Early Finish etc., in the same fashion as the duration=0 type milestone described above.
Hammock
A hammock activity in scheduling is an activity that spans or measures two points in a project schedule. It ‘hangs’ between those two points and is often shown on network diagrams underneath those two points. One would guess the name has come about as on the schedule it looks a little like a hammock hanging between two trees.
A Hammock activity has no fixed duration. The duration assigned to the hammock is flexible and is driven by the logic of the activities it encompasses. When the duration of other scheduled tasks changes, the hammock is updated automatically to reflect the changes. It therefore reflects the overall duration of the group of individual activities.
The duration of a hammock encompassing a group of activities is often calculated as the timespan between the start date of the earliest task in the group, and the finish date of the task that finishes last. The order of the tasks might not matter, and they could switch around as the work progresses.
Another benefit is that the tasks within the group do not need to be related to each other. Dissimilar work can be ‘hung’ together and grouped in a way that makes sense for management effort.
Hammock activities can also be used to create summary reports. However, one of the advantages of using hammocks over ‘standard’ summary tasks is that they can summarize activities across multiple areas of the project schedule, not just tasks in a single section.
Hammock tasks in construction are useful for determining duration of events like how long equipment will be required on site. Within a shipyard environment, Hammock activities might be used to resource schedule pre-fab lots.
The hierarchical sense of the work breakdown structure does not need to apply, and there’s no need to stick to an individual sequence of events. Different types of activity such as equipment use, concreting, erecting scaffolding, interior work and more can be put together.
Hammocks may also be used to calculate the distance in time/duration between multiple events/milestones in your schedule.
Note that, when establishing a hammock, it is linked in a slightly different manner than an activity. The Hammock is linked by entering two Predecessors, quite often as a Start to Start link to the first/earliest activity and the second predecessor as a Finish to Finish link to the final/latest activity. The same approach is used when establishing a hammock between multiple events/milestones.
Keep in mind that Safran does support all four link types, ie. FS/SF/SS/FF, when establishing a Hammock. Additionally, any Lag (+ve/-ve) entered for the hammocks links will also be taken into consideration when start/finish dates are calculated.
Note that you will not be able to enter a Successor. This is done to preserve the integrity of your network schedule as a hammock has no effect on any of your activities.
A Hammock may also have multiple points of measurement both as starting/ending points. In both cases the duration of the Hammock will be determined as the difference between the earliest/latest dates of your points of measure.
If you specify a calendar for the hammock, the calculated duration will also take into consideration the selected calendar.
Adding and Editing Activities
Adding an Activity in the Barchart Editor
The Barchart Editor provides a spreadsheet-like method to add activities to your schedule. When you add an activity using the Barchart and specify only the data that appears in the Activity Columns, Safran will automatically generate the bar in the calendar area of your Barchart.
Inserting a New Activity in the Barchart Editor
By clicking Insert on the HOME ribbon, Safran adds a new activity with a default duration above the selected activity. Safran automatically assigns the Activity ID and places the activity at the Timenow (defaults to today’s date when you create a new schedule).
Enter a description and duration for the activity and any other relevant activity information in the appropriate cells. The Add Activity feature adds a new activity at the end of the activity list in the Barchart Editor. You may also use the Alt+A keyboard shortcut to add activities.
Adding Activity Information Using the Activity Information View
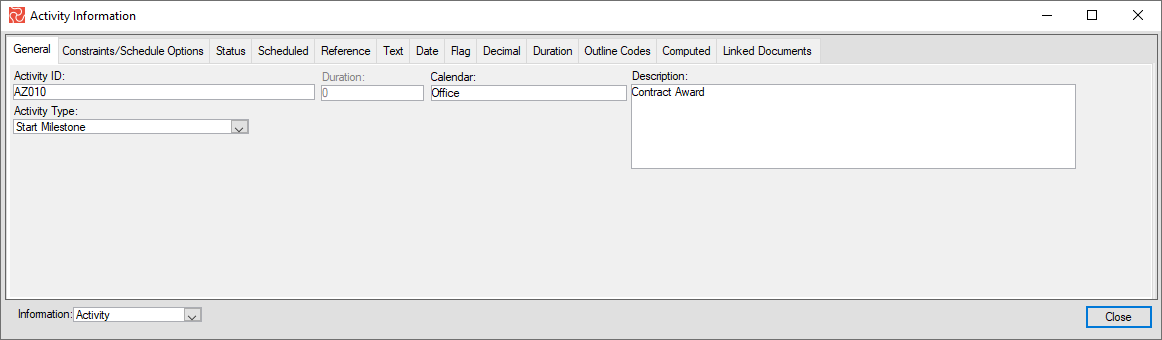
You can add and modify information about an activity in the Activity Information form at the bottom of the screen. Choose VIEW>Activity or ‘Activity Information’ from the shortcut menu. The activity information view is a tab-separated window that allows you to enter information. Activity ID, Duration, Calendar, Description, Activity Type, Target dates, Progress, Userfields, and References can be entered using the form and viewing analyzed dates data information.
Adding/Inserting a Hammock
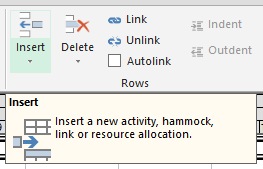
A hammock is a unique activity measuring the time between two points in a project. A hammock activity is related to its preceding activities through link records. The hammock will initially have a default duration of 0-time units. Its duration will be automatically computed when you add predecessors for the hammock activities. Select Insert>Add Hammock in the HOME ribbon to add a hammock to your project.
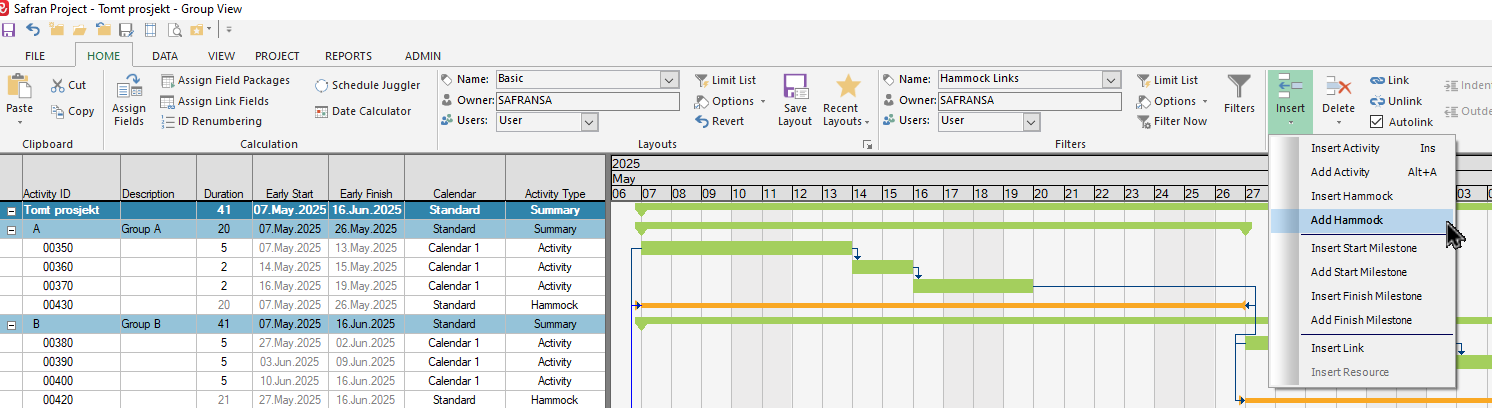
The new hammock activity appears at the end of the activity list. The Insert Hammock button adds a new hammock to the project but above the current activity.
Note that the option to enter successors for a hammock activity is disabled.
Microsoft Project does not support hammock activities; therefore, hammocks are exported as regular activities.
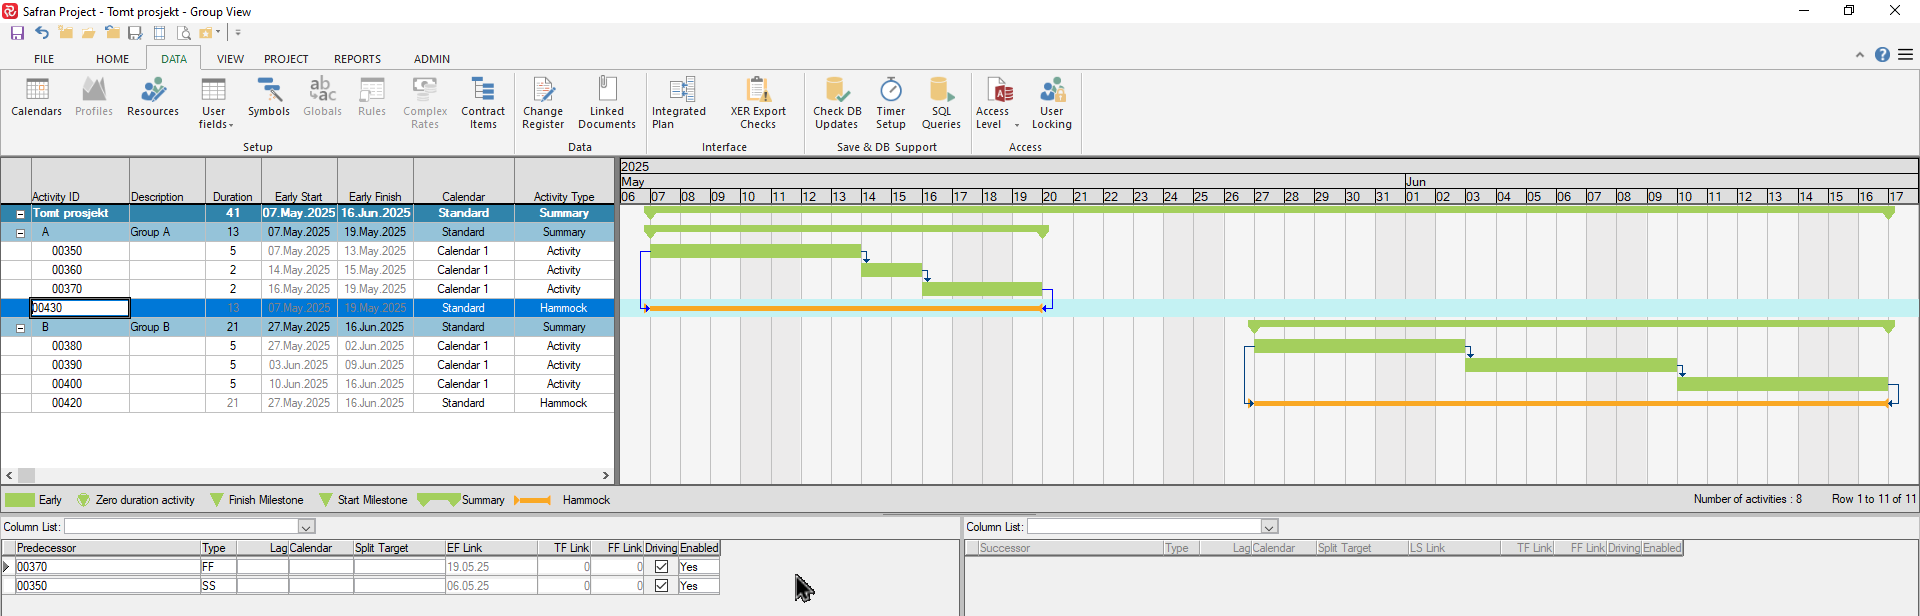
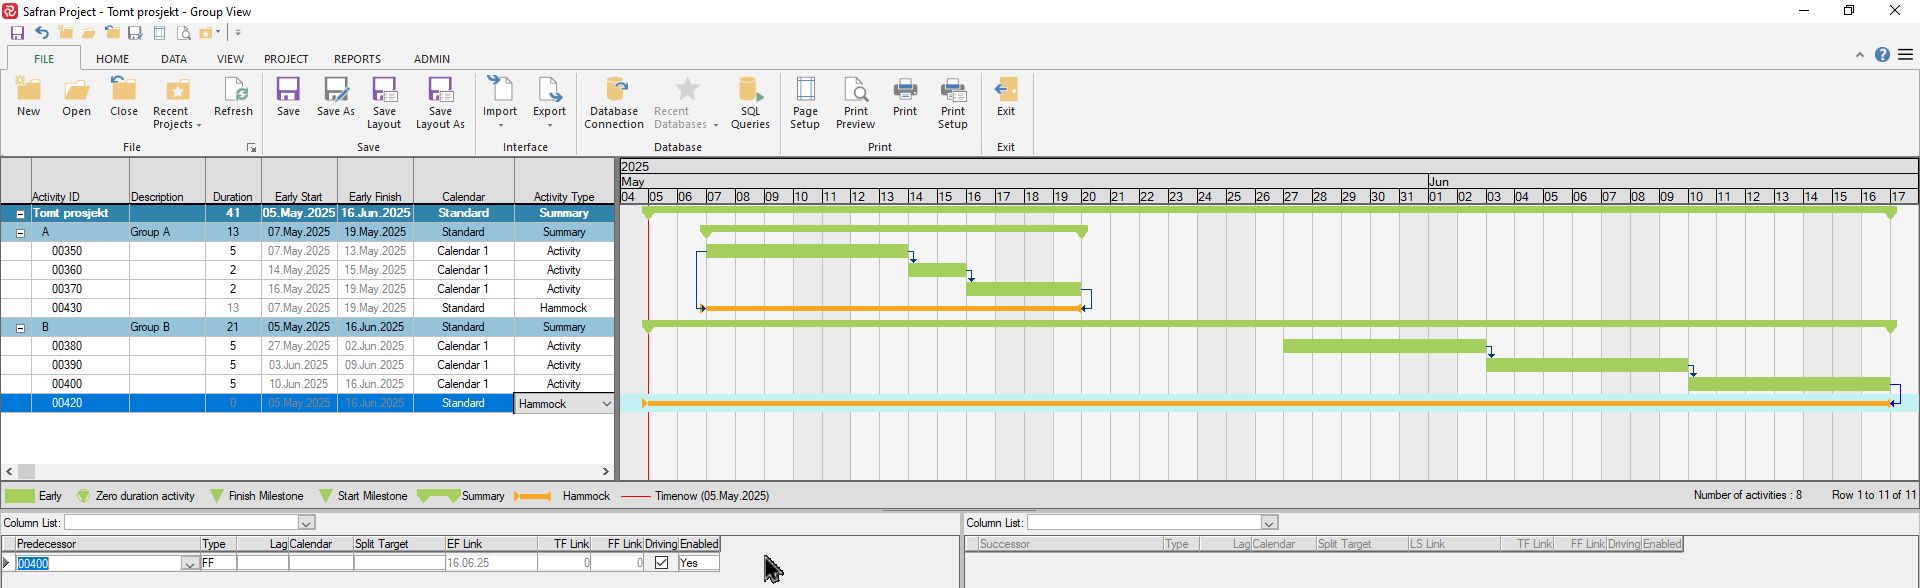
The Hammock shown above (00430) is linked by entering two Predecessors (00350/SS and 00370/FF), most often as a Start to Start link to the first/earliest activity and the second predecessor as a Finish to Finish link to the final/latest activity.
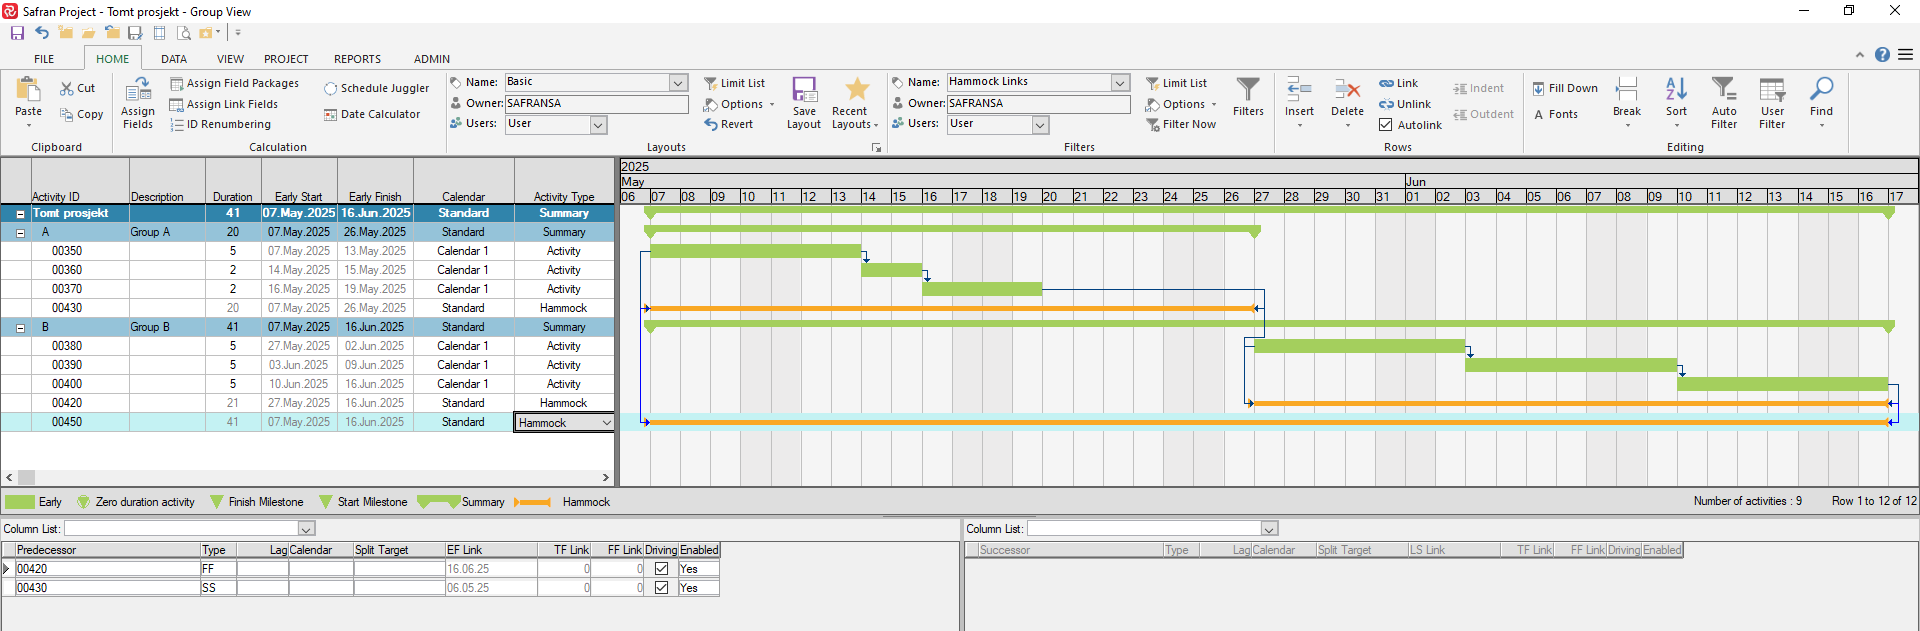
You can also link a hammock to other hammocks. In the example above hammock 00450 spans both hammocks 00430 and 00420.
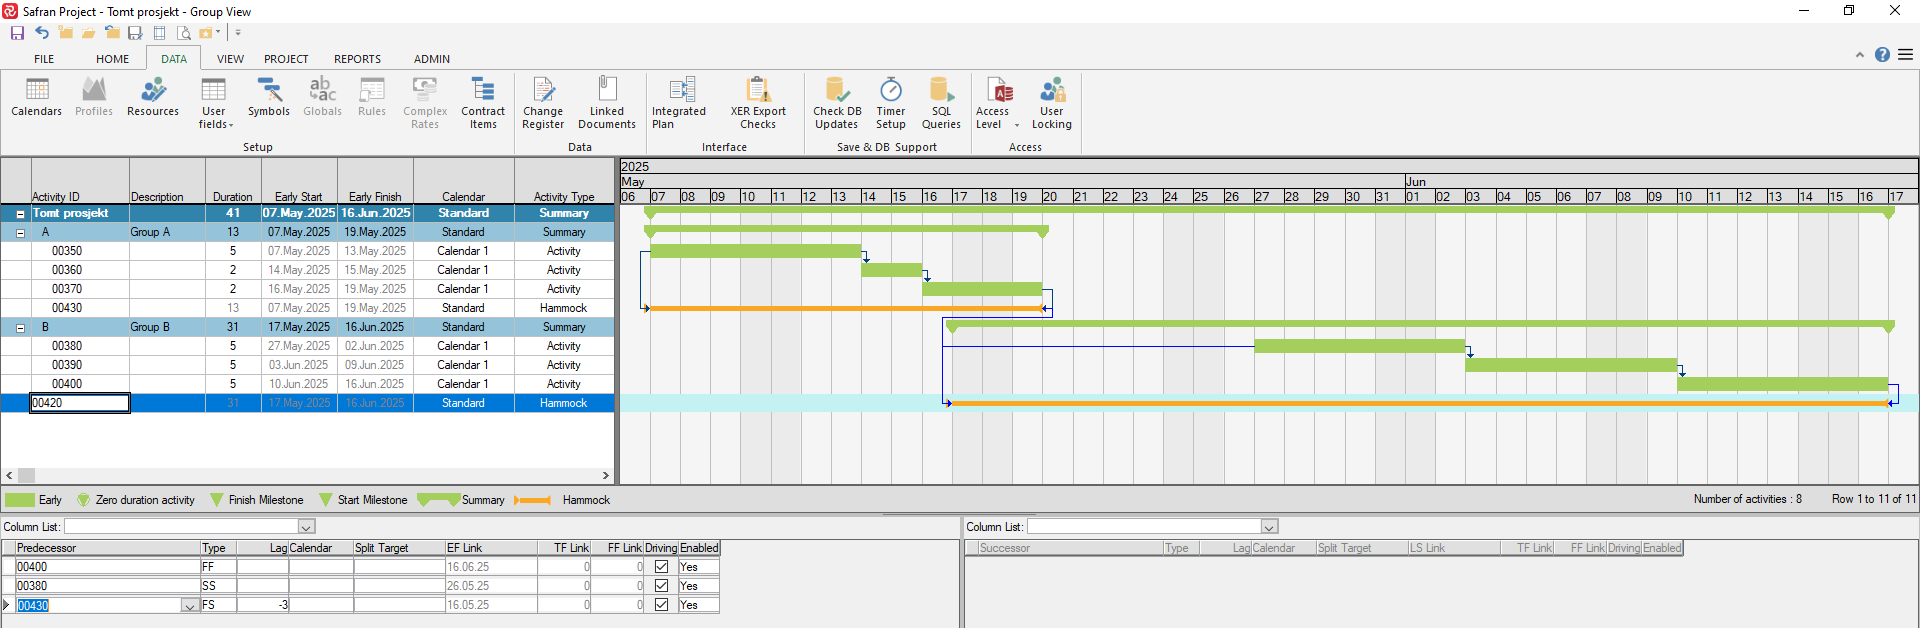
In the example above an additional predecessor has been added, in this case to another hammock (00430/FS/-3). Note the use of a Lag on the link. This affects the Early Start date and duration of hammock 00420 but has no effect on the other underlying activities.
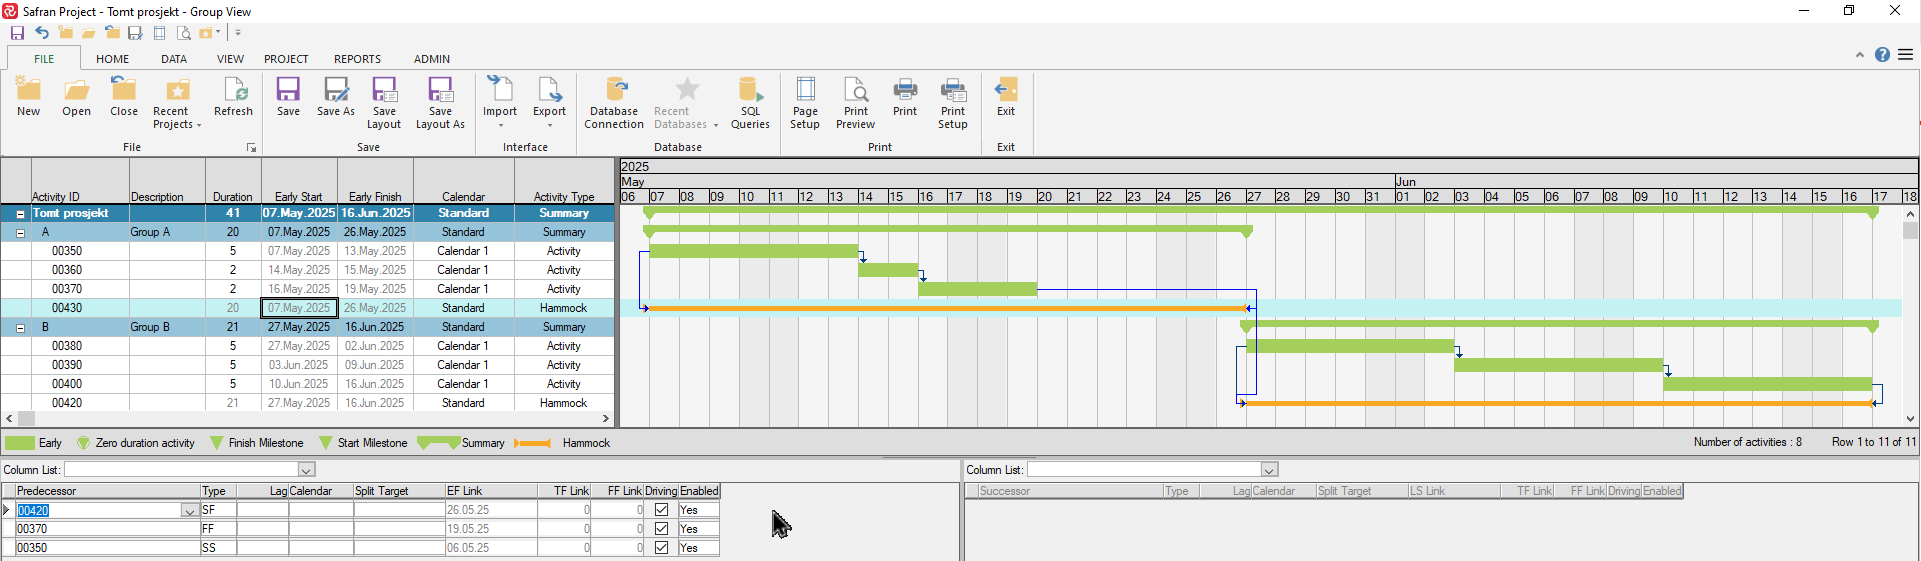
In this example a start to finish predecessor 00420 has been added to hammock 00430 which also increases the hammocks duration and extends the Early Finish date.
Note that If an open-ended (no start predecessor) hammock is created, the Early Start date will be set equal to Timenow and the duration calculated accordingly.
This is done in order to align Safran with Primavera P6 so that imported P6 projects give the same results in Safran.
Easy Click-and-Drag Scheduling
Safran Project’s easy click-and-drag method provides users with a visual approach to scheduling. People work better visually; this feature lets users sketch a schedule in seconds.
Creating an Activity Using the Click-and-Drag Technique
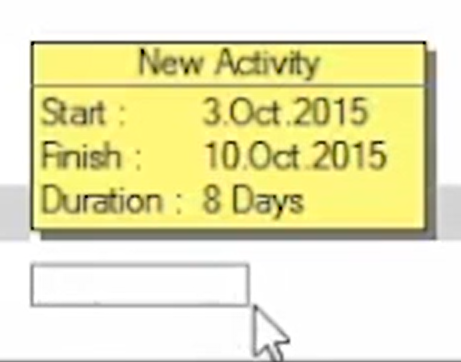
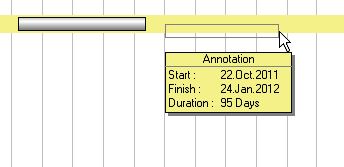
Move the mouse pointer to an empty row in the bar area and place the arrow on the start date of the new activity. At the bottom right corner of the bar area, the pointer note displays the date of your mouse pointer. Press the left mouse button and hold it down while moving the mouse pointer to the right to define the duration and finish date of the activity. The new activity message with some basic information on the activity will appear. Release the mouse button to complete the activity creation.
You get a symbol like this:
Afterwards, you will see a new activity at the bottom:
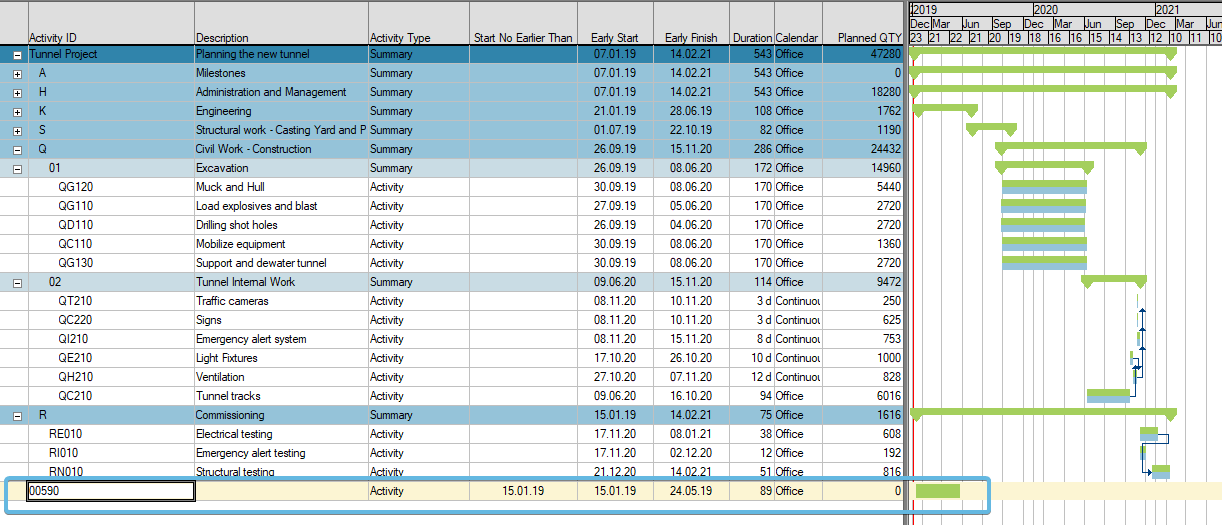
When you add activities graphically, they are positioned using the Start No Earlier Than Date field.
How to do this is illustrated in the video below. Remember you are only using the mouse for this technique. No keyboard is needed:
This technique is shown in this YouTube video with audio Demo - Getting Started with Safran Project 7.
Changing the Activity ID
Safran Project automatically generates Activity IDs in increments of one, starting from 1, when you add new activities. You can change the activity ID by typing over the original ID in the activity form. Safran Project automatically adjusts the ID everywhere in the system to ensure data consistency. For example, if the activity is assigned as a predecessor to another activity, Safran Project also changes the ID for the activity's predecessor.
Entering Activity Description
You can also identify your activities by descriptions. The description field is 250 characters wide. If you show the activity description in an Activity Column, Safran wraps the displayed description on the printed Barchart report if it doesn’t fit on one line.
Entering Activity Duration
The duration is your estimate for the total time required to complete the activity. The duration should be entered according to the duration units specified for the plan, either hours or days. Safran Project does not allow mixed durations in a single schedule. Every activity has an original and a remaining duration (the time left to accomplish the activity). When you update an activity, you can change the remaining duration, or have Safran recalculate it based on progress input.
Entering Activity Duration in the Activity Columns
When you enter a value in the duration field and press Tab or Enter, Safran Project automatically recalculates the early and late start and finish dates for the activity and draws the corresponding bar in the calendar area of the Barchart Editor.
Entering Activity Duration in the Activity Information View
Choose View>Information> Activity. In the duration field, enter the amount of time needed to complete the defined scope of work for the activity.
Entering Activity Duration Using the Interactive Bar
Highlight the bar and point to the finish date of an activity (the right end of the key bar), until the mouse changes to a double arrow.
Press the left mouse button and drag the end of the bar to the date you want, then release the mouse button. The Date Note displays the revised duration, early start and the new finish date as you stretch or shrink the bar. The early finish and duration fields also change in the Activity Columns when you finish dragging. You can drag the start of the activity in the same fashion, and Safran Project recalculates the duration and early start date.
Deleting Activities
When you delete an Activity from your schedule, Safran Project also removes associated resources and its relationship to other activities, both predecessors and successors. This is called a clean sweep. You should check the Activity’s predecessor and successor activities to ensure they are correctly linked to other activities in the schedule after you delete an activity. In many cases, the activity needs to be retained in your schedule due to requirements for tracking project history. In this case, you may use the cancel activity feature instead. This feature can be found in short-cut menu in barchart area.
To Delete Activities
Select an activity or group of activities in the Activity Columns, choose Delete in the HOME ribbon and confirm that you want to delete the activity(s). You may also use the keyboard short-cut CTRL+DEL to remove activities from your schedule. When you delete an activity, any associated annotations are removed as well.
Copy, Cutting, and Pasting Activities
Use Safran Project’s copy-and-paste functions to duplicate one or more activities. You may also use the cut-and-paste function to move activities within your schedule. You can easily copy activity information from one plan to another. You can also specify where Safran is to place the copied activities, which is a nice feature when working with summarized schedules.
To CUT and PASTE Activities
Use the Cut activity to remove an activity or group of activities from the Schedule window. Select the activity you want the copied activity(s) to appear above and select the Paste option. Safran Project then inserts the activity(s) into your schedule and updates any reference field information if you work in a summarized plan.
To COPY and PASTE Activities
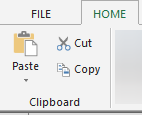
Use the Copy and Paste activities option to save data-entry time when duplicating one or more activities. When you paste the activity(s), Safran Project automatically assigns unique Activity IDs for the new activity(s). You may overwrite these IDs to adhere to any company standards. Highlight the activity you want to copy and choose Copy in the HOME ribbon. Then, mark the activity you wish the copied activity to appear above and select the Paste option to insert the activity. If you work in a summarized schedule, Safran Project updates the reference fields automatically.
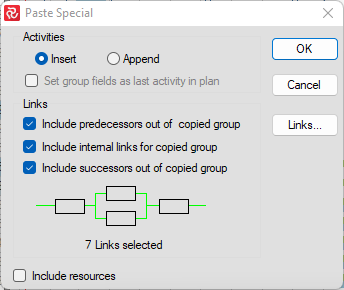
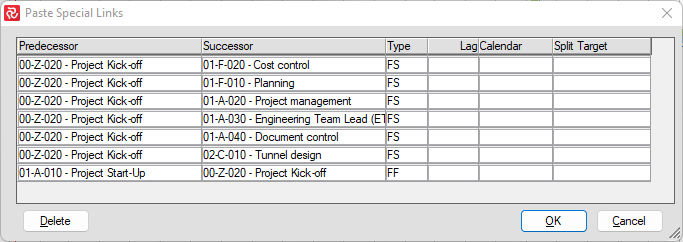
The Paste Special Option
The Paste Special option allows you to specify that the resource requirements should also be copied. First, mark the Activity or a selection of activities, then from the short-cut menu, choose Copy. To Paste activities and their requirements, select the Paste Special option and mark the Include Resources checkbox.
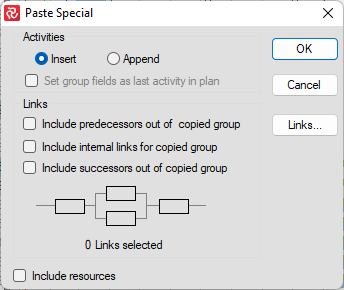
Use the Paste Special option to include activity relationships when you copy activities. When you copy more than a single activity, it can consist of all predecessors, successors, and all internal logic within a group. Before pasting, you may also modify the relationship data. Press the VIEW>Links button to view selected links.
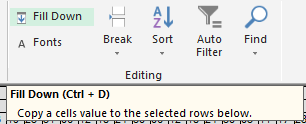
Automatically Fill in Data from a Cell (Fill Down)
Using the 'Fill Down' option, you can have Safran Project automatically repeat the content of a cell to a selected number of rows. For example, if the cell contains a duration of 40 days, you can quickly fill in other cells in that row with 40.
Position your cursor at the cell containing the content to be repeated. Then select the number of rows you want this value to be repeated for by pressing the Shift key and the left button on your mouse anywhere on the last row, then press CTRL+D.
It is also possible to select various rows using 'Shift' and 'mouse-click,' then 'Ctrl+D':
- Click within the 'cell' you want to copy and fill down.
- Press 'Shift' and hold it while marking the rows you would like your cell to be copied into.
- Press Ctrl+D (or HOME/Editing/Fill Down).
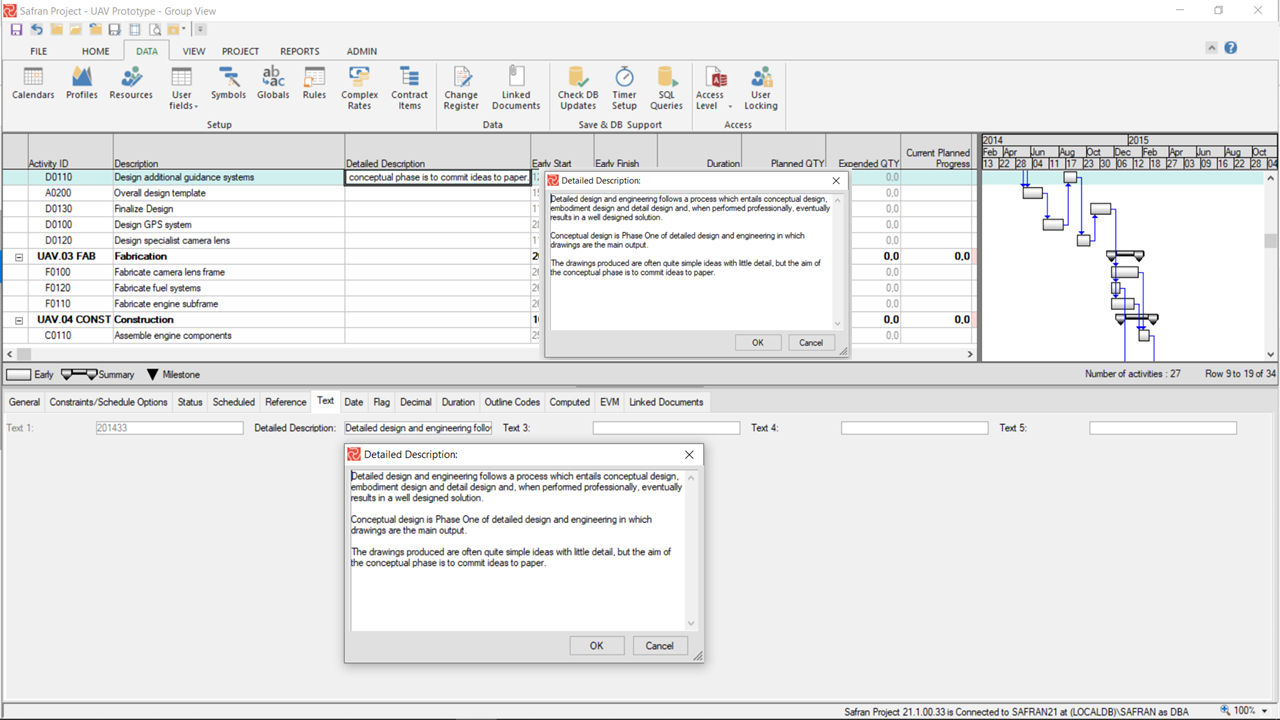
Editing Text Fields
Safran allows you to define various types of userfields. The Text type field can store any text value. Sometimes, a text field might contain an extended text, such as a detailed work description, which is not readily displayable in a Barchart Editor column or a cell in the Activity Details sub-panel.
By focusing on a specific activity and letting your pointer hover above the text column or cell, Safran opens an extended text box showing the complete text field value.

By focusing on the activity and double-clicking on a text column value or cell, Safran opens a text box, allowing you to edit the text field value.
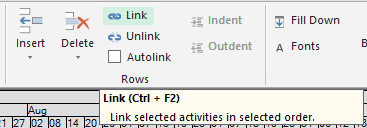
Automatically Link a Series of Activities
The Link feature creates a linked activity chain with a default finish-to-start relationship. The start of each activity depends on the completion of the previous activity.
To Automatically Link Activities in the Barchart
Select a range or series of activities, then select Link in the HOME ribbon, and Safran automatically adds finish-to-start dependencies.
The activities are linked in the same sequence as they appear in the Activity Columns or in the order you select the activities to be connected.
To link non-continuous activities, select the first activity to be connected. Press CTRL and choose activities to be connected. Then, press the Link Activities button on the toolbar.
Creating One-to-One Connections with the Mouse
In Safran Project, you can create a one-to-one connection or link between two activities by clicking the left mouse button in the graphics area of the Barchart Editor. To draw the link, place your cursor on the predecessor activity and press the left mouse button. This will display a small two-headed arrow. Now, drag the cursor toward the succeeding activity, and the cursor now changes its shape into a chain with an elastic band. Move this cursor onto the activity you consider to be a successor and release the mouse button. Once released, Safran will reschedule the schedule and draw your new link on the screen. You can create all link types depending on the activity sides on which you draw the link (see table below).
| Right-hand side of the predecessor to the left-hand side of the successor | FS |
|---|---|
| Left hand side of the predecessor to the right-hand side of the successor | SF |
| Left hand side of the predecessor to the left-hand side of the successor | SS |
| Right hand side of the predecessor to the right-hand side of the successor | FF |
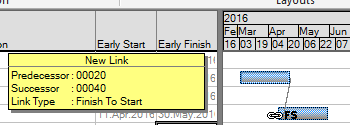
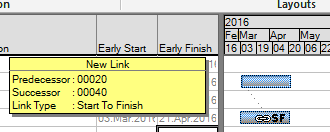
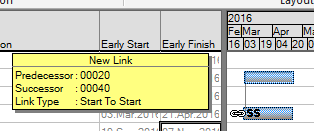
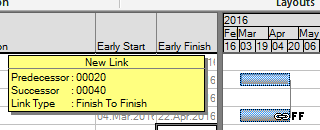
Make sure that the links option is set to visible. As you move your chain-cursor, Safran displays a new link information message.
See also the video below for a demonstration.
Linking One-to-Many and Many-to-One
If you want to link a single activity to a group of successors, do as follows: first, select the group of activities in the columns area. If it is an entire group, click the first activity row, then press Shift and click the last row of the group to select. If it is several individual activities, hold down the CTRL key as you choose each with your mouse one by one, then place your cursor on the bar of the from-activity and drag it across to one of the activities in the Group. Safran will then ask if you want to make all selected activities as successors for the activity. To link many-to-one activity, drag the cursor from one activity in the selected group to the succeeding activity. Safran will then ask if you want to make all selected activities as predecessors to the activity.
Below is a quick demo of how to use the methods described above:

Mastering these techniques will enable you to effectively link many activities in a schedule.
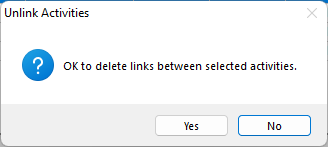
To Unlink Activities
Select a range of activities, and then select Unlink in the HOME ribbon to remove all dependencies.
Modifying Links
By double-clicking on a link, Safran Project opens a window that allows you to update logic information. You may modify, add, or delete existing links by clicking this window's appropriate button.
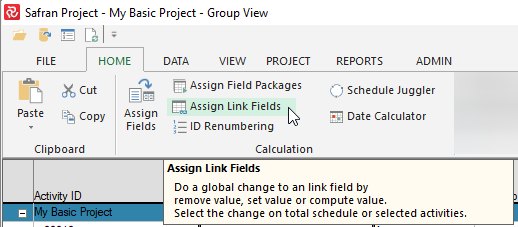
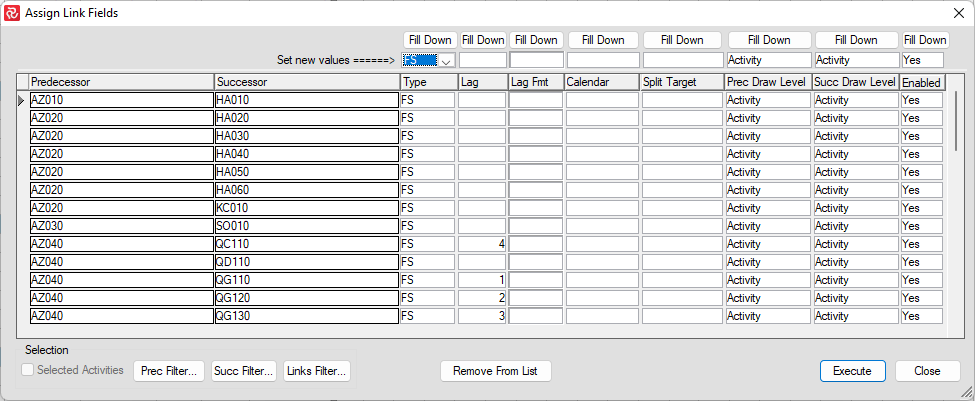
Using the Assign Link Fields Function
Select HOME>Assign Link Fields function in the HOME ribbon to universally change link fields for all or a selected set of activities. This feature allows you to apply changes or modifications through a single operation.
Stretching and Moving Activities On Screen
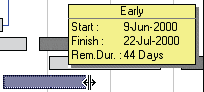
Safran Project allows you to work interactively with activities using the mouse. You work with the ‘Early Bar’ when you stretch or move a bar. Changes to the activity dates and durations are shown in real time, with complete CPM analysis and resource aggregation running in the background. This ensures you can immediately spot the impact of your latest modification on the schedule and resource requirements. In addition, it helps you ensure the project plan is constantly valid and assess if it can be completed within the schedule boundaries of your project contract.
Modifying Activity Duration
This is done by positioning the mouse pointer at the left or right end of the activity bar and ‘dragging’ in either direction to increase or decrease an activity's duration. When the mouse pointer is moved over the hot spot at either end of the activity bar, Safran Project indicates that the system is in duration modification mode by changing the tip to a right-left (<->) arrow. The early bar note continuously shows adjusted start/finish dates and duration as an activity's duration is modified.
Moving Activities in Time
Placing the pointer over the center of the early bar and pressing the left mouse button may move an activity forward or backward in time.
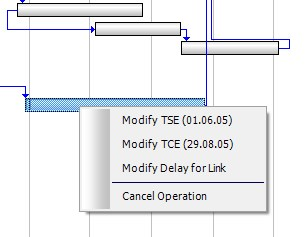
Depending on the surrounding project logic, Safran Project presents a list of potential permissible actions to be carried out due to moving the activity.
Rearranging - Moving an Activity to a New Row
You can use the mouse to drag an activity to another row in the Barchart Editor, and relationships will remain intact. Point to the left of the first Activity Column. Safran Project now highlights the entire row. Drag the mouse up or down through the Activity Columns until you reach the row where you want to move the activity, and then release the mouse. You can also move several activities at once by selecting the activities you want to move and then dragging them to the new location.
Moving Activities Between Summary Groups
If you are working with a summarized layout, moving activities between summary groups provides an easy way to modify activity data because Safran Project automatically reassigns the group or summary field values.
Assign Fields and update Activity Data
The Assign Fields feature is a powerful tool that allows you to change data for some or all activities in a single process. With the Assign Fields option, you can compute fields, remove item values, replace data, use date arithmetic, and assign or change text and data strings. The set field specification consists of a change statement and selection criteria. Either the selection criterion is entered as a filter, or you may specify to run the Assign Fields for selected rows. Your Assign Fields statements may be saved for reuse.
See the calculation chapter for details on the Assign Fields function.
The Fill Down functionality is also an excellent option to Assign Fields when performing a more straightforward mass update.
Adding Annotation Bars - Multiple Bars on a Single Row
Unlike most project management software, Safran Project schedules can have multiple bars and symbols per activity row. This flexible feature extends a user’s visual approach to schedule creation and allows you to make exciting Gantt/Barcharts. This feature can display multiple bars, representing significant activity dates such as early start date, early finish date, late start, late finish, baseline early start, baseline early finish, current early start, current early finish, and so on. Safran Project lets users have as many annotation bars and symbols as they need. These annotation bars and signs can mark any significant date or period. The Annotation Bar is interactive—it can be moved in time and stretched or shortened on screen. However, there is no date logic between the activity and annotation bars. When you create a new schedule, Safran Project presents you with a default annotation bar. You may change this default setting by selecting PROJECT>Options. You may use any defined symbols or bars as your annotation bar.
To Create an Annotation Bar Using the Mouse
Position your mouse pointer on a row of an existing activity and use the click-and-drag technique to create the desired start and finish date for the annotation bar (Note: to use this technique on the chosen bar, the Default Annotation Symbol in Project>Options should be selected). Annotation bars can be added both in front and after the activity itself. You may also add associated text for the annotation bar.
To Remove Annotation Bars
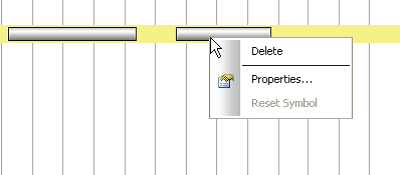
Position the mouse pointer over the annotation bar, right-click the mouse button, and select the Delete option.
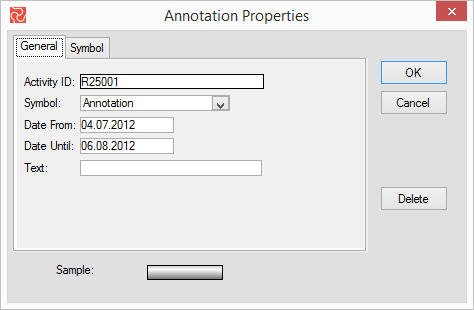
To Edit the Annotation Bar Properties
To edit, position your mouse pointer on any of the Annotation bars, and right-click the mouse to select the Properties option. This is a tab-separated window. Selecting the General tab can change the symbol for the selected annotation, modify the start/end date, and add text to be displayed at the right of the annotation. The Symbol tab lets you detail a specific symbol for the selected bar with color, pattern frame, frame style, size, etc. The unique features of this symbol can later be reset by using the Reset symbol option.
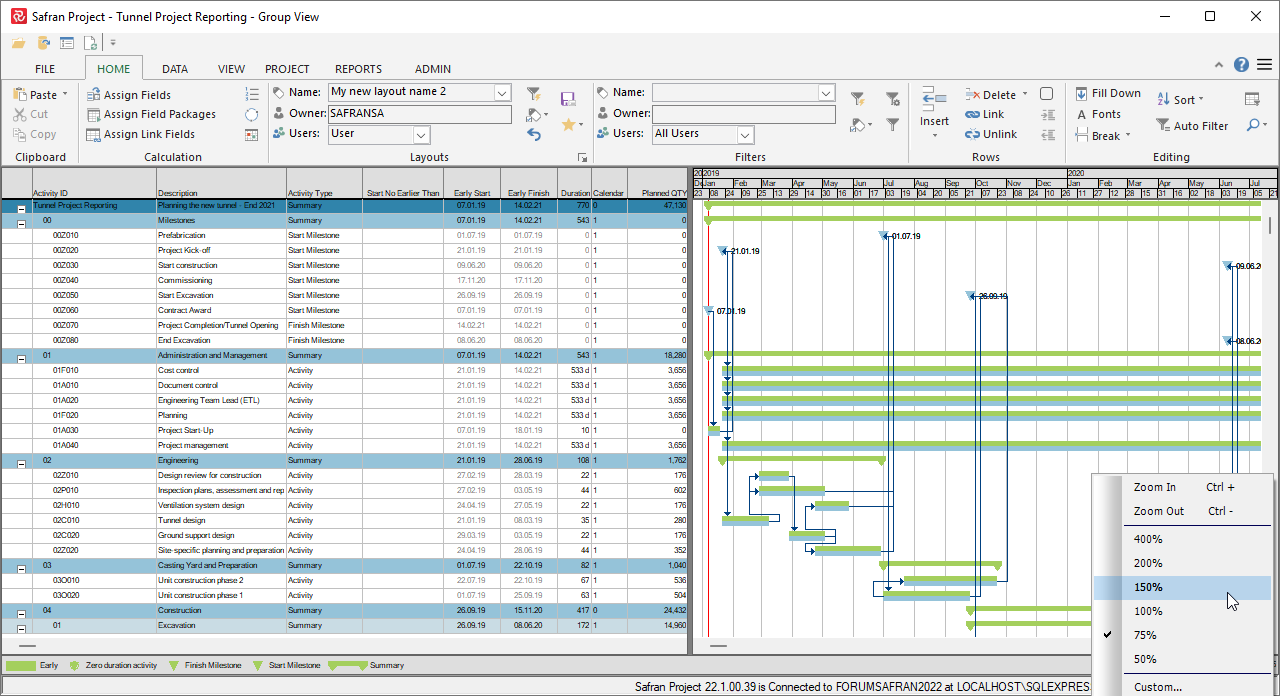
Zooming the Content of the Barchart
When presenting your schedule on a big screen or projector in a meeting room, it is beneficial to have the ability to enlarge graphics and text in the table area.
Safran Project supports CTRL+ scroll to zoom in or out, pressing the magnifying glass at the bottom of the pane or by clicking the zoom arrow on the down left corner of the Safran window and selecting the desired zoom in the menu.
Show Disabled Rows/Columns as Enabled
Another feature that can help readability when you present using Safran Project is the ability to display columns using only the standard text color (by default, read-only fields are grayed out). This is accessed through the short-cut menu in the columns area and select Enabled next to ‘Show disabled rows/columns.’
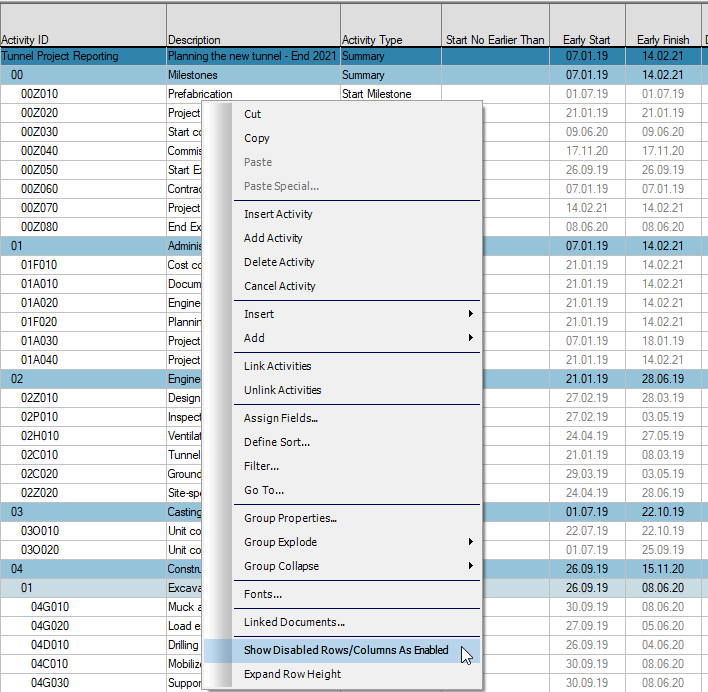
Notice how Early Start and Early Finish now are 'Black' instead of 'Grey':